
How to Install and Set Up Proton VPN on Mac Step-by-Step
Step-by-step guide to install and set up Proton VPN on Mac for enhanced online privacy and secure internet access.
You open your MacBook to start work or browse the internet, but you worry about your online privacy and the security of your connection. Proton VPN offers a way to encrypt your traffic and access content safely, but setting it up correctly on macOS can seem daunting.
This article guides you through how to install Proton VPN on Mac, from downloading the app to configuring it for daily use. You will also learn about its performance, common issues, and how to uninstall it if needed. Whether you use a MacBook or MacBook Air, this step-by-step guide will help you secure your internet experience with Proton VPN.
Key takeaways
- Download Proton VPN directly from the official website or the Mac App Store for reliable installation.
- Grant necessary permissions in System Preferences to ensure Proton VPN connects properly.
- Use the Kill Switch feature to prevent data leaks if the VPN connection drops.
- Performance can vary based on server load and your internet speed; test different servers for best results.
- Troubleshoot common issues by checking network settings and reinstalling if connection problems persist.
Before you start: What you need for Proton VPN on Mac
To install Proton VPN on your Mac, ensure your system meets the necessary requirements and you have essential preparations in place. Proton VPN supports macOS versions 10.13 (High Sierra) and later, so check your Mac’s About This Mac under the Apple menu to confirm compatibility.
You will need a Proton VPN account to use the service. Proton offers both free and paid plans, with free plans providing access to a limited number of servers and basic features, while paid plans include more servers, higher speeds, and advanced options like Secure Core and Tor over VPN.
A stable internet connection is required for downloading the app and completing the setup. Without reliable connectivity, the installation or connection process may fail.
Understanding Proton VPN’s privacy and security basics helps set expectations. Proton VPN on macOS uses strong encryption protocols to protect your data and offers a no-logs policy, which means it does not store your browsing history or connection details. Additionally, Proton VPN includes features like a kill switch to block traffic if the VPN connection drops.
Before proceeding, gather these essentials:
- Check macOS version (10.13 or later) - Verify in Apple menu > About This Mac.
- Create or log into a Proton VPN account - Visit the official website to sign up.
- Confirm stable internet access - Test by loading a webpage or downloading a small file.
- Understand plan differences - Free vs. paid to choose the option that fits your needs.
With these preparations, you’re ready to install and set up Proton VPN on your Mac smoothly.
How to install Proton VPN on MacBook or MacBook Air
- Open your preferred web browser and go to the official Proton VPN website at https://protonvpn.com/download. You should see a page listing the available apps for different platforms, including macOS.
- Click the Download for macOS button. This will download the Proton VPN installer file, typically named something like ProtonVPN.dmg. Wait for the download to complete.
- Locate the downloaded .dmg file in your Downloads folder or the location you saved it. Double-click the file to open the installer disk image. A new window should appear showing the Proton VPN app icon.
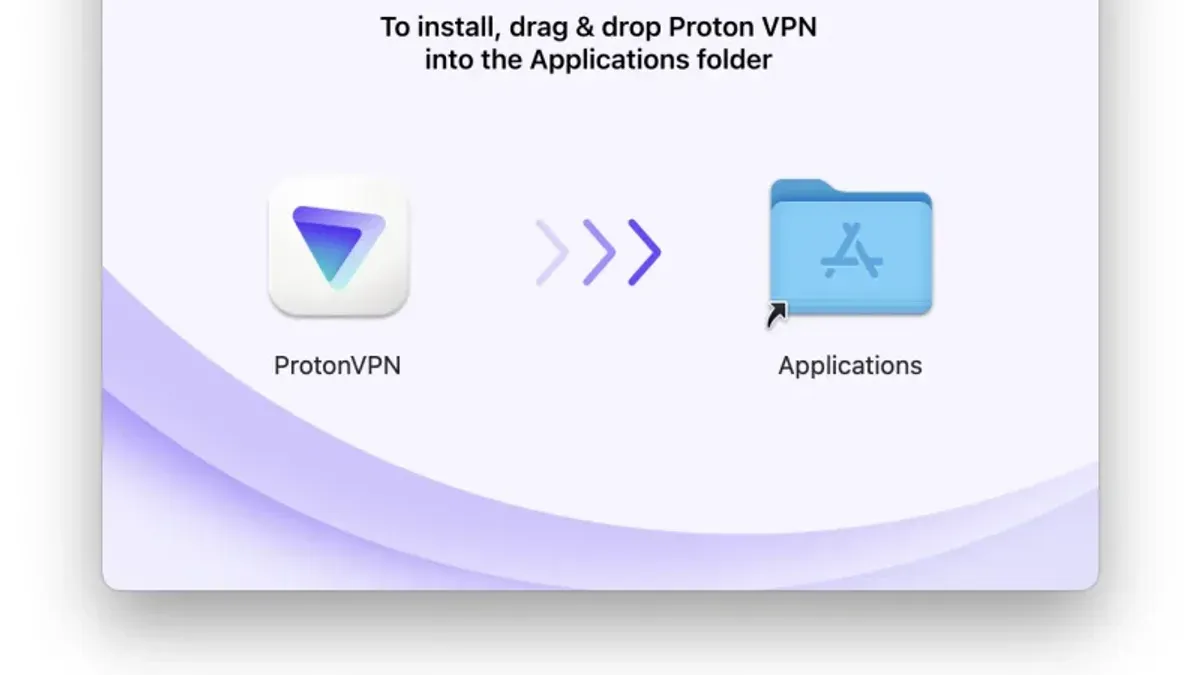
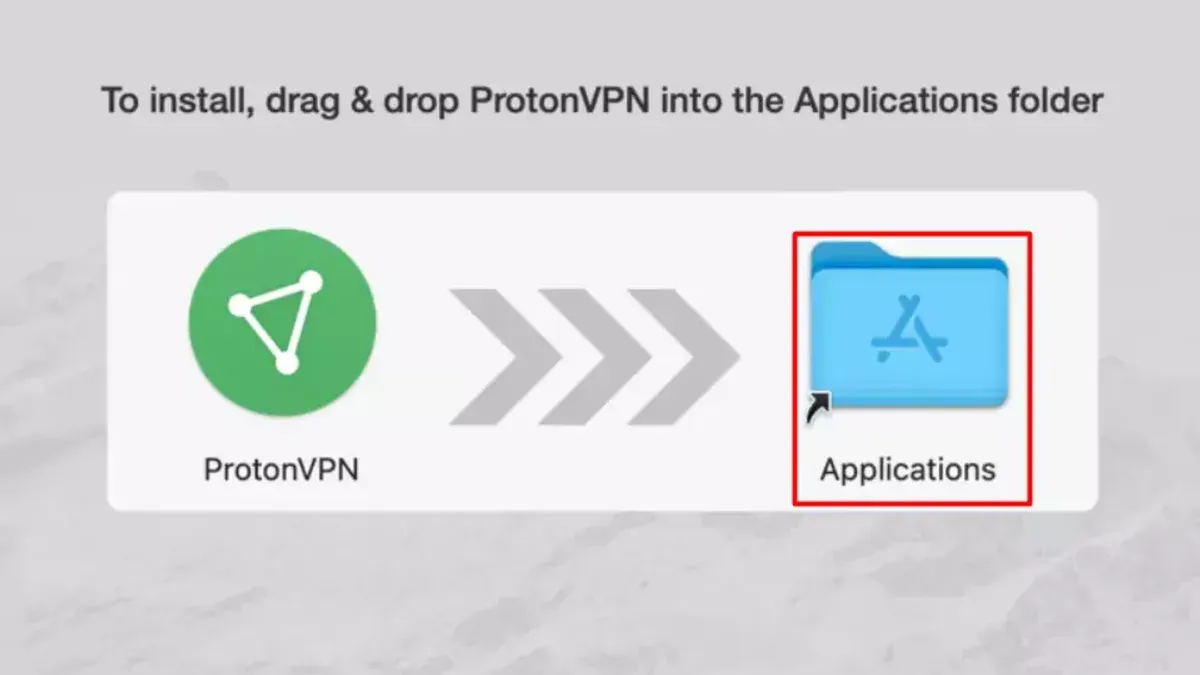
- Drag the Proton VPN app icon into the Applications folder shortcut in the same window. This copies the app to your system. Once the copy finishes, eject the disk image by clicking the eject icon next to it in Finder's sidebar or right-clicking and selecting Eject.
- Open the Applications folder and double-click the Proton VPN app to launch it. macOS may display a security prompt warning about opening an app downloaded from the internet. Click Open to proceed.
- When you run the app for the first time, macOS will ask for permission to add VPN configurations. Approve this prompt by entering your Mac user password or using Touch ID as required. This permission is necessary for Proton VPN to manage your VPN connections.
- After granting permissions, Proton VPN should open its main interface, indicating a successful installation. You can now proceed to sign in or create an account within the app.
If you encounter any security warnings beyond the standard macOS prompts or the installation does not complete, ensure you downloaded the installer from the official Proton VPN website to avoid corrupted or malicious files.
How to set up Proton VPN on macOS after installation
- Launch the Proton VPN app by clicking its icon in the Applications folder or Dock. You should see the login screen prompting for your Proton VPN account credentials.
- Enter your username and password, then click Sign In. Once logged in successfully, the main interface appears, showing the connection status, server list, and key features.
- Browse the list of available VPN servers by country or specialty. Select a server location by clicking on it; the selected server will be highlighted. This choice determines your apparent IP address and can affect connection speed.
- Click the Connect button to initiate the VPN connection. When connected, the interface displays a green status indicator and the connection duration, confirming a secure link.
- To enhance security, go to the Settings menu via the gear icon. Enable Auto-connect on startup to have Proton VPN start and connect automatically when you power on your Mac.
- In the same Settings panel, activate the Kill Switch. This feature blocks internet access if the VPN connection drops unexpectedly, protecting your privacy.
- Adjust notification preferences as needed to receive alerts on connection status changes or errors. These settings help monitor your VPN activity without opening the app.
Walkthrough screenshots typically show the login screen, the server selection interface with country flags, the main connection status displaying a green "Connected" badge, and the settings screen highlighting toggles for Auto-connect and Kill Switch. These visuals confirm each step and aid in recognizing correct app states during setup.
How to put Proton VPN on Mac: Using it effectively day-to-day
Using Proton VPN daily on your Mac involves managing connections, optimizing speed, and customizing settings to suit your needs. Here’s how to do it efficiently.
- Connect to a VPN server: Open Proton VPN and click the “Connect” button next to your preferred server. You should see the status change to "Connected" and your IP address update.
- Disconnect when done: Click the “Disconnect” button in the app when you want to end the VPN session. The status should change to "Disconnected," and your regular IP will be restored.
- Switch between free and paid servers: In the server list, free servers are usually marked and can be switched to or from based on your subscription. Paid servers often offer faster speeds and more locations. Choose according to your speed needs or privacy preferences.
- Manage bandwidth and speed: VPN speed depends on server load and distance. If you notice slow connections, try switching servers or connecting to one closer to your location. Proton VPN’s servers vary, with paid options generally providing better performance.
- Set up split tunneling or app exclusions: If you want certain apps to bypass the VPN, go to Settings > Split Tunneling. Add apps you want to exclude. This helps maintain speed for non-sensitive tasks while keeping other traffic secure. When set, excluded apps connect directly to the internet, visible in the app list.
- Check VPN status regularly: The Proton VPN icon in your menu bar shows connection status. If you experience drops, verify your internet connection and try reconnecting. Logs within the app can show recent connection attempts and errors for troubleshooting.
Typical session logs include timestamps for connection start and end, server name, and data usage. This helps monitor your VPN activity and identify any irregularities.
Does Proton VPN work on Mac: Performance and limitations
Proton VPN offers native support for macOS, delivering a stable and user-friendly experience tailored to the platform. Its macOS app integrates with system security features and is regularly updated to maintain compatibility with the latest macOS security patches.
Performance-wise, Proton VPN generally provides reliable connection speeds comparable to other leading VPNs on Mac. Speed test results typically show moderate to high throughput suitable for streaming, browsing, and file transfers, though peak speeds may vary based on server location and load.
Proton VPN effectively prevents DNS leaks on Mac by routing DNS requests through its encrypted tunnels. Independent leak tests confirm strong protection against IP and DNS leaks, ensuring your privacy remains intact during use.
Known limitations include occasional slower connection times on certain servers and higher battery usage due to encryption processes. Some users report difficulty with Proton VPN's kill switch feature on macOS Monterey and later versions, requiring manual troubleshooting or updates from Proton VPN.
Compatibility with macOS security updates is generally smooth, but major macOS releases can temporarily affect VPN stability until Proton VPN releases corresponding app updates. Users should keep their Proton VPN app updated to mitigate these issues.
In summary, Proton VPN works well on Mac with solid privacy protection and respectable speeds, though occasional macOS-specific quirks and resource demands are factors to consider.
Troubleshooting common Proton VPN installation and connection issues on Mac
Installation errors and permissions issues often arise if Proton VPN lacks the necessary system access. Ensure you allow all requested permissions during installation, especially when prompted to install network extensions. If you see an "Installation failed" message, try reinstalling after restarting your Mac.
- Open System Preferences > Security & Privacy > General tab.
- Look for any message about blocked software from Proton VPN and click "Allow".
- Restart your Mac and attempt installation again.
- Successful installation is confirmed when the app opens without error.
Connection failures or server timeouts can occur due to firewall settings or network problems. To troubleshoot:
- Check your internet connection by loading a website in your browser.
- In Proton VPN, try switching to a different server location.
- If connection still fails, temporarily disable your Mac’s firewall: System Preferences > Security & Privacy > Firewall tab, then turn off Firewall.
- Attempt connection again; successful connection shows a green status indicator in the app.
Slow speeds or dropped connections may result from interference by other VPN or security software.
- Close or uninstall any other VPN apps or third-party firewalls.
- Restart Proton VPN and reconnect.
- Check the speed by visiting a speed test website; faster speeds indicate the issue is resolved.
If Proton VPN won’t launch or crashes unexpectedly:
- Force quit the app: click the Apple menu > Force Quit, select Proton VPN, then click Force Quit.
- Restart your Mac and launch Proton VPN again.
- If crashes persist, uninstall and reinstall the app using the official installer from Proton VPN’s website.
Consult Proton VPN’s support site for specific error messages; some errors, like "Error 131," indicate permission issues requiring a full uninstall before reinstalling.
How to uninstall Proton VPN from Mac if needed
Uninstalling Proton VPN completely from your Mac involves removing the application, clearing VPN profiles, and deleting residual files to avoid conflicts with other network services.

Use the app’s built-in uninstall option if available
- Open the Proton VPN app on your Mac.
- Go to the menu bar and click Proton VPN > Uninstall Proton VPN if this option is present.
- Confirm the uninstall prompt; the app will remove itself and its main components.
Manual removal steps through Finder and system settings
- Quit the Proton VPN app completely by right-clicking its icon in the Dock and selecting Quit.
- Open Finder and navigate to the Applications folder.
- Locate Proton VPN.app, right-click it, and select Move to Trash.
- Open Finder, press Shift+Command+G, enter
~/Library/Application Support/, and delete theProtonVPNfolder if it exists. - Repeat the previous step for
~/Library/Preferences/and delete any files starting withcom.protonvpn. - Go to System Preferences > Network, select any VPN profiles named Proton VPN, and click the minus (–) button to remove them.
Verify complete uninstallation
- Restart your Mac to ensure all network settings are refreshed.
- Check that no Proton VPN app icon remains in the Dock or Launchpad.
- Confirm no Proton VPN VPN profiles remain in System Preferences > Network.
When uninstalling might be necessary
- If the app is malfunctioning or repeatedly crashing despite troubleshooting steps.
- When switching to a different VPN provider and you want to avoid conflicts.
- If you need to free up disk space or remove unused software.
Common leftover files include ~/Library/Application Support/ProtonVPN and preference files like com.protonvpn.ProtonVPN.plist. Removing these ensures a clean uninstall.
- How to Install and Set Up OpenVPN on Your Mac Step-by-Step
- How to Install WireGuard on Mac: A Clear Step-by-Step Guide
- How to Install Tailscale on Mac: A Clear Step-by-Step Guide
Frequently asked questions
How to set up protonvpn on macos?
After installing Proton VPN, open the app and log in with your credentials. Choose a server location from the list, then click the connect button. You can customize settings like Kill Switch and Auto-Connect under Preferences to enhance security.
Can you install vpn on macbook?
Yes, you can install VPN software on a MacBook. Most VPN providers, including Proton VPN, offer dedicated macOS apps that are straightforward to download and install from their websites or the Mac App Store.
Can you install VPN on MacBook?
Installing a VPN on a MacBook is possible and commonly done to secure internet connections. You simply download the VPN client compatible with macOS, install it, and configure your account details to start using it.
How to set up Proton VPN on MacBook?
Start by downloading the Proton VPN app from the official website or Mac App Store. Once installed, launch the app and sign in. Select a server and connect, then adjust preferences like DNS leak protection for optimal privacy.
How to install Proton VPN on MacBook Air?
Download the Proton VPN macOS app from the official Proton VPN website or the Mac App Store. Open the installer file and follow the on-screen prompts to complete installation. Afterward, launch the app, log in, and connect to your preferred server.
What this advice does not cover and who should look elsewhere
This article does not cover advanced Proton VPN configurations such as manually setting up OpenVPN profiles or using Proton VPN on non-Apple operating systems. If you require complex setups like split tunneling, custom DNS settings beyond the app defaults, or need VPN solutions for Windows, Linux, or mobile devices, you should consult more specialized guides or Proton VPN’s official documentation. Additionally, users needing enterprise-level VPN features or integration with corporate networks will find this guide insufficient.
To get started with Proton VPN on your Mac, the most useful next step is to sign up for an account on the official Proton VPN website, download the official macOS app, and carefully follow the installation steps outlined above. Ensuring you select the correct subscription plan that matches your privacy and speed needs will help you make the most of Proton VPN’s capabilities on your MacBook or MacBook Air.



