
How to Install Tailscale on Mac: A Clear Step-by-Step Guide
This guide shows you how to install Tailscale on Mac, enabling secure private networks with simple steps for download, installation, and login.
You want to create a secure private network between your Mac devices without the hassle of traditional VPN setups. Whether you're working remotely or managing multiple Macs, establishing a reliable connection is key.
This article explains how to install Tailscale on Mac, guiding you through the download, installation, and login processes. It also covers device-specific tips for MacBook and Mac Mini users and compares Tailscale’s approach with other platforms and tools.
Key takeaways
- Tailscale simplifies private networking by using your existing identity providers for authentication.
- Installation on Mac involves downloading the official package, running the installer, and logging in via a browser.
- MacBook users may need to adjust security settings to allow Tailscale’s network extension.
- Mac Mini setups benefit from persistent connections, especially if used as a home server.
- Tailscale differs from traditional VPNs by building a peer-to-peer mesh network rather than routing traffic through central servers.
Before you start: What you need to install Tailscale on Mac
To install Tailscale on your Mac, first verify that your macOS version is compatible. Tailscale supports macOS 10.12 (Sierra) and later, including current versions like macOS Ventura and Monterey. The installation package is relatively small, typically around 30 MB, but ensure you have sufficient disk space for the app and its dependencies.
You need administrative privileges on your Mac to complete the installation, as system-level network extensions are required. Confirm that your user account has admin rights by checking System Preferences > Users & Groups.
An active internet connection is essential for downloading Tailscale and for subsequent authentication. If you plan to install via the Mac App Store, you'll need a valid Apple ID signed in on your device. Alternatively, you can download the installer directly from Tailscale's official website, which requires granting permission to run apps from identified developers.
Tailscale is a VPN solution built on WireGuard technology that creates secure, encrypted private networks between your devices. It simplifies networking by automatically managing keys and peer connections, enabling seamless access to your devices without complex configuration.
How to download and install Tailscale on your Mac
- Open your preferred web browser and navigate to https://tailscale.com/download. You will see a list of available downloads for different platforms. Scroll to the macOS section and click the "Download" button. When the download finishes, locate the Tailscale.dmg file in your Downloads folder.
- Double-click the Tailscale.dmg file to mount the disk image. A window will open showing the Tailscale app icon and an Applications folder shortcut. Drag the Tailscale icon into the Applications folder. This copies the app to your system.
- Open your Applications folder and double-click the Tailscale app to launch it the first time. macOS will prompt you to verify the app since it was downloaded from the internet. Click "Open" to proceed.
- Upon launching, a macOS dialog will ask permission to add a network extension. This is necessary for Tailscale to manage your secure network connections. Click "Allow" in the Network Extension prompt. If the option is grayed out, open System Preferences > Security & Privacy > General tab, and click "Allow" next to the message about Tailscale.
- Tailscale may also request Accessibility permissions to control certain network functions. Go to System Preferences > Security & Privacy > Privacy tab > Accessibility, then add Tailscale by clicking the "+" button and selecting the app. This enables full functionality.
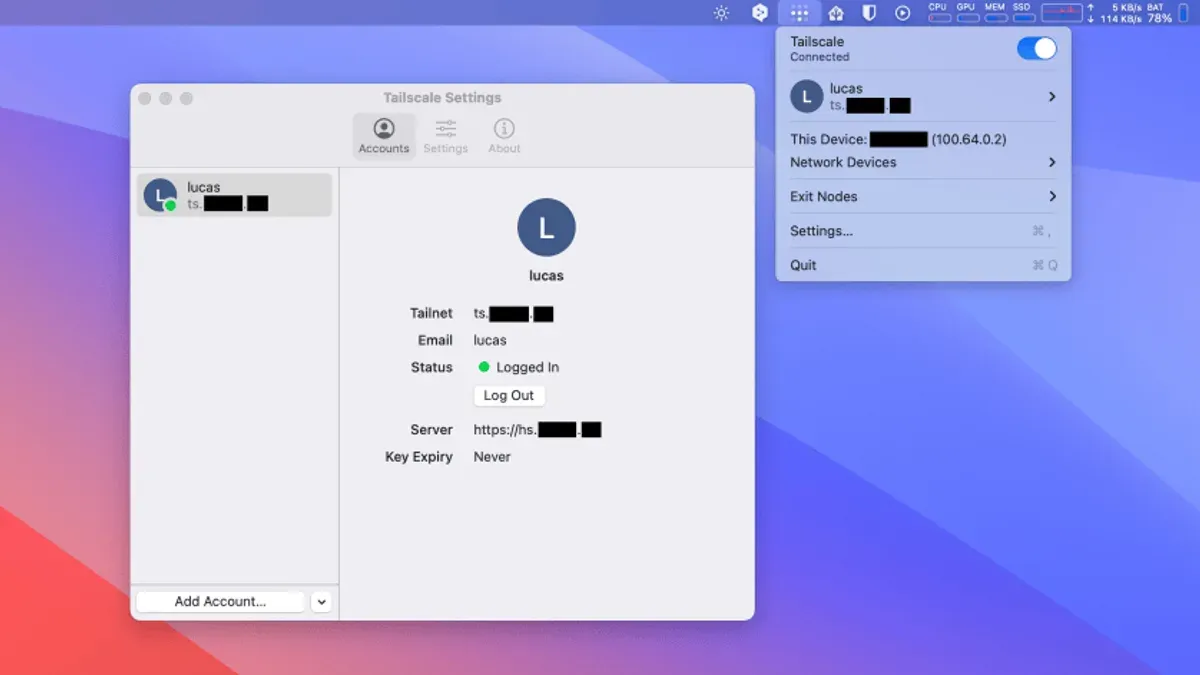
- After granting permissions, Tailscale’s icon appears in the menu bar. You are ready to proceed with logging in and setting up your secure network.
How to set up and log in to Tailscale on Mac
- Open the Tailscale app on your Mac. You will be prompted to sign in using an identity provider; choose Google, Microsoft, or GitHub based on your preference. Once selected, a browser window opens for authentication.
- Complete the sign-in process in the browser by entering your credentials. After successful authentication, the browser will redirect you to a confirmation page indicating you can return to the Tailscale app.
- Back in the Tailscale app, wait for the connection process to complete. You should see a status message such as “Connected” along with your assigned Tailscale IP address.
- Enable Magic DNS from the app’s settings or the Tailscale admin console. This feature simplifies network navigation by allowing you to access devices by name instead of IP addresses.
- Verify that your Mac appears in the Tailscale admin console's device list. This confirms your device is visible and connected to your private network.
- Optionally review other default settings like subnet routes or access controls in the admin console to customize your connection further if needed.
Example screenshots typically show the login screen with identity provider options and the Tailscale dashboard listing connected devices with their connection status and IP addresses.
How to install Tailscale on Mac Mini and MacBook: device-specific tips
While the installation process of Tailscale is consistent across Mac devices, some hardware and network considerations differ between Mac Mini and MacBook models. Understanding these differences helps optimize your Tailscale setup.
| Aspect | Mac Mini | MacBook |
|---|---|---|
| Network Interface | Primarily Ethernet; usually stable wired connection | Primarily Wi-Fi; may switch between networks |
| Power Management | Typically always plugged in; less aggressive sleep modes | Battery-powered; aggressive energy-saving settings may interrupt connections |
| User Interface | Often used headless or with external monitor | Built-in display and keyboard for direct interaction |
For Mac Mini users, ensure your Ethernet connection is stable before starting Tailscale. If running your Mac Mini headless (without monitor), verify remote access is enabled through System Preferences > Sharing > Remote Login to manage Tailscale remotely.
MacBook users should consider adjusting Energy Saver settings to prevent the device from sleeping during extended connections. Navigate to System Preferences > Battery > Power Adapter and set “Prevent computer from sleeping automatically when the display is off.” This helps maintain persistent Tailscale connections, especially when switching networks.
- Open the Tailscale app on your Mac Mini or MacBook. The interface should appear as usual regardless of device.
- Check your network connection: Ethernet for Mac Mini or Wi-Fi for MacBook; ensure it is active and stable.
- For Mac Mini headless setups, confirm remote access is enabled to manage Tailscale from another device.
- Adjust power settings on MacBook under System Preferences > Battery to avoid sleep interruptions.
- Complete the Tailscale login and configuration as usual; your device should appear connected in the Tailscale dashboard.
How to install Tailscale on Windows, Linux, and other platforms
If you manage devices across different operating systems, installing Tailscale on Windows and Linux is straightforward and enables seamless secure networking among all your devices.
Installing Tailscale on Windows 10 and Windows 11
- Visit the official Tailscale Windows download page at https://tailscale.com/download/windows. You will find installers compatible with both Windows 10 and Windows 11.
- Download the appropriate installer (.msi file) and run it. When prompted by User Account Control, allow the installer to make changes.
- Follow the installation wizard steps until completion. Once installed, launch the Tailscale app from the Start menu.
- Sign in with your preferred identity provider. After successful login, your Windows device will appear in your Tailscale network.
Installing Tailscale on popular Linux distributions
- Access the official Linux install instructions at https://tailscale.com/kb/1100/install-linux/, which provides commands tailored for distributions like Ubuntu, Debian, Fedora, and CentOS.
- For example, on Ubuntu or Debian, open a terminal and run:
curl -fsSL https://tailscale.com/install.sh | sh
- After installation, start Tailscale with
sudo tailscale upand follow the displayed link to authenticate your device. - Once authenticated, your Linux device will join your Tailscale network, visible alongside your Mac and Windows devices.
Using Tailscale across multiple platforms allows you to maintain a consistent, secure private network without complicated VPN setups. The official Tailscale documentation provides detailed screenshots and troubleshooting tips for each platform to guide you through the process.
How to use Tailscale without installing it
You can access some Tailscale features without installing the client on your Mac by using web or mobile interfaces. This approach is useful for temporary access, guest users, or devices where installation is restricted.
Using Tailscale on mobile and web clients
Tailscale offers mobile apps for iOS and Android, allowing you to connect to your network from smartphones or tablets without installing anything on your Mac. Additionally, the Tailscale web admin console provides network management capabilities but does not offer full device connectivity.
Limitations of install-free access
Without the Tailscale client installed, you cannot create secure tunnels directly from your Mac, limiting your ability to access private network resources. Mobile apps require installation, so truly install-free usage on Mac devices is limited to web-based management and guest access via shared links.
Alternatives for temporary or guest access
For guest or temporary users, you can use Tailscale's sharing features to create ephemeral access links. These links allow limited, time-bound entry to specific resources without a full client install. This method suits occasional collaborators or troubleshooting scenarios.
- Open the Tailscale web admin console at https://login.tailscale.com/admin. You should see your network devices and status.
- Navigate to the "Access Controls" or "Sharing" section and create a sharing link for the desired resource. Confirm that the link has appropriate expiration and permission settings.
- Send the sharing link to the guest user. When they open it, they can connect to the resource through a browser or supported app without full client installation.
This method is practical when you need to provide quick access without modifying device configurations permanently. However, it does not replace the full security and functionality of a locally installed Tailscale client.
Troubleshooting common issues when installing Tailscale on Mac
Installing Tailscale on your Mac can sometimes encounter permission, network, or software conflicts. These issues usually manifest as error messages or connectivity failures. Here are common problems and how to fix them.

Permission or network extension errors
You may see an error like “System Extension Blocked” or “Network extension permission denied.” This happens when macOS prevents Tailscale’s VPN extension from loading. To fix this:
- Open System Preferences and go to Security & Privacy.
- Under the General tab, look for a message about blocked system software from “Tailscale, Inc.” and click Allow.
- Restart your Mac to enable the extension fully.
- Launch Tailscale again; if you see no errors, the permission issue is resolved.
Conflicts with other VPN or network software
Running multiple VPNs or network filters can interfere with Tailscale’s network extension. If Tailscale won’t connect or repeatedly disconnects:
- Quit all other VPN or network management apps.
- Restart your Mac to clear residual network settings.
- Open Tailscale and check if the connection stabilizes.
- If the problem persists, temporarily uninstall conflicting VPN software and test again.
Connectivity issues and verifying device status
If your Mac appears offline or unreachable in the Tailscale admin console, verify the device status:
- Open the Tailscale app on your Mac and ensure it shows as connected.
- Check your internet connection by visiting a website to rule out network outages.
- In the Tailscale admin console (accessible online), confirm your Mac’s IP address and status are active.
- If offline, restart the Tailscale service via Activity Monitor or by logging out and back in on the app.
- Ensure Magic DNS is enabled if you rely on domain names for device connections.
Following these steps typically resolves the most common installation and connectivity problems with Tailscale on Mac.
How to install Horndis on Mac and why it differs from Tailscale
Horndis is a USB Ethernet driver primarily used to enable network connectivity over USB on certain devices, often in USB tethering scenarios or embedded systems. Unlike Tailscale, which creates secure, encrypted mesh networks using WireGuard, Horndis focuses on enabling basic network interfaces rather than providing VPN or encrypted networking features.
To install Horndis on your Mac, follow these steps:
- Download the Horndis driver package from the official repository or trusted source. After downloading, you should see a.dmg or.pkg installer file.
- Open the installer by double-clicking the downloaded file. This launches the installation wizard.
- Follow the on-screen prompts to install the driver. You may need to enter your Mac administrator password when prompted.
- After installation, restart your Mac to ensure the driver loads correctly. Upon reboot, your system should recognize USB Ethernet devices compatible with Horndis.
- Connect a compatible USB device and verify the network interface appears in System Preferences under Network. You should see a new interface like “USB Ethernet” listed.
While Horndis enables USB-based networking, it lacks the advanced security, ease of use, and cross-device connectivity features of Tailscale. Tailscale simplifies private networking with automatic key management and device coordination, whereas Horndis requires manual setup and does not encrypt traffic.
In summary, Horndis serves a low-level, hardware-focused role, mainly for USB network interfaces, while Tailscale offers a modern, secure networking solution suitable for a broad range of devices and use cases.
- How to Install and Set Up OpenVPN on Your Mac Step-by-Step
- How to Install TeamViewer on Mac: A Complete Step-by-Step Guide
- How to Install and Use Chrome Remote Desktop on Mac
- How to Install AnyDesk on Mac: A Clear Step-by-Step Guide
Frequently asked questions
How to install tailscale on linux?
To install Tailscale on Linux, first choose your Linux distribution. For Debian or Ubuntu, use the command curl -fsSL https://tailscale.com/install.sh | sh in the terminal. After installation, start Tailscale with sudo tailscale up and log in using your preferred authentication method. Some distributions may require enabling systemd services or additional dependencies.
How to download tailscale?
You can download Tailscale directly from the official Tailscale website. Visit tailscale.com/download and select your operating system—Mac, Windows, Linux, iOS, or Android. The site provides the latest stable version, ensuring compatibility and security.
how to install tailscale on windows 10
On Windows 10, download the Tailscale installer from the official website and run the executable file. Follow the installation prompts, then launch Tailscale and sign in with your account. The app integrates with Windows networking to create a secure mesh VPN with minimal configuration.
how to install tailscale on linux
Installing Tailscale on Linux involves running the official installation script available on the Tailscale website. Open a terminal and execute curl -fsSL https://tailscale.com/install.sh | sh, then activate Tailscale by running sudo tailscale up. Ensure your system meets dependencies like systemd for smooth operation.
how to download tailscale
To download Tailscale, go to tailscale.com/download and pick the version for your device's operating system. The site offers installers and packages for various platforms, including Mac, Windows, Linux, and mobile devices, with straightforward download links and instructions.
What this guide does not cover and who should do something else
This guide does not cover advanced Tailscale network configuration or enterprise deployment scenarios. If you require multi-user administration, complex access controls, or integration with corporate identity providers beyond basic login options, you should consult the official Tailscale documentation or seek advice from IT professionals. Additionally, this guide focuses on individual Mac users; organizations managing many devices might need specialized setup and monitoring tools not discussed here.
For most Mac users, the next step is to open the Tailscale app after installation and complete the login process using your preferred identity provider, such as Google or Microsoft. Pay close attention to the authorization prompts to ensure your device is correctly added to your private network. This initial connection is crucial for securing your network traffic and enabling seamless access across your devices.



