
How to List USB Devices in Mac Terminal: A Practical Guide
Discover easy commands to list and identify USB devices connected to your Mac using the Terminal for effective troubleshooting and management.
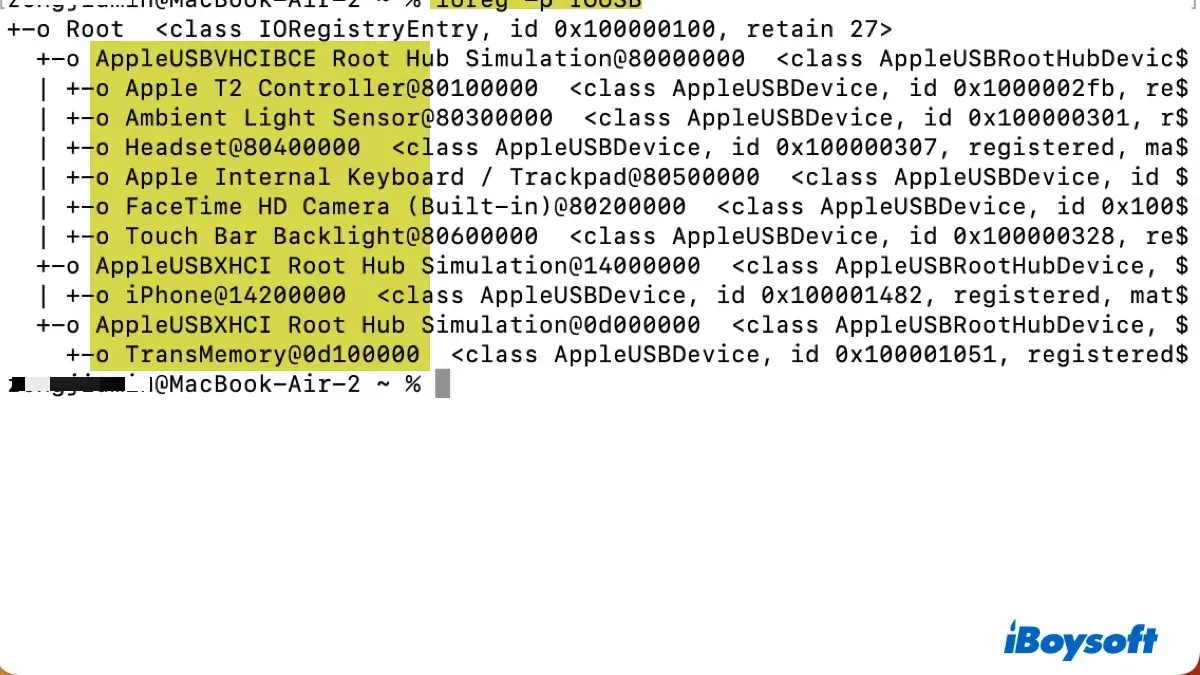
You have connected a USB device to your Mac but aren’t sure if it’s recognized correctly. Whether you’re troubleshooting a peripheral or managing multiple devices, using the Terminal can provide detailed insights not always visible in the graphical interface.
This article explains how to list USB devices in Mac Terminal, guiding you through reliable commands like system_profiler and ioreg. You’ll learn how to interpret the output, identify connected USB drives, and understand the differences from other operating systems’ commands. Practical examples and troubleshooting tips will help you confidently navigate device information directly from macOS Terminal.
Key takeaways
- Use
system_profiler SPUSBDataTypeto get a comprehensive USB device summary. ioreg -p IOUSBshows a hierarchical view of USB devices and their properties.- Listing disks with
diskutil listhelps identify USB storage devices. - Terminal commands differ from Windows or Linux tools; macOS uses distinct system interfaces.
- Common issues include missing device details due to permission restrictions or inactive ports.
Before you start: What you need to list USB devices in Mac Terminal
To successfully list USB devices using the Mac Terminal, you need a few basic prerequisites in place. First, you should have a fundamental understanding of how to open and use the Terminal app on your Mac. This is where you will enter the commands to view connected USB devices. You can open Terminal quickly by pressing Command + Space to bring up Spotlight, typing “Terminal,” and pressing Enter. When Terminal launches, you will see a command prompt where you can input commands.
Second, ensure you have a USB device physically connected to your Mac. Without a device plugged in, Terminal commands will not display any USB hardware information. You can verify that your Mac recognizes the device before using Terminal by opening the System Information app: click the Apple menu, select “About This Mac,” then “System Report,” and look under the “USB” section. Here, you should see your connected devices listed.
Third, some commands may require administrator privileges to execute. This means you might need to use sudo before certain commands and enter your Mac user password. Having administrator or sudo access ensures you can retrieve detailed hardware information when needed.
Finally, remember that macOS Terminal commands and outputs differ significantly from Linux or Windows command lines. Commands familiar from other operating systems won't necessarily work on macOS, so this guide focuses specifically on macOS-native tools and syntax.
- Press Command + Space to open Spotlight, type “Terminal,” and press Enter. The Terminal window should appear with a command prompt.
- Connect your USB device to your Mac. Wait a few seconds to ensure it is detected.
- Click the Apple menu and select “About This Mac.”
- Click “System Report…” to open the System Information app.
- In the sidebar, select “USB.” You should see your connected USB device listed in the details pane.
How to bring up Terminal on Mac
To list USB devices using Terminal, you first need to open the Terminal app on your Mac. There are two common ways to access Terminal quickly and efficiently.
- Use Spotlight Search: Press
Cmd + Spaceto open Spotlight. In the search bar, type "Terminal". When the Terminal app icon appears, either pressEnteror click it. This launches Terminal, showing a window with a command prompt where you can type commands. - Open Terminal via Finder: Click the Finder icon in your Dock to open a Finder window. From the menu bar, select Go > Utilities. In the Utilities folder, locate and double-click the Terminal application. This opens the Terminal window with a ready command prompt.
When Terminal opens, you’ll see a window displaying a prompt that typically includes your computer’s name, your username, and a symbol like $ or # where you enter commands. For example, it might look like username@MacBook-Pro ~ %. This prompt indicates Terminal is ready to accept your input.
Terminal windows support multiple tabs and resizing, letting you organize your command sessions as needed. You can also customize the appearance through Terminal preferences, such as changing font size or color scheme, to make reading output easier.
Opening Terminal via Spotlight is the fastest method, while Finder navigation helps if Spotlight is disabled or unresponsive. Both methods lead you to the same command interface where you’ll run the commands to list USB devices.
How to see USB devices on Mac Terminal using system_profiler
The system_profiler SPUSBDataType command is the primary macOS tool to list detailed information about USB devices connected to your Mac. It provides a hierarchical view of the USB device tree, showing each device's vendor name, product ID, serial number, and other relevant details.
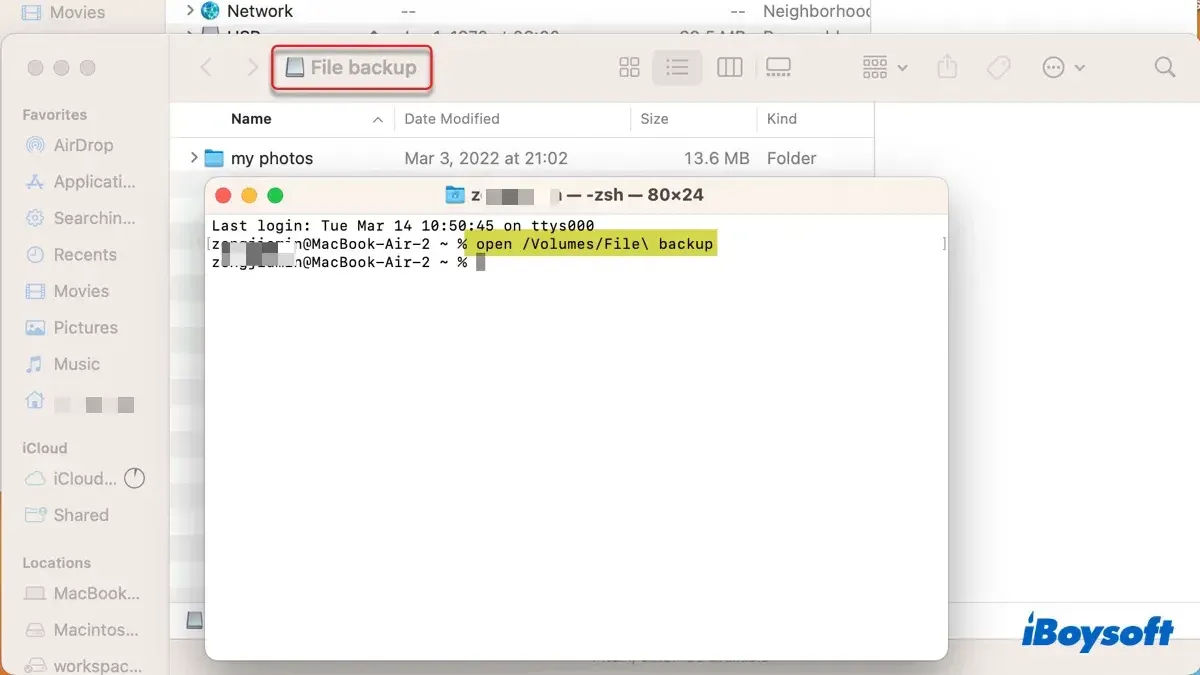
- Open Terminal.
- Type
system_profiler SPUSBDataTypeand press Enter. - Wait for the command to complete; you will see a detailed list of USB devices organized by USB bus and port hierarchy.
The output shows USB buses and devices nested under them. For example:
USB 3.0 Bus:
Host Controller Driver: AppleUSBXHCILPTH
USB Device:
Product ID: 0x1234
Vendor ID: 0x5678 (ExampleVendor)
Version: 1.00
Serial Number: ABCD12345678
Speed: Up to 5 Gb/sec
Location ID: 0x14100000 / 3
Key fields include Product ID and Vendor ID, which uniquely identify the device model, and the Serial Number, useful for distinguishing multiple identical devices. The Location ID reveals the physical USB port used.
To make the output easier to navigate, you can pipe it through less for scrolling:
system_profiler SPUSBDataType | less
Or use grep to filter for a specific device, such as by vendor name or product ID:
system_profiler SPUSBDataType | grep -A 10 'ExampleVendor'
This command shows the lines matching "ExampleVendor" plus the following 10 lines, helping isolate relevant device details.
While system_profiler provides comprehensive USB data, its output can be lengthy and may take several seconds, so filtering or paginating the text improves usability when searching for specific devices.
How to list USB devices on Mac Terminal using ioreg
The ioreg command provides a lower-level view of your USB device tree, showing detailed properties not always visible with system_profiler. This method is useful when you need granular information such as device vendor IDs, product IDs, and serial numbers directly from the IORegistry.
- Open Terminal and enter
ioreg -p IOUSB -l -w 0. This command lists all USB devices in a detailed tree format without line wrapping. - After running the command, you will see a hierarchical structure displaying USB device properties. Each device node includes keys like
USB Vendor Name,idVendor,idProduct, andUSB Serial Number. - If the output is lengthy, you can pipe it to
lessfor navigation:ioreg -p IOUSB -l -w 0 | less. Use search (/) inside less to find keywords like your device name or vendor ID.
To locate a specific device, scan through the output for the USB Vendor Name or USB Product Name. For example, a device entry might look like:
{
"USB Vendor Name" = "Apple Inc."
"idVendor" = 1452
"idProduct" = 610
"USB Serial Number" = "C02XXXXXXX"
}
Unlike system_profiler, ioreg presents raw device properties and is less user-friendly but more comprehensive for debugging or scripting. It does not format output hierarchically by default, so familiarity with device property keys helps in interpreting results.
How to list drives and disks related to USB devices in Mac Terminal
To identify USB storage devices connected to your Mac, use the diskutil list command in Terminal. This lists all mounted disks and volumes, including USB drives, with their identifiers, sizes, and partition schemes.
- Open Terminal and type
diskutil list, then press Enter. You will see a list of all storage devices, including internal and external drives, each labeled with a disk identifier like/dev/disk2. - Compare disk identifiers from
diskutil listwith device information obtained earlier fromsystem_profiler SPUSBDataType. Look for matching device names or vendor IDs to correlate USB devices with their corresponding disks. - Optionally, run
df -hin Terminal to view mounted volumes, their mount points, and sizes. This helps confirm which USB drives are currently accessible and where they are mounted in the filesystem.
Remember, not all USB devices are storage devices; some may be input devices, hubs, or other peripherals that will appear in system_profiler USB listings but not in diskutil list.
| system_profiler USB Device | diskutil list Output |
|---|---|
| USB External Drive Vendor: Seagate Product ID: 0x1234 | /dev/disk2 External, Physical Size: 500 GB Partition Map: GPT |
| USB Keyboard Vendor: Logitech Product ID: 0x5678 | Not listed (no storage) |
How to use macOS Terminal effectively for device management
Using the Terminal to manage USB devices extends beyond simply listing them. You can navigate related directories, check mount points, and handle device permissions, all from the command line.
- List the contents of the
/Volumesdirectory by enteringls /Volumes. This shows mounted USB devices and other storage volumes. Successful output will list volume names, such as MyUSBDrive, indicating the device is mounted. - Check permissions and ownership of a mounted device by running
ls -l /Volumes/MyUSBDrive. This reveals user and group ownership and access rights, helping you understand who can read or write files on the device. - Use
sudocautiously when commands require elevated privileges, such as modifying device settings or unmounting drives. For example,sudo diskutil unmount /Volumes/MyUSBDriveattempts to unmount the volume. If you misusesudo, you may see warnings like “Warning: misuse of sudo may damage your system”. - Combine commands with pipes to filter or format output for clarity. For instance,
diskutil list | grep USBfilters the disk list to show only USB-related devices, making the output easier to interpret. - Explore device properties by chaining commands, such as
ioreg -p IOUSB | grep -i serialto find USB device serial numbers quickly.
By mastering these terminal techniques, you gain precise control over USB device management, moving beyond simple visibility to effective interaction and troubleshooting.
Troubleshooting common issues when listing USB devices in Mac Terminal
If a USB device does not appear in Terminal listings, first verify the physical connection. Ensure the device is firmly plugged into the USB port and powered if necessary. Next, open the System Information app via Apple menu > About This Mac > System Report, then check under USB for device presence. If the device is absent here, the issue is likely hardware-related or a faulty cable.
When you encounter Permission denied or similar errors running commands like ioreg or system_profiler, try prefixing commands with sudo. This elevates your privileges temporarily. If permission errors persist, review your user account rights in System Preferences > Users & Groups and ensure you have administrator access.
Terminal output can be overwhelming or confusing. To manage this, use grep to filter results for specific device names or vendor IDs. For example, system_profiler SPUSBDataType | grep -i "keyboard" extracts entries mentioning keyboards. Use less (e.g., system_profiler SPUSBDataType | less) to scroll through output at your own pace. Redirecting output to a file (system_profiler SPUSBDataType > usb_devices.txt) lets you review data with a text editor.
Note that macOS commands differ from Linux or Windows tools. For instance, macOS does not have a direct equivalent to lsusb. This can cause confusion when expecting similar output or device identifications. Understanding these platform differences helps set proper expectations when interpreting Terminal results.
- How to Generate an SSH Key in Mac Terminal: A Step-by-Step Guide
- How to Use SSH in Mac Terminal: A Clear Step-by-Step Guide
- How to Check CPU Information Using sysctl in Mac Terminal
- How to Monitor Network Traffic in Mac Terminal: A Step-by-Step Guide
Frequently asked questions
How to list usb devices in linux?
To list USB devices in Linux, you can use the command lsusb in the terminal. This lists all connected USB devices with their vendor and product IDs. For more detailed information, tools like usb-devices or examining /sys/bus/usb/devices can help.
How to bring up terminal mac?
You can open Terminal on a Mac by going to Finder > Applications > Utilities > Terminal. Alternatively, use Spotlight Search by pressing Command + Space, typing "Terminal," and hitting Enter.
How to use mac terminal?
Mac Terminal lets you interact with macOS through text commands. You can navigate files using commands like cd and ls, manage processes, run scripts, and execute system commands. It’s helpful for troubleshooting, automation, and accessing features not available through the graphical interface.
How to list files in terminal?
Use the ls command to list files in the current directory. Adding options like -l shows detailed information, and -a includes hidden files. For example, ls -la displays all files with details.
How to find usb on mac?
To find USB devices on a Mac, you can use System Information by holding the Option key and clicking the Apple menu, then selecting System Information > USB. This shows all connected USB devices with details like manufacturer and product ID. Alternatively, use Terminal commands like system_profiler SPUSBDataType for a text-based view.
What this guide does not cover and who should look elsewhere
This guide does not cover detailed device driver installation or advanced USB debugging tools. Some USB devices may not provide detailed information accessible via Terminal commands due to hardware or system limitations. Users unfamiliar with Terminal commands should exercise caution to avoid unintended system changes, as mistyped commands can affect system stability or security.
The single most useful next step is to practice using the system_profiler SPUSBDataType command regularly to familiarize yourself with the output structure and device details. This hands-on experience will help you quickly identify connected USB devices and understand their properties, making troubleshooting and device management more efficient.



