How to Reset Dock to Default Using Mac Terminal: Step-by-Step Guide
Discover step-by-step commands to reset your Mac Dock to default using Terminal and manage Dock settings effectively.
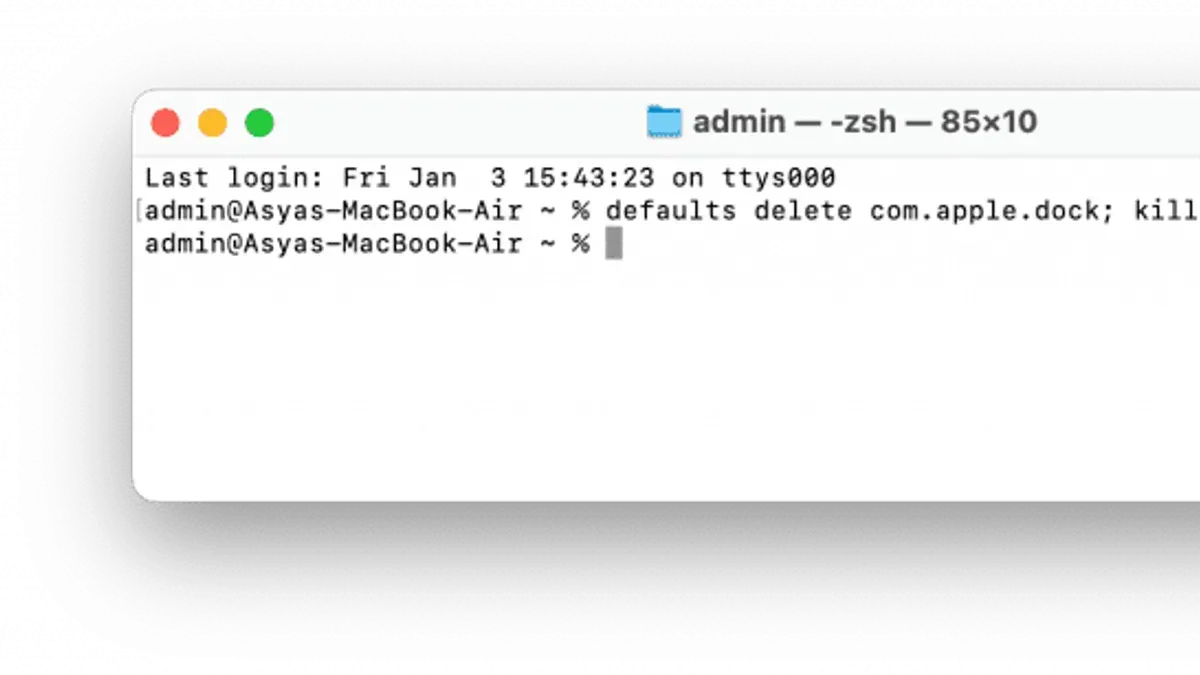
You open your Mac and notice the Dock looks cluttered or behaves oddly after installing new software or tweaking settings. Instead of manually adjusting icons and preferences, you want a clean slate to start fresh. If you are wondering how to reset Dock to default in Mac Terminal, this guide will walk you through the exact commands to return the Dock to its original state.
This article covers a step-by-step process using Terminal commands to reset the Dock, explains how changing your Terminal shell might affect this process, and provides additional useful Terminal commands related to Dock management. You will also learn how to troubleshoot common issues and manage the Dock’s visibility and position without relying on graphical interfaces.
Key takeaways
- Use the "defaults delete com.apple.dock" command followed by "killall Dock" to reset the Dock.
- Changing the default Terminal shell can impact command syntax and behavior.
- Force quitting Terminal is done with "pkill Terminal" or using Activity Monitor.
- Lock the Dock’s position and keep it visible using Terminal commands to modify Dock preferences.
- Restart your Mac via Terminal using "sudo shutdown -r now" for a full system reboot after Dock resets.
Before you start: what you need to reset the Dock via Terminal
Resetting the Dock through Terminal requires some familiarity with command-line operations on your Mac. You should be comfortable opening the Terminal app and entering commands accurately. Additionally, you need administrator access or the ability to enter your user password when prompted, as some commands may require elevated privileges.
Understand that resetting the Dock will erase all your current custom app icons and layout settings, restoring it to the default state. This means any personalized arrangement or added folders will be lost. To avoid losing your current Dock setup permanently, it is advisable to back up your Dock preferences before proceeding.
Backing up your Dock preferences can be done by copying the Dock's property list (plist) file using Terminal. Here is how you do it:
- Open Terminal. You should see a prompt ready to accept commands.
- Type cp ~/Library/Preferences/com.apple.dock.plist ~/Desktop/dock-backup.plist and press Enter. This command copies the Dock preferences file to your Desktop.
- Check your Desktop for the file named dock-backup.plist. Its presence confirms the backup was successful.
This backup allows you to restore your previous Dock configuration if needed by replacing the current plist with this saved version.
How to reset Dock on Mac using Terminal commands
Resetting your Dock to its default state via Terminal involves deleting your current Dock preferences and restarting the Dock process. This removes customizations such as app arrangement and pinned items, while system-wide Dock settings remain unchanged.
- Open Terminal from Applications > Utilities or via Spotlight search.
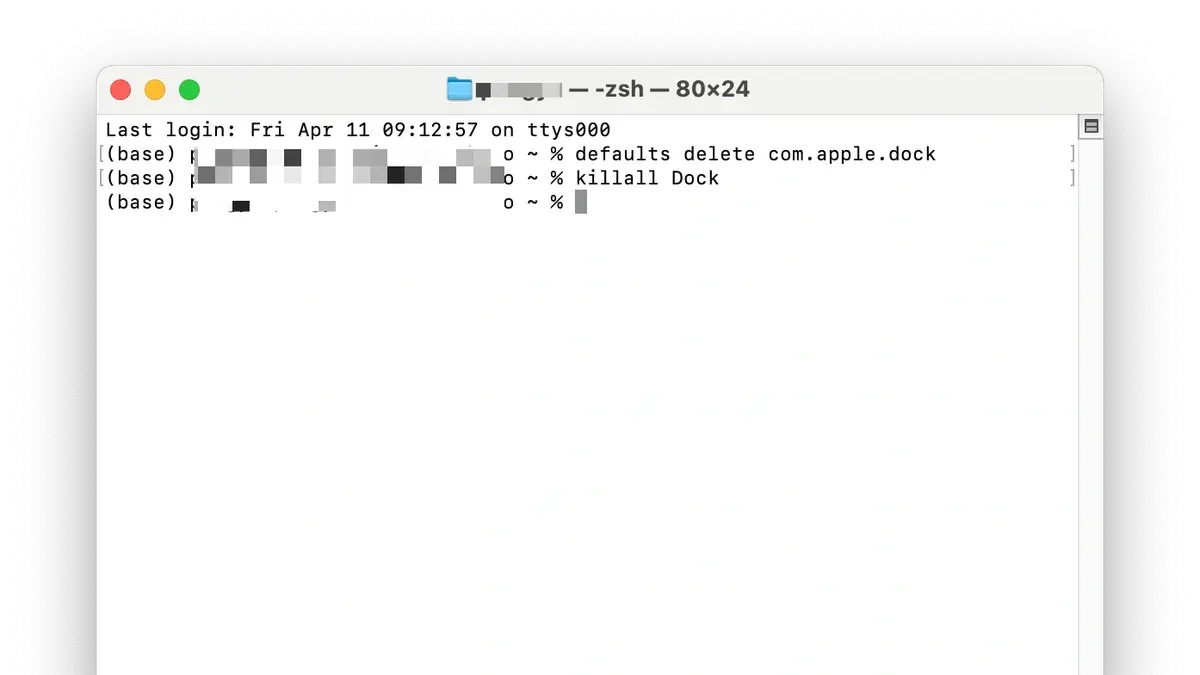
- Type the command defaults delete com.apple.dock and press Enter. This command deletes the Dock preference file for your user account. You will not see any output if it succeeds.
- Next, restart the Dock by entering killall Dock and pressing Enter. This command will quit and immediately relaunch the Dock.
- Observe your Dock disappear and then reappear. It will now reflect the default macOS Dock layout and behavior, with default apps and no custom folders or stacks.
After running these commands, your Dock resets to factory settings, but system-level configurations like Mission Control behavior are unaffected. This method is effective for resolving issues caused by corrupted Dock preferences or unwanted customizations.
How to change default Terminal shell on Mac and its relation to Dock reset
macOS uses different shells like zsh (the default since recent versions) and bash, which affect how commands and scripts run in Terminal. Your current shell determines command syntax and environment variables, which can influence script compatibility, including those for resetting the Dock.
To check which shell you are using, enter echo $SHELL in Terminal. This will display the path of the active shell, such as /bin/zsh or /bin/bash.
If you prefer to change your default shell, use the chsh command followed by the shell path. For example, to switch to bash, type chsh -s /bin/bash and then restart Terminal. After restarting, echo $SHELL should confirm the change.
While Dock reset commands like defaults delete com.apple.dock and killall Dock work similarly regardless of shell, differences in shell environments can affect custom scripts or aliases you might use alongside these commands. Ensuring your shell matches your scripting needs helps avoid unexpected behavior when managing the Dock via Terminal.
How to force quit or force close Terminal on Mac
Sometimes, the Terminal app may become unresponsive during your Dock reset or other troubleshooting tasks. Force quitting Terminal can resolve this without affecting your Dock reset process, but it should be done cautiously to avoid data loss.
- Open Activity Monitor from the Utilities folder in Applications. You should see a list of all running processes.
- In Activity Monitor's search bar, type Terminal to filter the processes.
- Select the Terminal process, then click the X button in the top-left corner of the window.
- Choose Force Quit in the confirmation dialog. The Terminal window will close, indicating the app has been terminated.
- Alternatively, if you prefer command line, type
killall Terminalin another Terminal window or useps aux | grep Terminalto find specific Terminal process IDs (PID). - Then execute
kill -9 [PID]replacing [PID] with the actual number to terminate that process safely.
Force quitting is useful when Terminal freezes or commands hang, but always save your work or session data beforehand to prevent loss. This approach ensures your Dock reset commands remain intact and the system stays stable.
How to make the Dock stay visible and lock its position on Mac
After resetting your Dock, you might want to customize its behavior by keeping it visible and locking its size and position. Terminal allows you to adjust these settings with specific commands.
- To prevent the Dock from hiding automatically, enter defaults write com.apple.dock autohide -bool false in Terminal. When successful, your Dock will remain visible at all times without disappearing.
- To lock the Dock size and prevent resizing, use defaults write com.apple.dock size-immutable -bool true. This command stops changes to the Dock’s icon size until you undo it.
- Apply your changes by restarting the Dock with killall Dock. The Dock will briefly disappear and then reappear with the new settings active.
You can further customize Dock preferences by scripting additional defaults write commands to modify icon size, magnification, or position (left, bottom, right). However, completely locking the Dock’s position or disabling all user modifications is limited; macOS does not provide a built-in Terminal command to fully prevent repositioning or moving the Dock.
How to restart or reboot Mac from Terminal
Restarting the Dock or the entire Mac through Terminal can help apply changes or resolve issues without needing to log out or manually reboot.
- To restart the Dock, open Terminal and type killall Dock, then press Enter. You should see the Dock disappear briefly and then reappear, indicating it has restarted.
- If you need to reboot the whole Mac, use the command sudo shutdown -r now. After entering this, you will be prompted for your administrator password. Once entered, the system will begin restarting immediately.
Restarting the Dock is quicker and less disruptive, useful for applying Dock-related changes or troubleshooting. Rebooting the Mac is more thorough and should be reserved for when issues persist or system-level changes require it.
Before rebooting from Terminal, save all your work and close applications, as the command forces an immediate restart without additional prompts.
Troubleshooting common issues when resetting Dock via Terminal
If the Dock does not reset after running defaults delete com.apple.dock and killall Dock, first ensure that the commands were entered correctly and that you have administrator privileges. A common error is a permission denied message, which usually means you need to prepend sudo to the command or check your user’s admin rights.
Third-party Dock customization apps can interfere with Terminal resets by overwriting Dock preferences or locking certain settings. If you use tools like cDock or DockMate, disable or uninstall them before attempting a reset to avoid conflicts.
When Terminal commands alone don’t restore the Dock, manual edits to the com.apple.dock.plist file located in your ~/Library/Preferences/ folder may be necessary. Use a plist editor or the macOS built-in Property List Editor to remove stubborn customizations. Alternatively, GUI tools like Onyx can reset the Dock and related caches more thoroughly.
Steps to verify a successful reset:
- Run
defaults delete com.apple.dockin Terminal. You should see no output, indicating the preferences were deleted. - Run
killall Dock. The Dock will disappear briefly and then reappear in its default state. - If the Dock remains unchanged, check for error messages. For example, Operation not permitted indicates a permissions issue.
- Confirm no third-party Dock managers are active by quitting or uninstalling them.
- If problems persist, manually delete
~/Library/Preferences/com.apple.dock.plistand restart the Dock again.
- How to Reset Launchpad Using Mac Terminal: A Clear Step-by-Step Guide
- How to Speed Up Dock Animation Using Mac Terminal Commands
Frequently asked questions
How to reset terminal mac?
To reset Terminal on a Mac, you can clear its preferences by deleting the Terminal plist file located at ~/Library/Preferences/com.apple.Terminal.plist. After removing this file, restart Terminal to restore default settings. Alternatively, you can reset specific Terminal settings within the app's Preferences pane.
How to force quit terminal in mac?
You can force quit Terminal by pressing Command + Option + Escape to open the Force Quit Applications window, selecting Terminal, and clicking Force Quit. This method immediately closes Terminal even if it is unresponsive.
How to force close terminal in mac?
Force closing Terminal is identical to force quitting it. Use Command + Option + Escape, or open Activity Monitor, find the Terminal process, and click the stop button to quit it forcibly.
How to make dock stay on mac?
To keep the Dock visible continuously, open System Settings, go to Desktop & Dock, and disable Automatically hide and show the Dock. This setting locks the Dock in place and prevents it from disappearing when not in use.
How to get dock on mac?
If the Dock is missing, you can restart it using Terminal by running killall Dock. This command terminates the Dock process, which macOS immediately reloads, restoring the Dock to the screen.
What resetting the Dock via Terminal does not cover and who should consider alternatives
Resetting the Dock through Terminal will erase all your custom app icon arrangements and any personalized settings related to the Dock itself. This method does not recover deleted applications or affect system-wide preferences beyond the Dock configuration. If you rely heavily on a particular Dock layout, backing up your preferences beforehand is advisable.
Users who are not comfortable using Terminal or handling command-line instructions should proceed with caution. For those unfamiliar with Terminal, using the graphical user interface (GUI) options to reset or customize the Dock may be safer and less prone to errors.
Exploring Terminal commands can be powerful, but it requires precise input and awareness of the consequences. If you are unsure or want to preserve your current setup, consider alternative methods or seek assistance.
The single most useful next step after resetting your Dock is to customize it immediately by adding your frequently used applications and adjusting settings like Dock size and position through System Preferences > Dock & Menu Bar. This ensures your workspace returns to a productive and personalized state promptly.