
How to Set Up Parental Controls on Mac: A Step-by-Step Guide
This guide explains how to set up parental controls on Mac to customize restrictions, filter content, and manage app usage for your child’s safety.
You notice your child spending more time on their Mac, exploring apps and websites without restrictions. Balancing their curiosity with safety can feel challenging without the right tools in place.
This guide explains how to set up parental controls on Mac, offering clear steps to customize restrictions on MacBook, MacBook Air, MacBook Pro, Mac Mini, and connected Apple devices. You will learn how to manage user accounts, filter internet content, and control app usage beyond the basic Screen Time features to suit your family's needs.
Key takeaways
- Use System Settings > Screen Time to create managed accounts with tailored restrictions.
- Set up content filters under Content & Privacy Restrictions to limit websites and app access.
- Manage app permissions individually to control downloads and in-app purchases.
- Integrate parental controls across Apple devices like Apple Watch for consistent monitoring.
- Review and adjust settings periodically to balance protection with user independence.
Before you start: What you need to set up parental controls on Mac
To set up parental controls on your Mac, ensure it runs macOS Catalina (10.15) or later, as these versions fully support Screen Time and parental control features. Older macOS versions have limited or different parental control tools.
You will need Apple ID credentials to manage user accounts and Screen Time settings effectively. Make sure you have the login information for the administrator account, which has full device permissions, unlike standard or managed user accounts with restricted rights.
Familiarity with System Settings (formerly System Preferences) is essential since most controls are configured there, under Screen Time and Users & Groups sections. Knowing how to navigate these menus will streamline the process.
Optional devices like the Apple Watch can extend monitoring if you want to track or manage your child's activity across the Apple ecosystem, but they are not mandatory for Mac parental controls.
Before setting controls, decide the scope you want: limit internet access, restrict certain apps or programs, or set time limits. This clarity helps tailor the settings to your family's needs.
- Check your Mac’s macOS version by clicking the Apple menu > About This Mac; confirm it is macOS Catalina or newer. You should see the version number displayed.
- Verify you have administrator access by opening System Settings > Users & Groups; an admin account will say “Admin” under the username.
- Ensure you know your Apple ID credentials for the accounts you will manage; you will need these to configure Screen Time and user settings.
- Decide which parental controls to apply: internet filtering, app restrictions, or time limits. This will guide your setup steps.
How to set up parental controls on MacBook, MacBook Air, MacBook Pro, and Mac Mini
- Open System Settings (or System Preferences on older macOS versions) from the Apple menu.
- Navigate to Users & Groups. Here, you can either create a new user account for your child by clicking the + button or convert an existing account.
- When creating a new account, select Standard as the account type and enable Parental Controls if available. On newer macOS versions, parental controls are managed through Screen Time.
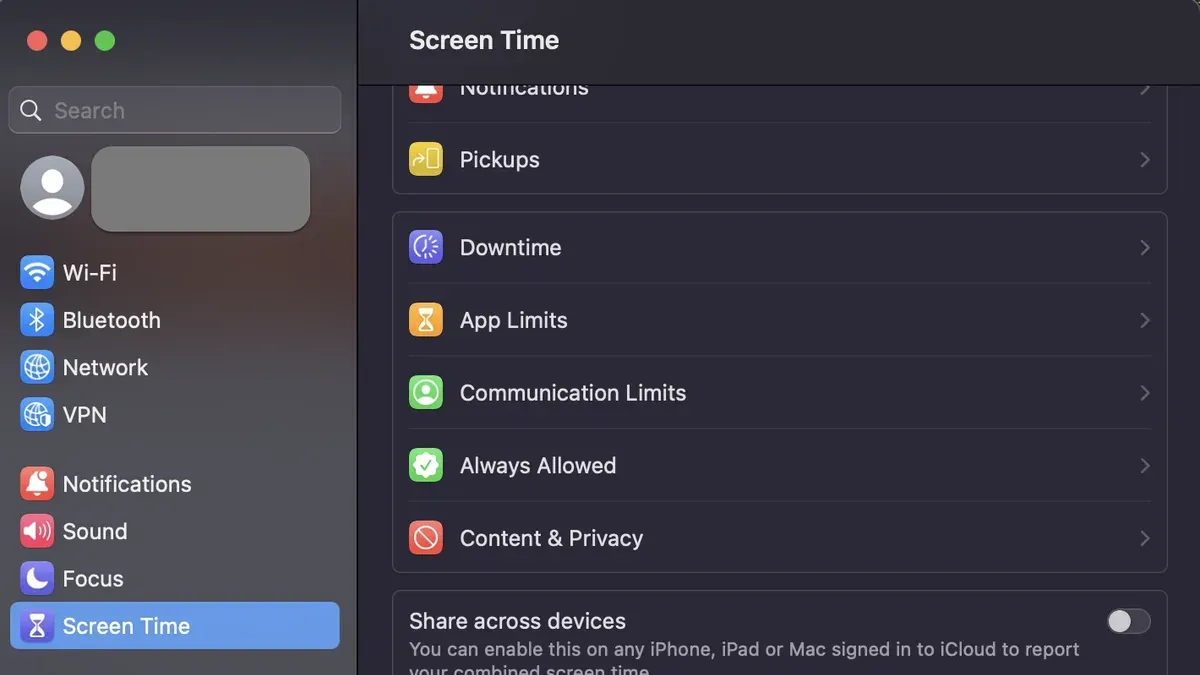
- Open Screen Time from System Settings and select your child’s user account from the drop-down menu at the top-left.
- Set App Limits by selecting categories or specific apps, then defining daily usage time. For example, you might limit social media apps to one hour per day.
- Configure Communication Limits to control who your child can communicate with during allowed screen time and downtime.
- Under Downtime, schedule periods when your child’s Mac access is restricted except for essential apps.
- Use Content & Privacy Restrictions to filter web content, block adult websites, restrict explicit language in music and podcasts, and prevent changes to privacy settings.
- Manage Purchases and Downloads by enabling Ask to Buy via your Apple ID Family Sharing settings, requiring approval for app and media purchases.
- Note that while the setup process is consistent across MacBook, MacBook Air, MacBook Pro, and Mac Mini, slight interface variations may exist depending on macOS version and screen resolution. For example, some options may appear under different menu labels or tabs.
- Once configured, test the controls by logging into the child account and verifying restrictions are in place as intended.
How to set up parental controls on Apple Watch and integrate with Mac controls
Extending parental controls to an Apple Watch helps you monitor and limit your child's device usage alongside Mac controls. Start by enabling Screen Time on the child's Apple Watch through Family Sharing, which allows you to manage settings remotely from your Mac or iPhone.
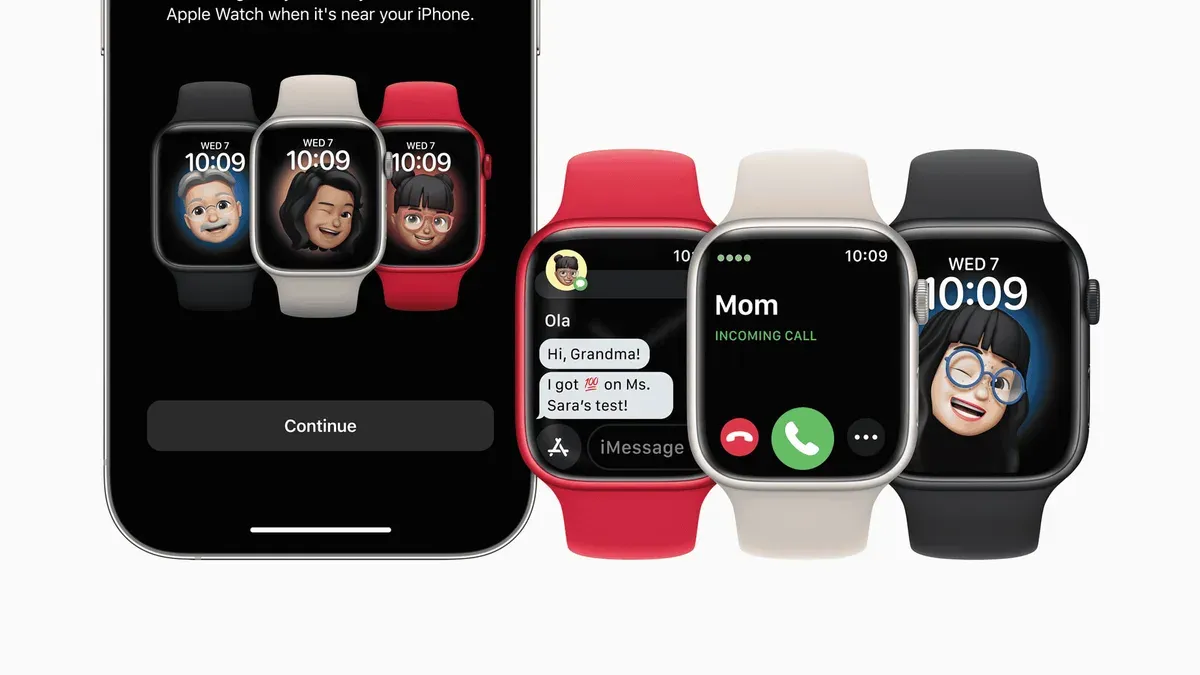
- Open the Watch app on your iPhone linked to the child's Apple Watch. You should see the child's watch listed under your devices.
- Tap on the child's Apple Watch, then select Screen Time. Turn on Screen Time if it is not already enabled; you should see options to configure limits.
- Set Communication Limits by choosing During Allowed Screen Time or During Downtime. For example, restrict communication to contacts only during downtime; this will appear as a confirmation of the limit set.
- Adjust additional settings such as App Limits and Downtime to control the duration your child can use apps or the watch itself.
- Use Family Sharing on your Mac by going to System Settings > Family, selecting the child's account, and verifying that Apple Watch Screen Time settings appear linked and manageable.
Apple Watch parental controls mainly focus on communication limits, app usage, and downtime, complementing the more extensive Mac controls that include internet filtering and detailed app restrictions.
| Parental Control Feature | Mac | Apple Watch |
|---|---|---|
| Screen Time Usage Limits | Yes, detailed for apps and categories | Yes, but fewer app categories |
| Communication Limits | Yes, contacts and messaging | Yes, but limited to contacts and calls |
| Internet Filtering | Yes, comprehensive web content filters | No, Apple Watch does not support web filtering |
| App Installation Control | Yes, with restrictions on app downloads | Limited, mostly controls app usage not installation |
While Apple Watch parental controls provide useful communication and app restrictions, they do not replace the broader capabilities available on the Mac. Use them as complementary tools to maintain consistent oversight across devices.
How to set up parental controls for internet use on Mac
To filter and monitor web content on your child's Mac, use the Screen Time feature's built-in content restrictions. This allows you to block adult websites, restrict explicit language, and customize allowed or blocked sites.
- Open System Preferences and select Screen Time. Choose the child's user account from the sidebar.
- Click Content & Privacy, then enable Content & Privacy Restrictions. Navigate to the Content tab.
- Under Web Content, select Limit Adult Websites. You can add specific URLs to the Always Allow or Never Allow lists for fine-tuned control. When done, the child’s browser blocks restricted sites and filters explicit content.
- To enforce safe search, toggle on options like Try to Limit Adult Content which activates safe search in supported browsers.
- For Microsoft Edge on Mac, use the browser’s built-in family features or configure Screen Time restrictions to block inappropriate sites. Edge’s Kids Mode offers additional filtering, but it requires separate setup within the browser.
- Consider third-party parental control software if you need advanced monitoring or filtering options such as time-based internet access or social media restrictions. These often provide more granular controls but require installation and can impact system performance.
Using Screen Time’s built-in filters generally offers straightforward setup with system-wide effect, while third-party tools provide added customization at the cost of complexity and potential privacy trade-offs.
Example: After enabling Limit Adult Websites and adding a specific gaming site to the Never Allow list, attempts to access that site will show a blocked page message, confirming effective filtering.
How to control apps and programs on Mac with parental controls
To limit app usage and block specific programs, use the Screen Time feature found in System Preferences. It allows you to set daily time limits for individual apps or entire categories, such as games or social networking.
- Open System Preferences and select Screen Time. When the Screen Time window appears, choose your child's user account from the drop-down menu.
- Click on "App Limits" on the sidebar, then hit the "+" button. Select the apps or app categories you want to limit, set the allowed daily time, and click "Done." You will see the limits applied in the list.
- To block apps entirely, go to "Content & Privacy" in Screen Time, enable it by turning on the toggle, then navigate to the "Apps" tab. Here, uncheck the categories or specific apps you want to block. These apps will become inaccessible to the child account.
- Manage program permissions by going to System Preferences > Security & Privacy > Privacy tab. Restrict access to features like Camera, Microphone, and Files & Folders for particular apps.
- Restrict app downloads by enabling "Require Password" for purchases and downloads in the App Store settings under System Preferences > Apple ID > Media & Purchases. Set this to always require a password to prevent unauthorized app installations.
Legacy or non-App Store software may bypass these controls, especially if children have administrator access. Regularly reviewing installed applications and limiting admin rights helps reduce this risk. Children might also try to use guest accounts or alternative browsers to circumvent restrictions, so managing user accounts carefully is essential.
How to manage user accounts for effective parental control
Managing user accounts correctly is essential for effective parental controls on Mac. Different account types—Administrator, Standard, and Managed (Child)—offer varying levels of control and access.
| Account Type | Allowed Actions | Typical Use |
|---|---|---|
| Administrator | Full system access, can install software, change settings, manage other accounts | Parent or guardian managing the device |
| Standard | Use most apps and change settings for own account, cannot manage other accounts or install system-wide software | General users without administrative privileges |
| Managed (Child) | Restricted access with parental controls enabled, cannot change system settings or permissions | Child accounts tailored for parental supervision |
- Open System Preferences and go to Users & Groups. You should see a list of current accounts.
- Click the lock icon and enter your administrator password to make changes.
- Click the + button below the account list to add a new user.
- In the new user dialog, select Managed with Parental Controls as the account type, then enter the child's name and password.
- After creation, select the managed account and click Open Parental Controls to configure restrictions tailored to your preferences.
- Ensure the child's account is not set as administrator to prevent unauthorized changes to settings or software installations.
- To monitor or switch accounts remotely, use Fast User Switching or Screen Time Family Sharing features, allowing you to view usage and make adjustments without direct access to the device.
Limiting the child's account privileges while maintaining administrator access for yourself strikes a balance between control and usability. Regularly review account settings to ensure restrictions remain in place as needed.
Troubleshooting common problems setting up parental controls on Mac
When parental controls fail to apply or revert after restarting your Mac, begin by verifying that the child account is properly set as a managed account under System Preferences > Users & Groups. If changes disappear, check that Screen Time is enabled and that you have administrator rights. Restart the Mac and confirm if restrictions persist.
Screen Time not syncing across devices often results from Family Sharing misconfigurations or disabled iCloud syncing. To diagnose, ensure all devices use the same Apple ID for Family Sharing and navigate to System Preferences > Apple ID > iCloud to confirm Screen Time is toggled on. Successful syncing shows consistent usage and limits across devices.
If blocked websites remain accessible, review the Content & Privacy Restrictions within Screen Time. Confirm that web content filtering is set to "Limit Adult Websites" or a custom list. Some browsers or VPNs may bypass these controls; disabling conflicting VPNs or security software can restore effectiveness.
App limits not enforcing or being bypassed often arise from outdated macOS versions or apps installed outside the App Store. Confirm your macOS is current and check Screen Time app limits. If limits fail, try removing and re-adding restrictions. Note that some legacy or enterprise applications may circumvent controls.
Conflicts with third-party security or VPN software are a frequent cause of parental control issues. Temporarily disable these applications and test parental controls. If controls function correctly when these are off, adjust settings or whitelist Screen Time features in the security software.
- Open System Preferences > Users & Groups; verify the child account is managed and locked. You should see "Managed with Screen Time" under the account name.
- Go to System Preferences > Apple ID > iCloud; confirm Screen Time is enabled on all family devices. Usage data should match across devices within minutes.
- In System Preferences > Screen Time > Content & Privacy, check web content filters are active. Blocked sites should no longer load in Safari or supported browsers.
- Test app limits by opening an app with a set limit; once the limit is reached, the app should be inaccessible without a Screen Time passcode.
- Disable any VPN or security software temporarily; if controls start working, adjust those applications to avoid interference.
Additional tips for enhancing parental controls on Mac
To maintain effective parental controls, regularly review and update the restrictions you have set. Changes in your child's needs or maturity level may require adjustments, ensuring controls remain appropriate and fair.
Communicate openly with your children about why these controls are in place. Experts emphasize that clear dialogue helps children understand boundaries and encourages responsible device use rather than fostering resentment.
Use the weekly Screen Time reports available in System Preferences > Screen Time > Reports. These reports show daily and weekly usage patterns by app and category, helping you identify areas where limits may need tightening or relaxing.
Enhance Mac parental controls by combining them with router-level internet filtering. Many modern routers offer parental controls that block inappropriate content network-wide, adding an extra layer of protection beyond device-specific settings.
- Open System Preferences and select Screen Time. You should see a summary of usage across apps and websites for the past week.
- Discuss the report with your child, highlighting any concerns or achievements. This should foster understanding and cooperation.
- Adjust app limits or content restrictions as needed based on the report findings. Changes take effect immediately and will show in the next report.
- Access your router’s parental control settings through its admin interface. Enable content filtering and set schedules or restrictions to complement your Mac controls.
- How to Allow Apps from Anywhere on Mac: A Step-by-Step Guide
- How to Manage iCloud Storage on Mac: A Step-by-Step Guide
Frequently asked questions
How to set up apple parental controls?
To set up Apple parental controls, go to System Settings on your Mac and select Screen Time. From there, create a child account or select an existing user, then customize restrictions such as app limits, communication controls, and content filters. You can also manage downtime and set privacy controls to tailor the experience.
How to set up parental controls on MacBook Neo?
Although “MacBook Neo” is not a standard Apple model, parental controls on any MacBook, including the latest models, are configured via System Settings under Screen Time. Create or select a child user account, then apply content restrictions, app limits, and web filtering to suit your family's needs. The process is consistent across MacBook models.
How to set up parental controls on Mac laptop?
On any Mac laptop, access System Settings and open Screen Time. Add or select the child’s user account, then adjust settings like app usage limits, communication safety, and content restrictions. You can also use Family Sharing to manage controls remotely and ensure consistent rules across devices.
How to set up parental controls on Mac user accounts?
Start by creating a standard user account for your child via Users & Groups in System Settings. Next, activate Screen Time for that account and enable relevant restrictions such as app limits, web content filtering, and downtime schedules. Managing controls per user account ensures personalized and effective supervision.
What are the best parental controls software options for Mac?
Besides built-in Screen Time features, popular third-party parental control software for Mac includes Qustodio, Net Nanny, and Norton Family. These tools often offer more detailed reporting, flexible internet filtering, and app management beyond native capabilities. Choose software based on your desired level of control and ease of use.
What this guide does not cover and who should look elsewhere
This guide focuses exclusively on parental controls within the Apple ecosystem, specifically Mac and related devices. It does not address parental control solutions for non-Apple platforms or Windows PCs beyond browser-level restrictions you can apply on a Mac. Parental controls depend heavily on managing user accounts and software restrictions, which tech-savvy children may find ways to circumvent, so these methods are not foolproof. For families seeking more detailed monitoring or control features, some third-party parental control software offers more granular options but can involve privacy trade-offs and require careful consideration.
The single most useful next step is to create a dedicated child user account in your Mac's System Settings under Users & Groups with managed restrictions immediately applied. From there, customize app permissions, web content filters, and screen time limits based on your child's age and needs. This approach ensures you have a controlled environment tailored to your family’s unique requirements.



