How to Take Ownership with chown in Mac Terminal: A Step-by-Step Guide
Fix permission errors by learning how to take ownership with chown in Mac Terminal safely and effectively.
You’ve just copied files to your Mac and notice you can’t open or modify them. Permission errors or unexpected ownership can block access and cause frustration.
This article explains how to take ownership with chown in Mac Terminal, helping you understand when and why to use this command safely. You’ll learn to check current ownership, apply the correct syntax, and avoid common pitfalls that could affect system stability.
Key takeaways
- Check file and directory ownership with
ls -lbefore making changes. - Use
sudo chown user:group pathto change ownership safely. - Avoid recursive ownership changes unless necessary, as they can affect system files.
- Confirm changes with
ls -lto ensure correct ownership. - Be cautious with system directories to prevent permission conflicts.
Before you start: What you need to use chown safely
To use chown effectively on your Mac, you need access to the Terminal with administrator privileges. This means you should be able to run commands prefixed with sudo, which grants the necessary rights to change file ownership. Without these privileges, ownership changes will fail.
It is essential to have a basic understanding of file ownership and permissions on Unix-based systems like macOS. Every file and directory has an owner and a group. The ls -l command displays these details in the Terminal, helping you identify current ownership before making changes.
For example, the output of ls -l might look like this:
-rw-r--r-- 1 alice staff 1024 Oct 15 09:30 example.txt
Here, alice is the owner and staff is the group. The root user is the superuser with unrestricted access; changing ownership of system or critical files to or from root can cause serious issues. Be aware of these risks and avoid modifying files outside your user directory unless you have a clear reason and understanding.
- Open Terminal from Applications > Utilities.
- Type
ls -lfollowed by the file or directory name to check ownership. You should see the owner and group listed in the third and fourth columns. - If you need to change ownership, ensure you have administrator rights by prefixing commands with
sudo. You will be prompted for your password.
Understanding file ownership and why chown matters
On a Mac, every file and directory has two key ownership attributes: a user owner and a group owner. The user owner is typically the creator or assigned individual responsible for the file, while the group owner represents a collection of users who share access rights. Ownership directly influences who can read, write, or execute a file, impacting system security and functionality.
Ownership works alongside permissions to define access. For example, a file owned by user "alice" with read and write permissions allows Alice to modify it, but others may be restricted based on their group or other permissions. While chmod changes the permissions themselves (like read, write, execute), chown changes who holds ownership, shifting who those permissions apply to.
Common situations requiring ownership changes include transferring files between systems, where ownership may default to a different user, and executing scripts that must be owned by a specific user to run correctly. Misaligned ownership can prevent file access or cause security risks.
| Aspect | Ownership | Permissions |
|---|---|---|
| What it controls | Who owns the file (user and group) | What actions owners and others can perform |
| Effect | Determines which users the permissions apply to | Allows or denies read, write, execute access |
| Commands | chown (change owner/group) | chmod (change permission bits) |
Understanding and managing ownership ensures you maintain appropriate access and system stability.
Step 1: Checking current ownership of files and directories
Before changing ownership, you need to inspect the current user and group associated with your files and directories to avoid unintended consequences. The ls command is your primary tool for this.
- Open Terminal and navigate to the directory you want to check using cd [directory_path]. You should see no errors if the path is correct.
- Type
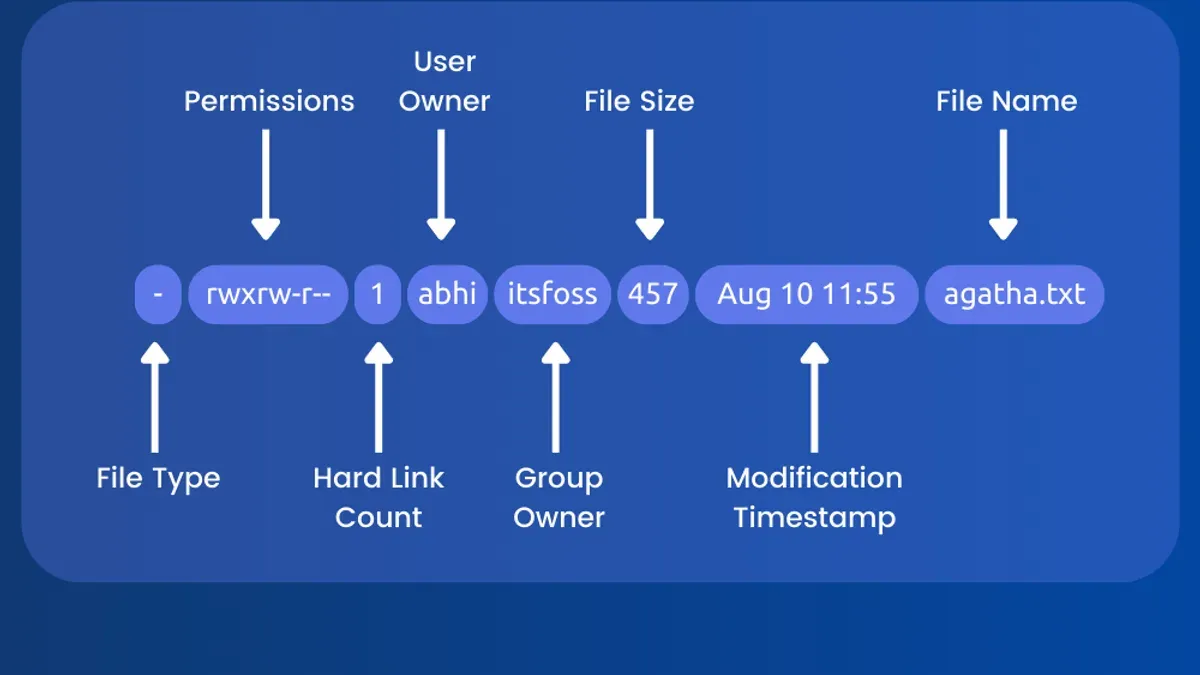
ls -land press Enter. This lists files and directories with detailed information. You will see columns showing permissions, number of links, owner (user), group, size, modification date, and filename. The third column is the user, and the fourth is the group. - To view extended attributes, which sometimes affect ownership-like metadata, run
ls -le. This adds attribute details below each file entry. - If you want to check ownership recursively within subdirectories, use
ls -lR. This outputs ownership for all nested files and folders.
For example, a typical ls -l output looks like this:
| Permissions | Links | User | Group | Size | Date Modified | Name |
|---|---|---|---|---|---|---|
| -rw-r--r-- | 1 | alice | staff | 2048 | Oct 14 10:23 | document.txt |
| drwxr-xr-x | 4 | alice | staff | 128 | Oct 13 09:17 | Projects |
Here, alice is the owner user, and staff is the group. Identifying files where the user or group does not match the expected owner helps determine where chown might be necessary.
Step 2: Using chown syntax to change ownership
The basic syntax for changing ownership with chown is:
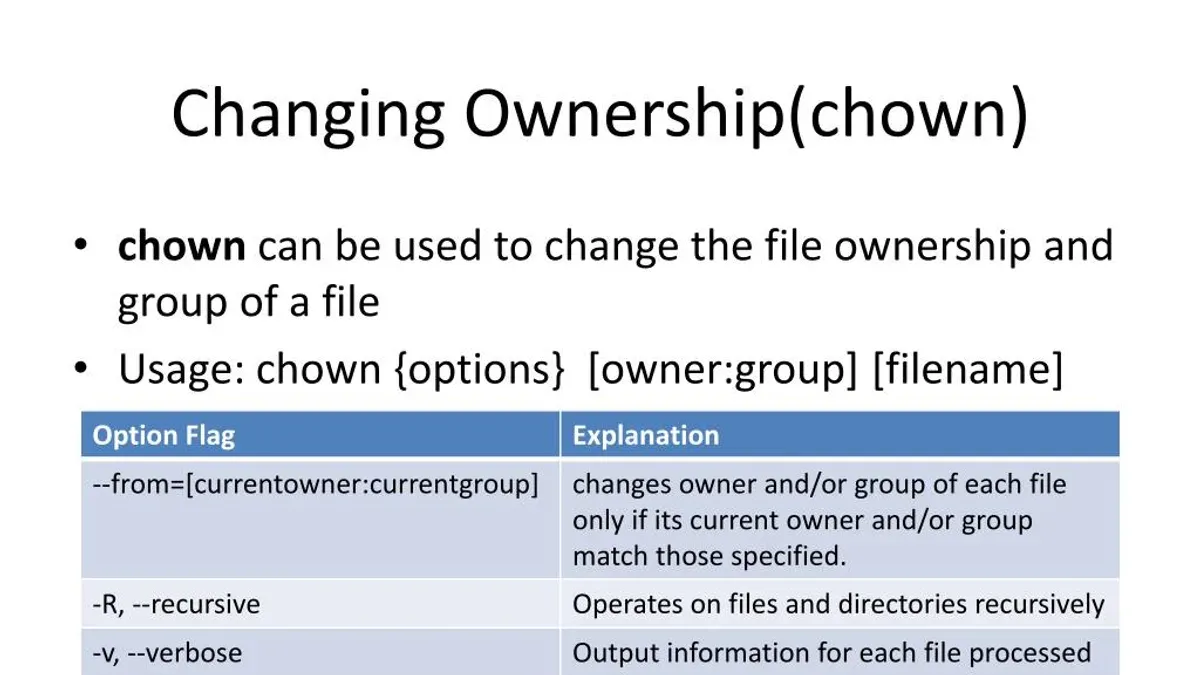
chown [options] user[:group] file(s)
This means you specify the new owner as user, optionally followed by a colon and the group. You can change only the user, only the group, or both at once.
- To change the user ownership of a single file, enter:If successful, the command returns no output. You can verify the change with
ls -l example.txt, which should show alice as the owner.chown alice example.txt
- To change the group ownership only, use a colon before the group name but leave the user blank:This changes the group to staff without altering the user.
chown:staff example.txt
- To change both user and group simultaneously:This sets the owner to alice and the group to staff.
chown alice:staff example.txt
- When changing ownership on system files or other users’ files, prepend
sudoto gain administrator privileges:You will be prompted for your password. Successful commands return no output.sudo chown alice example.txt
- To change ownership recursively for a directory and all its contents, add the
-Roption:This changes ownership for Documents and every file and subdirectory inside it.Use-Rcautiously. Mistakes can affect many files unintentionally.sudo chown -R alice:staff Documents/
Examples without -R alter only the specified file or directory, leaving contents unchanged. With -R, changes apply deeply and broadly.
Step 3: Best practices and safety tips for using chown on Mac
Using chown requires caution to avoid disrupting system stability or security. Avoid changing ownership of system files, hidden files (those starting with a dot), or files within protected directories like /System or /Library unless you have a clear, necessary reason. macOS’s System Integrity Protection (SIP) restricts ownership changes on critical system files to prevent damage.
Before applying ownership changes, back up important files to prevent accidental data loss. Use ls -l before and after running chown to confirm what ownership changes will occur and verify their success afterward.
Consider whether chown is the right tool; sometimes adjusting permissions with chmod or changing access control lists (ACLs) is safer and more appropriate.
- Identify the target files or directories and run
ls -lto view current ownership. You should see the current owner and group listed. - Backup these files using Time Machine or manual copy to a safe location. After backup, you have a restore point if anything goes wrong.
- Use
chowncarefully on non-system files only. For example,chown username:groupname /path/to/file. Avoid commands likechown -R root:wheel /System, which can break macOS functionality. - Check ownership again with
ls -lto confirm changes. If SIP is enabled, ownership changes on protected files will be silently ignored or rejected, which you can verify by no difference inlsoutput. - If an error occurs, review the command syntax and file paths. Errors like "Operation not permitted" often indicate SIP restrictions or insufficient privileges.
Step 4: Troubleshooting common chown errors
When using chown, you may encounter errors that prevent ownership changes. Here are common issues and how to address them.
- Permission denied errors: If you see "chown: changing ownership of 'file': Operation not permitted", it means you lack sufficient privileges. Fix this by prefixing the command with
sudo, likesudo chown user:group file. You should be prompted for your administrator password, and the command will execute with elevated rights. - Invalid user or group errors: An error such as "chown: user does not exist" indicates the specified user or group is not recognized. Verify available users with
dscl. list /Usersand groups withdscl. list /Groups. Correct the username or group accordingly. - Immutable flags or System Integrity Protection (SIP): Files with immutable flags set (visible via
ls -lO) or protected by SIP cannot have ownership changed. To remove an immutable flag, usesudo chflags nouchg file. SIP-protected files require SIP to be disabled (not generally recommended) before changes are possible. - Unexpected outcomes or no changes: If ownership does not update, double-check the file path and confirm you have proper permissions. Using the verbose flag
-v, for examplesudo chown -v user file, shows each file processed and helps identify where the command may fail.
Using these steps helps diagnose and resolve typical chown command errors safely on your Mac.
Step 5: Verifying ownership changes and next steps
After using chown, it is essential to confirm that ownership changes took effect as intended. Begin by re-running ls -l on the affected files or directories. You should see the updated user and group names reflecting your changes. For example, before and after outputs might show:
| Before | After |
|---|---|
-rw-r--r-- 1 olduser staff 1024 Oct 15 file.txt | -rw-r--r-- 1 newuser staff 1024 Oct 15 file.txt |
Next, check that any applications or scripts relying on those files function correctly, as ownership changes can affect access. If you encounter permission issues, adjusting file permissions with chmod may be necessary to grant appropriate access rights.
To find all files owned by a specific user, use the find command. For example:
find /path/to/search -user newuserfind /path/to/search -user olduser(to identify any remaining files owned by the previous user)
Regularly auditing file ownership and permissions helps maintain system security and prevents unintended access problems. Document any ownership changes you make and monitor system behavior afterward to ensure stability.
- How to Disable Gatekeeper in Mac Terminal: Step-by-Step Guide
- How to Generate an SSH Key in Mac Terminal: A Step-by-Step Guide
- How to Use SSH in Mac Terminal: A Clear Step-by-Step Guide
Frequently asked questions
What does the chown command do on Mac Terminal?
The chown command changes the ownership of files or directories by assigning them to a different user or group. This is useful when managing permissions, especially if you need to give access control to another user account on your Mac.
Can I change ownership of system files using chown?
Changing ownership of system files is generally restricted to protect macOS integrity. Most system files are protected by System Integrity Protection (SIP), and attempting to modify them with chown will often result in permission errors unless SIP is disabled, which is not recommended for typical users due to security risks.
How do I fix 'Operation not permitted' errors when using chown?
This error usually occurs because macOS restricts permission changes on certain files or directories. To fix it, ensure you run chown with sudo for administrative privileges, and check if System Integrity Protection (SIP) is preventing changes. Avoid disabling SIP unless absolutely necessary and you understand the security implications.
What is the difference between chown and chmod?
Chown changes the owner or group of a file, while chmod modifies the permission settings such as read, write, and execute for users. Both affect access control but in different ways: chown controls who owns the file, and chmod controls what actions users can perform on it.
When this guide is not enough
This guide does not cover advanced ownership scenarios involving network shares or Access Control Lists (ACLs). If you manage enterprise environments or complex permissions setups, it’s best to consult your system administrator or IT support to avoid unintended consequences.
Ownership changes with chown can affect system stability and security if applied incorrectly. If you are unsure about the implications of changing ownership on critical system files or shared resources, seeking expert advice is recommended.
The single most useful next step is to practice ownership changes on non-critical files in a controlled directory. Use commands like ls -l to verify ownership before and after running chown, and always keep backups of important data so you can recover if something goes wrong.