How to Update Homebrew Packages in Mac Terminal: A Clear Step-by-Step Guide
Follow this clear step-by-step guide to update Homebrew packages in Mac Terminal and keep your Mac software efficient and up to date.
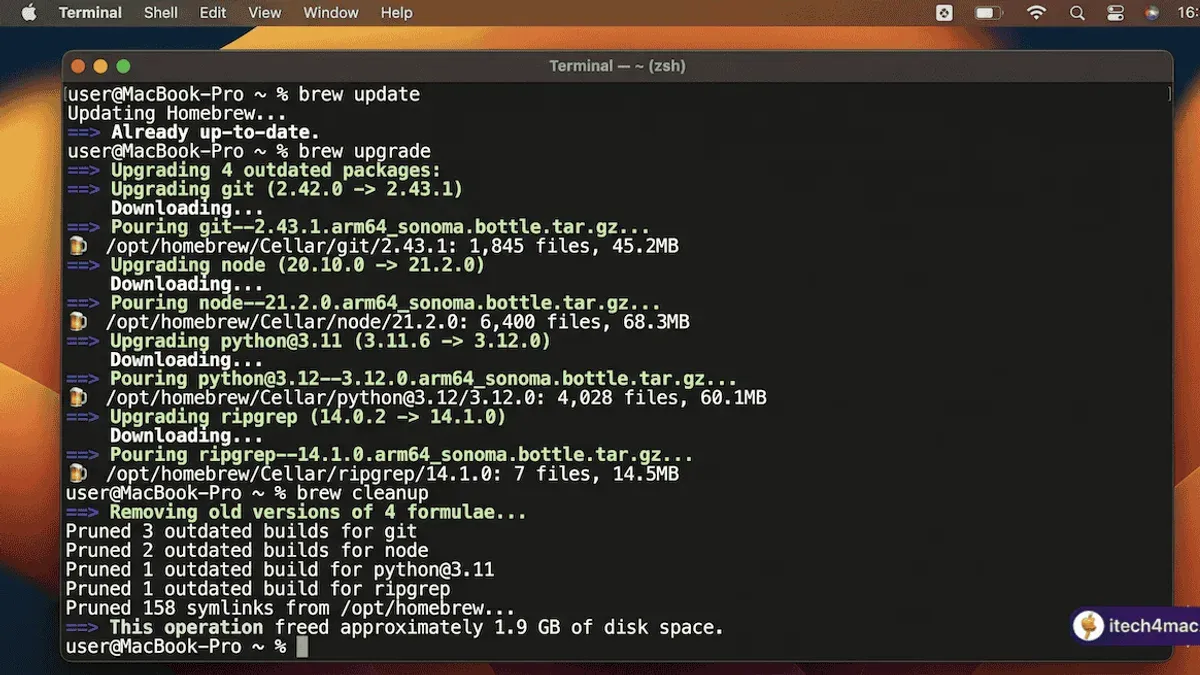
Managing software on your Mac can quickly become cumbersome, especially when dealing with multiple packages installed via Homebrew. You might find yourself wondering how to update Homebrew packages in Mac Terminal without running into errors or confusion about commands.
This article guides you through a clear, step-by-step workflow that covers installing Homebrew if you haven’t yet, updating Homebrew itself, managing your packages, and troubleshooting common issues. By following these instructions, you will maintain an efficient and error-free Homebrew setup using Terminal.
Key takeaways
- Ensure your Mac has the necessary developer tools before installing Homebrew.
- Use
brew updateto refresh Homebrew’s package definitions before upgrading. - Run
brew upgradeto update all installed packages safely. - List installed packages with
brew listto track what’s currently on your system. - Address common errors like permission issues by verifying directory ownership or running Terminal with appropriate permissions.
Before you start: What you need to update Homebrew packages
To update Homebrew packages smoothly, start by ensuring your Mac meets the software requirements. Homebrew supports macOS versions from macOS Mojave (10.14) onward, including Catalina, Big Sur, Monterey, and later releases. Older versions may cause compatibility issues.
Next, confirm you have access to the Terminal app, found in the Applications > Utilities folder. Basic familiarity with command line usage is essential for running Homebrew commands effectively.
Check if Homebrew is already installed by typing brew --version in Terminal. If you see a version number, Homebrew is installed; if not, you’ll need to install it first.
Finally, Homebrew relies on the Xcode Command Line Tools for compiling and installing software. To verify these tools are installed, enter xcode-select -p in Terminal. A valid path like /Library/Developer/CommandLineTools indicates the tools are present. If not installed, you can trigger installation by running xcode-select --install.
How to install Homebrew in Mac Terminal
- Open Terminal on your Mac. You can find it in Applications > Utilities or search using Spotlight.
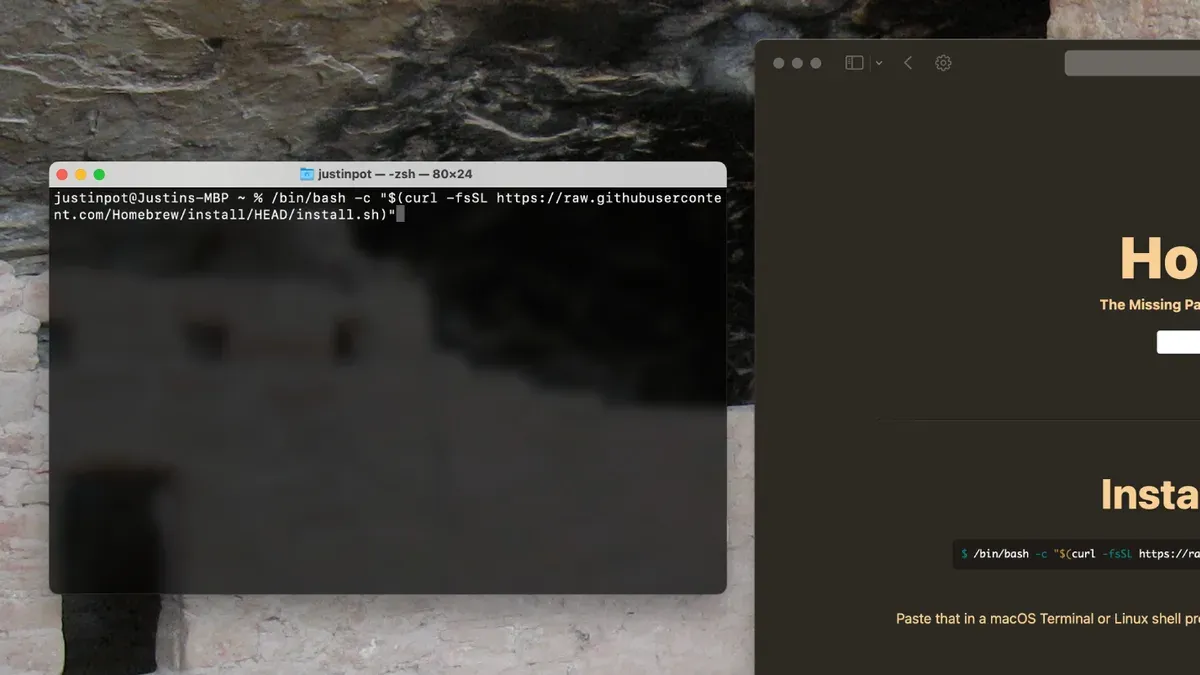
- Run the official Homebrew installation script by entering the following command:/bin/bash -c "$(curl -fsSL https://raw.githubusercontent.com/Homebrew/install/HEAD/install.sh)"This command downloads and executes the Homebrew installation script from the official repository. During the process, you may be prompted to enter your macOS user password and confirm installation steps.
- Wait as the script installs Homebrew and its dependencies. Typical output includes lines such as "Downloading Homebrew..." and "Installation successful!".
- After installation completes, verify it by typing brew --version in Terminal. A successful installation returns the Homebrew version number, for example, Homebrew 4.0.0.
- Be aware that running scripts directly from the internet carries security risks. Only run the official Homebrew script from the verified URL above to avoid malicious code.
How to update Homebrew Mac Terminal
To keep the Homebrew tool itself current, you use the brew update command. This command fetches the latest version of Homebrew and updates its package repository metadata, ensuring you have access to the newest formulas and fixes.
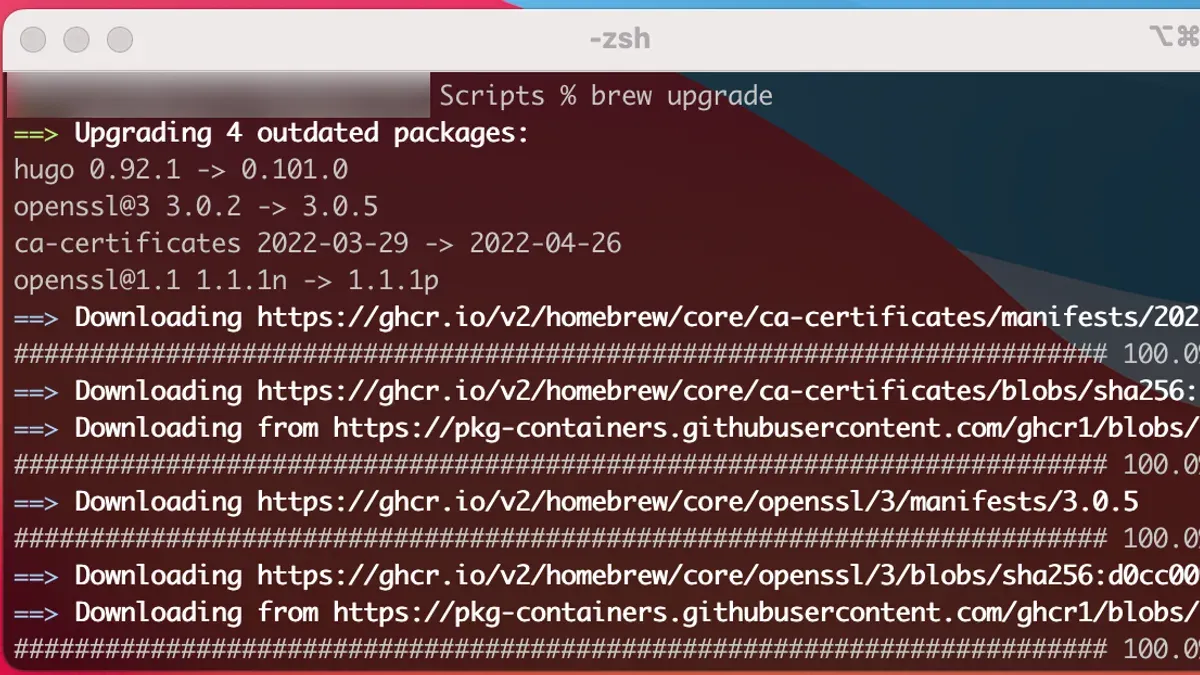
- Open Terminal on your Mac.
- Type
brew updateand press Enter. - Observe the output, which typically includes messages like "Updated Homebrew from [commit] to [commit]" and "Updated [number] taps." This confirms the repositories have refreshed successfully.
For example, a typical output might look like this:
Updated Homebrew from 123abc to 456def.
Updated 2 taps (homebrew/core, homebrew/cask).
Note the difference between brew update and brew upgrade: brew update refreshes Homebrew itself and its formula listings, while brew upgrade actually updates the installed packages to newer versions. Both commands are often used together but serve distinct purposes.
Best practice is to run brew update frequently, ideally before upgrading packages, to ensure you work with the latest available software definitions.
How to update Homebrew packages
After upgrading, clean up old versions of packages to free disk space using brew cleanup. This removes outdated package files no longer needed. It will report how many files were removed, such as:
Removing: /usr/local/Cellar/git/2.40.1... (50 files, 10MB)
To upgrade a specific package, use brew upgrade [package name]. For example, brew upgrade git updates only Git. You will see output confirming the package upgrade:
git 2.40.1 → 2.41.0
==> Upgraded 1 package.
Upgrade all outdated packages by typing brew upgrade. This command updates every package that has a newer version. Terminal will display progress and completion messages like:
==> Upgrading 2 outdated packages:
git 2.40.1 → 2.41.0
wget 1.21.3 → 1.22.0
==> Successfully upgraded 2 packages.
Check which packages need upgrading by running brew outdated. You will see a list of installed packages with newer versions available, for example:
git (2.40.1) → 2.41.0
wget (1.21.3) → 1.22.0
How to list installed Homebrew packages on Mac
To see all the Homebrew packages currently installed on your Mac, use the brew list command in Terminal. This command outputs a simple list of installed formulae or casks, helping you verify what’s present on your system.
- Open Terminal.
- Type brew list and press Enter. You should see a list of package names, such as:
| Example Output |
|---|
| git wget python vlc google-chrome |
Formulae are command-line tools and libraries, while casks are usually graphical applications or larger software bundles. To list installed casks only, use brew list --cask.
- For detailed information on any package, run brew info [package]. For example, brew info python shows version, installation path, dependencies, and more.
| Example Output of brew info python |
|---|
| python: stable 3.11.7 (bottled) Interpreted, interactive, object-oriented programming language https://www.python.org/ /usr/local/Cellar/python/3.11.7 (4,900 files, 58MB) * Poured from bottle on 2026-10-15 From: https://github.com/Homebrew/homebrew-core/blob/HEAD/Formula/python.rb |
If you have many packages, consider piping the list through grep to filter names, or redirect output to a file for easier review, e.g., brew list > installed.txt.
Troubleshooting common Homebrew update issues in Terminal
If you encounter permission errors related to /usr/local or /opt/homebrew, it often means your user lacks the required ownership. Fix this by running sudo chown -R $(whoami) /usr/local/* or sudo chown -R $(whoami) /opt/homebrew/* depending on your installation path. You should see no errors after this command.
Network or Git repository access errors during brew update can happen due to firewall or DNS issues. Verify your internet connection and try brew update --verbose to get detailed error messages. If Git errors persist, run cd $(brew --repo) && git fetch && git reset --hard origin/master to manually reset the repository.
Broken or failed package installations may cause brew upgrade to halt. Resolve this by running brew cleanup then brew install --force <package_name> or brew reinstall <package_name>. Confirm success when the package installs without errors.
If problems remain, uninstall Homebrew safely with /bin/bash -c "$(curl -fsSL https://raw.githubusercontent.com/Homebrew/install/HEAD/uninstall.sh)" and then reinstall it using the official script. This resets your Homebrew environment while preserving your data.
- How to Use sudo Safely in Mac Terminal: A Step-by-Step Guide
- How to Generate an SSH Key in Mac Terminal: A Step-by-Step Guide
- How to Use SSH in Mac Terminal: A Clear Step-by-Step Guide
Frequently asked questions
how to update homebrew mac terminal
To update Homebrew using the Mac Terminal, open the Terminal app and enter brew update. This command fetches the newest version of Homebrew and its package definitions, ensuring your system has the latest formulas available before upgrading packages.
how to install homebrew in mac terminal
To install Homebrew on your Mac via Terminal, run the official installation script by entering /bin/bash -c "$(curl -fsSL https://raw.githubusercontent.com/Homebrew/install/HEAD/install.sh)". This command downloads and executes the installer, which guides you through setting up Homebrew and its necessary dependencies.
how to update homebrew mac
Updating Homebrew on a Mac involves two steps: first, run brew update to refresh its core and formulae, then use brew upgrade to update all installed packages to their latest versions. Running these commands regularly helps avoid conflicts and ensures you have access to recent features and security patches.
mac homebrew list installed packages
You can view all Homebrew packages installed on your Mac by typing brew list in Terminal. This command outputs the names of the installed packages, helping you track what software is managed by Homebrew and decide which ones to update or remove.
What this guide does not cover and who should look elsewhere
This guide does not cover using Homebrew on non-macOS systems such as Linux or Windows Subsystem for Linux. It also does not address advanced topics like creating custom taps, developing your own formulae, or managing complex dependency issues that require deep troubleshooting beyond common errors. If you need to customize Homebrew extensively or develop packages, consulting official Homebrew documentation or specialized developer resources is recommended.
For most users, the best next step after updating your Homebrew packages is to periodically run brew update followed by brew upgrade to keep both Homebrew and all installed packages current. This ensures you benefit from the latest features, security patches, and bug fixes while preventing common errors caused by outdated installations.