How to Use Split View on Mac: A Clear Step-by-Step Guide
Master using Split View on Mac to manage two app windows side-by-side and improve your multitasking with this clear step-by-step guide.
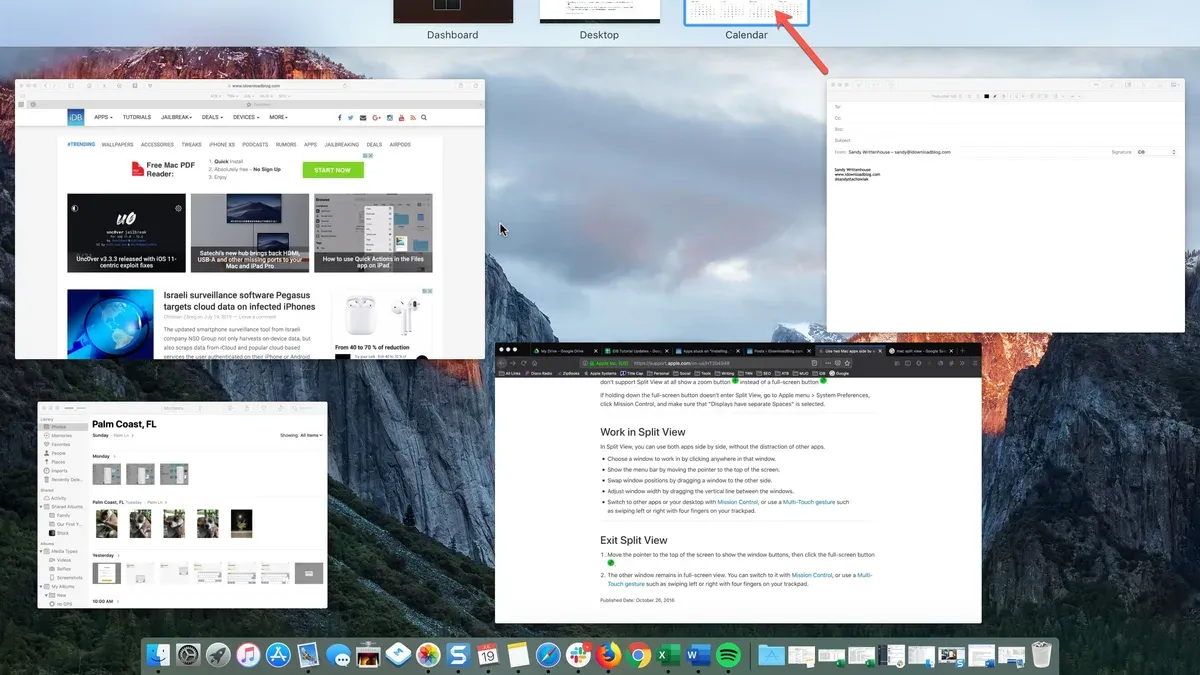
Working with multiple windows open on your Mac can quickly become overwhelming, especially when you need to reference information side-by-side. You might find yourself constantly switching between apps or resizing windows manually, which disrupts your workflow.
This article explains how to use Split View on Mac to manage two app windows simultaneously in full screen. You will learn step-by-step methods for entering Split View, tips for different MacBook models, comparisons with other window management tools, and solutions for common issues you might encounter.
Key takeaways
- Hold the green full-screen button or use Mission Control to activate Split View easily.
- Some apps do not support Split View, requiring alternative window management methods.
- Split View works differently on various MacBook models and macOS versions—adjust your approach accordingly.
- Mission Control offers a quick way to organize and switch between split windows.
- When multitasking with many windows, consider alternatives like Spaces or third-party apps.
Before you start: What you need to use Split View on Mac
Split View is available on Macs running macOS El Capitan (10.11) and later. Ensure your Mac is updated to at least this version to access Split View functionality. Compatible hardware includes MacBook Air, MacBook Pro, iMac, Mac mini, and Mac Pro models that support these macOS versions.
To use Split View, the apps involved must support full-screen mode. Most native macOS apps like Safari, Mail, and Notes do, but some third-party or older applications do not. For example, Microsoft Office apps or certain legacy software may not enter Split View, limiting your options.
Before starting, confirm that full-screen mode is enabled and working properly. You can test this by clicking the green traffic light button in the top-left corner of a window; the window should expand to full screen.
Note that Split View on Mac differs from iPad Split View. On Mac, it works by placing two windows side-by-side in full-screen spaces, while iPad allows apps to share the screen without full-screen mode. The Mac approach requires windows to be in full screen first.
- Check your macOS version by clicking the Apple menu and selecting "About This Mac". You should see El Capitan (10.11) or later. If not, update your system via "System Preferences" → "Software Update". When successful, your Mac supports Split View.
- Open any app and try clicking the green full-screen button in the window's top-left corner. If the window expands to full screen, full-screen mode is enabled.
- Try this with the two apps you want to use in Split View. If either app does not enter full screen, it likely won’t support Split View.
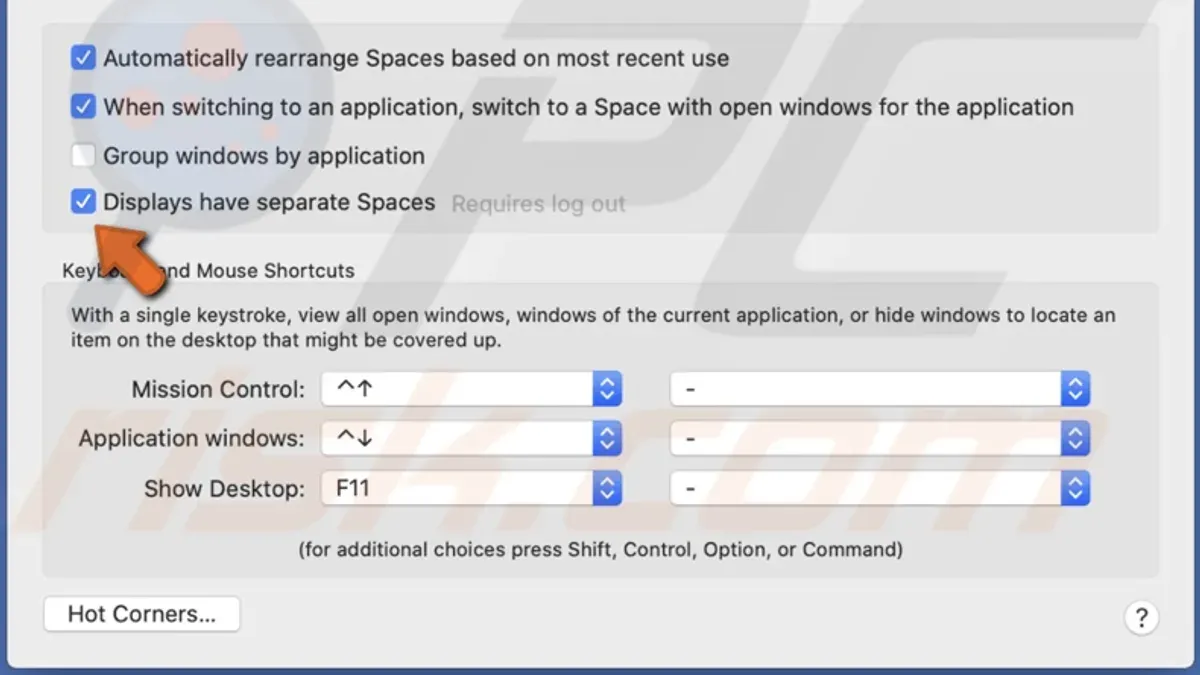
- Ensure that "Displays have separate Spaces" is enabled under "System Preferences" → "Mission Control". This setting facilitates proper window management in Split View.
How to use split screen on Mac: the basic method
Using Split View on your Mac is straightforward once you know how to access it from the green full-screen button. Follow these steps to activate and manage Split View efficiently.
- Hover over the green full-screen button in the top-left corner of any app window. A small menu will appear with options to "Enter Full Screen," "Tile Window to Left of Screen," and "Tile Window to Right of Screen." This confirms your Mac supports Split View for that app.
- Select which side to place the window on by clicking either "Tile Window to Left of Screen" or "Tile Window to Right of Screen." The chosen window will fill that half of the screen.
- Choose the second app window from the other side of your screen. Your other open windows will appear as thumbnails on the opposite side for you to select. Click the window you want to fill the remaining half.
- Adjust the divider by clicking and dragging the vertical black bar between the two windows. Move it left or right to allocate more screen space to one app or the other.
- Exit Split View by moving your cursor to the top of the screen to reveal the window buttons, then click the green full-screen button on either window. This returns both apps to standard windows on your desktop.
This method works consistently across most apps that support full-screen mode, providing a quick way to manage two windows side-by-side without manual resizing.
How to split windows on Mac using Mission Control
Mission Control offers an alternative way to create a Split View by allowing you to drag windows between full-screen spaces. This method provides more control over window arrangement but requires familiarity with navigating Mission Control.
- Open Mission Control by swiping up with three or four fingers on your trackpad, pressing the Mission Control key (usually F3), or using Control + Up Arrow. You should see all open windows and spaces displayed.
- Locate the window you want to move and drag it onto an existing full-screen window thumbnail at the top of the screen. When you hover over the full-screen window, it will highlight, indicating you can combine them.
- Release the window to place it alongside the existing full-screen app, creating a Split View space. You will see the two windows tiled side-by-side.
- Exit Mission Control by clicking anywhere outside the thumbnails or pressing the Escape key. Your Split View space becomes active.
- To manage or switch between Split View spaces, open Mission Control again; you can see each Split View as a separate space at the top and switch or rearrange them by dragging.
The benefit of this method is precise control over which windows combine, especially when managing multiple full-screen apps. However, it can be less intuitive and slower than using the green full-screen button directly, requiring familiarity with Mission Control gestures and navigation.
How to use split view on MacBook Air and MacBook Pro: tips for different models
Split View works identically on both MacBook Air and MacBook Pro, but screen size differences affect your experience. The MacBook Pro’s larger and higher-resolution displays provide more space for side-by-side windows, making it easier to work with multiple apps simultaneously. MacBook Air’s smaller screens may feel cramped when using Split View, especially on models with 13-inch Retina displays.
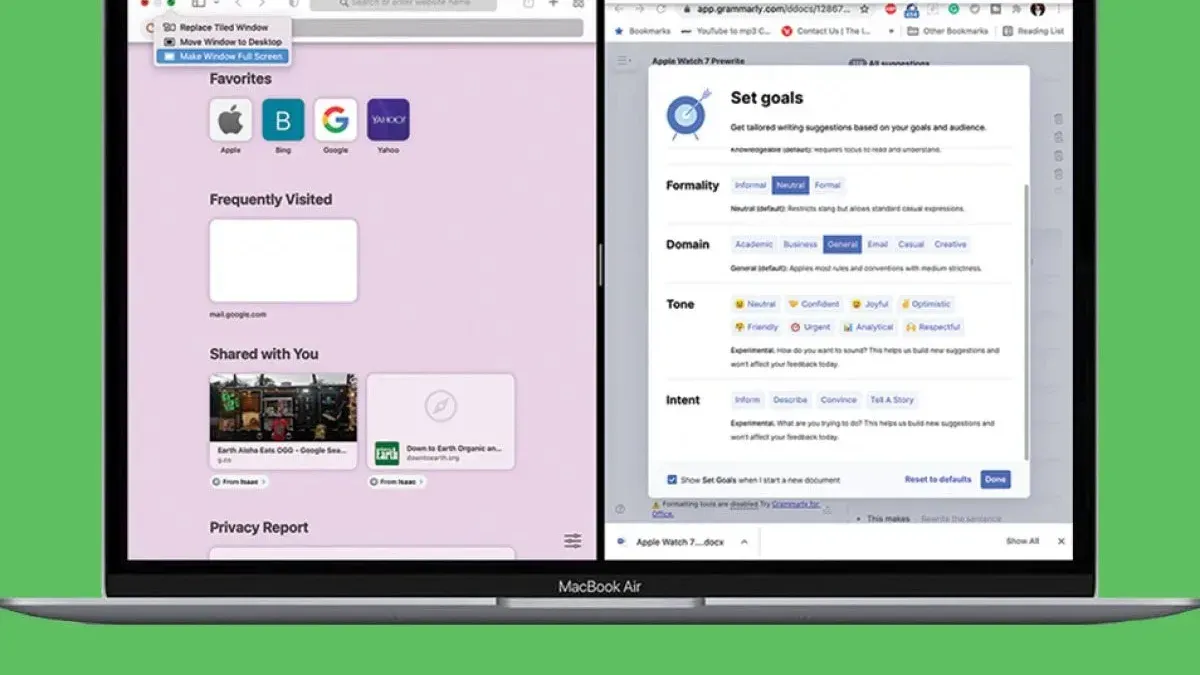
Older MacBook Air models with less powerful processors or limited RAM might experience slower app performance when running multiple apps in Split View, so consider closing background apps to improve responsiveness.
Using external displays with a MacBook Pro enhances Split View significantly. For example, connecting a 27-inch 5K monitor allows you to place two full-screen apps side-by-side with ample space, improving clarity and multitasking efficiency.
Trackpad gestures help manage Split View quickly: use three-finger swipes to switch between full-screen spaces and Mission Control, and pinch with three fingers to zoom in on content. These gestures make navigating multiple windows smoother without relying solely on the mouse.
How to use split screen on MacBook for VSCode and other apps
VSCode supports its own internal split screen feature, allowing you to divide the editor into multiple panes within the same window. To combine this with macOS Split View for multitasking, open two separate VSCode windows before entering Split View.
- Open VSCode and create a new window via File > New Window. You should see two separate VSCode windows.
- Click and hold the green full-screen button on one VSCode window and drag it to the left or right side of the screen until you see a shaded area appear.
- Select the second VSCode window on the opposite side to complete the Split View setup. The screen now shows two separate VSCode windows side-by-side.
- Within each VSCode window, use the internal split feature (View > Editor Layout > Split Up/Down/Left/Right) to organize files or terminals as needed.
For apps that do not support full-screen mode or Split View, a workaround is to manually resize and position windows side-by-side instead. This lacks the automatic tiling and gesture support but still allows multi-window workflows.
Combining macOS Split View with app-specific layouts helps optimize your workflow by balancing system-level window management with in-app organization. For instance, coding in one VSCode pane while referencing documentation or testing in another app side-by-side increases efficiency.
How to do split view on Windows compared to Mac
Windows offers Snap Assist as its primary window management tool, allowing you to quickly arrange windows side-by-side or in corners using keyboard shortcuts or dragging actions. In contrast, Mac’s Split View centers around using the green full-screen button to tile two apps in full screen.
On Windows, Snap Assist lets you drag a window to the left or right edge of the screen to snap it into place. You can also use Win + Left/Right Arrow keys for the same effect. Windows supports snapping up to four windows in a grid, providing more flexibility for multitasking than Mac’s two-app Split View.
Mac Split View integrates tightly with macOS features like Mission Control and Spaces, allowing you to create dedicated full-screen workspaces with split windows. Windows Snap Assist is more focused on quick layouts on the desktop without creating separate workspaces.
| Feature | Windows Snap Assist | Mac Split View |
|---|---|---|
| Number of windows per layout | Up to 4 (grid layouts) | 2 (side-by-side) |
| Activation method | Drag to screen edges or Win + Arrow keys | Hold green full-screen button or Mission Control drag |
| Workspace integration | Single desktop with window snapping | Separate full-screen Spaces with split windows |
| Gesture support | Limited touch gestures, keyboard shortcuts | Trackpad gestures for Mission Control and Spaces |
| Flexibility | More flexible window arrangements | More focused on distraction-free two-app workflow |
Overall, Windows Snap Assist offers more options for arranging multiple windows simultaneously, which can suit users needing complex multitasking layouts. Mac Split View emphasizes simplicity and integration with macOS workflows, making it ideal for focused work with two apps. If you are transitioning between systems, understanding these differences can help you choose the best window management approach for your needs.
Troubleshooting common Split View issues on Mac
If the green full-screen button does not offer Split View, first ensure the app supports full-screen mode. Some apps, especially third-party or legacy ones, lack this feature and will not enter Split View. In such cases, consider using side-by-side windows manually by resizing them.
When apps won’t enter Split View or the option is missing, try closing and reopening the apps. If the issue persists, check System Preferences > Mission Control and confirm that “Displays have separate Spaces” is enabled. Disabling this can prevent Split View from functioning correctly.
If a window appears stuck or Split View becomes unresponsive, resetting Mission Control and display settings often resolves the problem. Follow these steps:
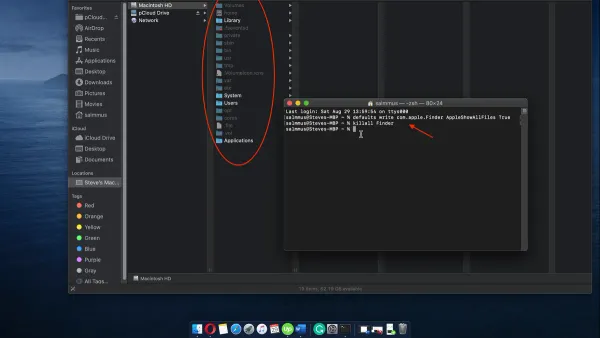
- Open Terminal (Applications > Utilities > Terminal).
- Type killall Dock and press Enter. This restarts the Dock and Mission Control processes.
- Wait a few seconds; your desktop will refresh.
- Try entering Split View again. You should see the green button now offer the option to tile the window.
For persistent glitches, resetting display settings can help. Go to System Preferences > Displays, then hold the Option key and click “Detect Displays.” This reinitializes display connections and can fix Split View display bugs.
Common error messages like “App can’t enter full screen” indicate lack of support for full-screen mode, which blocks Split View. In these cases, manual window arrangement is the best alternative.
When Split View might not be the best option for your workflow
Split View works well for many multitasking scenarios but has limitations depending on your screen size and workflow preferences. On very small screens, such as 11-inch MacBook Air models, dividing the display can make both windows cramped, reducing readability and ease of use. Conversely, on very large external displays, Split View restricts window arrangement to just two apps side-by-side, which may feel limiting compared to more flexible window management tools.
In some cases, using multiple desktops via Mission Control or macOS’s Stage Manager can provide better context switching and organization, especially if you regularly work with several apps or projects simultaneously. These options allow you to group and switch between sets of windows without forcing them into a split layout.
Certain apps benefit from full-screen mode rather than sharing space. For example, creative software like Final Cut Pro or photo editing tools often perform better and feel less cluttered when used full screen, as they require maximum screen real estate and fewer distractions.
Your personal workflow plays a large role. If you find resizing windows or managing the Split View divider distracting, or if you need more than two apps visible at once, alternatives like third-party window managers or simply manually resizing windows may serve you better.
Consider these factors to decide if Split View enhances or hinders your productivity.
- How to Assign and Manage Apps on Desktops on Your Mac
- How to Use Window Tiling on Mac: A Practical Step-by-Step Guide
Frequently asked questions
How to use split view on ipad?
To use Split View on your iPad, open an app and swipe up from the bottom to access the Dock. Drag a second app from the Dock to the left or right edge of the screen. Adjust the divider between apps to resize them as needed. Note that not all apps support Split View.
How to do split view on mac?
On a Mac, click and hold the green full-screen button in the top-left corner of a window. Then, drag the window to the left or right side of the screen and release the button. Select another open window to fill the opposite side. You can exit Split View by moving the cursor to the top and clicking the green button again.
How to use split view on iPad?
Using Split View on iPad involves opening an app, then dragging another app from the Dock to the screen’s edge. This places two apps side-by-side, allowing multitasking. You can move the divider to allocate more space to one app or the other.
How to do split view on Mac?
To initiate Split View on Mac, hold the green maximize button on a window and choose “Tile Window to Left of Screen” or “Tile Window to Right of Screen.” Then pick a second window for the other side. This method works on macOS versions supporting Mission Control and Split View.
How to use split screen on MacBook?
Using Split Screen on a MacBook follows the same steps as other Macs: hold the green full-screen button on a window, select a side, then choose another app for the opposite side. You can also use Mission Control to drag windows into Split View. Adjust the divider between windows to suit your workflow.
Limits of Split View and When to Consider Other Options
Split View requires apps to support full screen mode; some older or third-party applications may not work properly or at all in this mode. Additionally, this guide does not cover advanced window management tools or third-party apps that offer more customizable or complex multi-window arrangements beyond what Split View provides.
If you regularly use apps that do not support full screen or need more control over window placement and sizing, exploring tools like Magnet, Rectangle, or BetterSnapTool may be more suitable for your workflow.
The single most useful next step is to try activating Split View on your Mac by holding the green full-screen button in the upper-left corner of a window and selecting a side for it. This simple action helps you experience Split View firsthand and decide if it fits your everyday multitasking needs or if another approach is better.