How to Use a VPN Profile on Mac: A Clear Step-by-Step Guide
This guide explains how to use a VPN profile on Mac with step-by-step instructions for setup, activation, switching profiles, and troubleshooting.
You want to access work resources securely from your Mac or shield your online activity on public Wi-Fi. Setting up and managing a VPN profile properly can help you achieve these goals without confusion.
This article explains how to use a VPN profile on Mac, covering both the built-in macOS VPN options and third-party apps. You’ll get clear, step-by-step instructions to create, activate, and switch VPN profiles, plus tips for work setups, troubleshooting common issues, and understanding what VPN profiles can and cannot do.
Key takeaways
- Use System Preferences > Network to add VPN profiles manually with detailed settings.
- Third-party VPN apps often provide faster setup with automatic profile management.
- Check VPN connection status in the menu bar or Network settings to confirm it’s active.
- Switch between multiple VPN profiles easily via the Network pane or app interface.
- Work VPNs may require additional authentication and specific protocols for security compliance.
Before you start: What you need to use a VPN profile on Mac
A VPN profile on Mac is a set of configuration details that allows your device to connect securely to a VPN server. Unlike simply installing a VPN app, which often automates the setup, a VPN profile is manually configured within your Mac’s system settings or managed through specialized VPN software. This distinction is important because manual profiles give you more control but require precise details from your VPN provider.
To use a VPN profile on your Mac, you need a few essentials:
- A VPN service subscription or direct access to a VPN server, including the server address and connection type. Once provided, your Mac can route internet traffic securely through that server.
- A Mac running macOS that supports VPN connections. macOS includes built-in support for common VPN protocols such as IKEv2, L2TP over IPSec, and PPTP (although PPTP is deprecated and generally discouraged for security reasons). When configured correctly, your Mac will display the VPN connection status in the menu bar.
- Authentication credentials like a username and password, or security certificates supplied by your VPN provider. These verify your identity and establish a trusted connection.
Manual VPN profile setup involves entering these details directly into System Preferences under Network settings. In contrast, VPN apps typically preconfigure these profiles, offering convenience and additional features like kill switches or automatic server selection.
How to set up a VPN profile on Mac using system settings
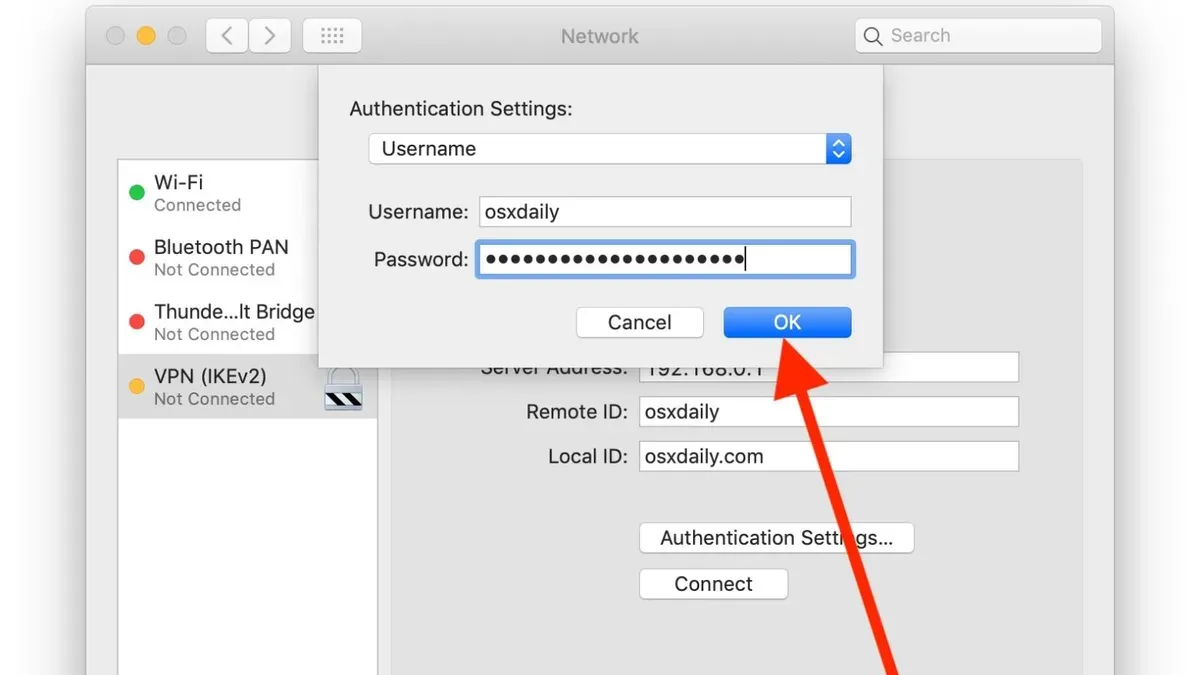
- Open System Preferences from the Apple menu and select Network. You will see a list of network interfaces on the left side.
- Click the plus (+) button below the list to add a new network interface. In the dropdown menu next to Interface, choose VPN and select the VPN type (such as L2TP over IPSec or IKEv2) that matches your VPN service. Enter a name for the VPN service and click Create.
- In the new VPN settings pane, fill in the Server Address with the VPN server’s domain or IP address (for example, vpn.example.com).
- Enter the Remote ID provided by your VPN service, which is usually the same as the server address. The Local ID is typically optional and can be left blank unless your VPN requires it.
- Click Authentication Settings. Choose the authentication method your VPN requires, such as a password, shared secret, or certificate. For example, select Shared Secret and enter the secret key supplied by your VPN provider, or enter your user credentials if prompted.
- After entering authentication details, click OK and then Apply to save the VPN profile.
- To connect, select the VPN profile in the Network list and click Connect. The status will change to Connected when successful.
- You can disconnect by clicking Disconnect in the same place.
- To manage multiple VPN profiles, simply add more VPN interfaces via the plus button and switch between them by selecting the desired profile and connecting or disconnecting as needed.
This manual method provides control over specific VPN details but requires accurate information and can be less convenient than dedicated apps.
How to use VPN apps for Mac to manage VPN profiles easily
Using VPN applications on your Mac provides a streamlined alternative to manual VPN profile setup. Popular VPN apps like ExpressVPN, NordVPN, and CyberGhost offer automatic configuration, eliminating the need to input server details manually. These apps also include features such as a kill switch, which blocks internet traffic if the VPN disconnects unexpectedly, and app-level VPN controls to restrict which apps use the VPN connection.
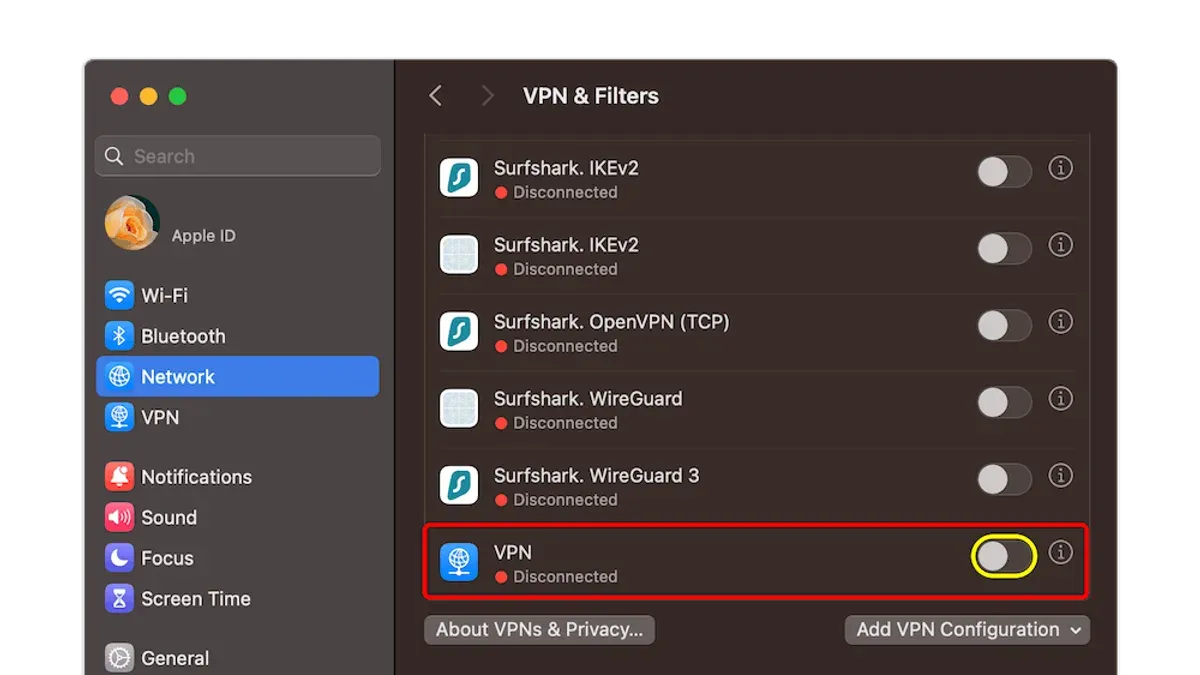
VPN apps simplify management by allowing you to connect, disconnect, and switch servers with a click, rather than navigating system preferences. They often update server lists and security settings automatically, reducing maintenance on your part.
- Download the VPN app from the official website or Mac App Store. After installation, open the app to see the login screen.
- Enter your VPN account credentials and sign in. Upon successful login, the app typically displays a list of available servers or locations.
- Select a server and click "Connect." Once connected, the app usually shows a status indicator confirming the active VPN connection.
Below is a comparison table summarizing key features of top VPN apps for Mac:
| VPN App | Automatic Setup | Kill Switch | App-Level VPN | Advantages | Disadvantages |
|---|---|---|---|---|---|
| ExpressVPN | Yes | Yes | Limited (split tunneling) | Fast speeds, reliable connection | Higher price point |
| NordVPN | Yes | Yes | Yes | Strong security, many servers | Occasional app glitches |
| CyberGhost | Yes | Yes | No | User-friendly interface | Less customizable |
While VPN apps offer ease of use and advanced features, manual setup via system settings gives you more granular control and avoids reliance on third-party software. However, apps are generally better for users prioritizing convenience and additional safety features.
How to check if a VPN is active and working on your Mac
To confirm your VPN connection is active, start by checking the Network preferences. Open System Preferences > Network, then select your VPN profile from the sidebar. When connected, the status shown should be Connected with a green dot.
You can also look for the VPN icon in the menu bar, which appears as a small rectangle with a rounded top. Clicking it should show the connection status and allow quick disconnect or reconnect.
To verify your internet traffic is routed through the VPN, use an IP lookup website such as whatismyipaddress.com. First, note your IP address before connecting to the VPN. For example, your IP might display as 203.0.113.45 with a location in your country. After connecting to the VPN, refresh the page or revisit the site; your IP should change to the VPN server's range, for instance, 198.51.100.23, reflecting a different location.
Common signs your VPN is not working include failure to connect in Network preferences, no VPN icon in the menu bar, or your IP address remaining unchanged after connection. If these occur, check your VPN profile settings or try reconnecting.
- Open System Preferences and select Network.
- Click your VPN profile in the sidebar and look for a green dot with the status Connected.
- Verify the VPN icon appears in the menu bar; click it to confirm connection status.
- Visit an IP lookup website to note your current IP address and location.
- Connect to your VPN profile, then refresh or revisit the IP lookup site.
- Confirm your IP address and location have changed to the VPN server's details.
How to enable and switch between VPN profiles on Mac
Activating and switching between VPN profiles on your Mac can be done via system settings or through VPN apps, depending on your setup. Organizing your profiles with clear, descriptive names helps you identify each one quickly—consider names like "Work VPN" or "Personal VPN" to distinguish their use cases.
- Open System Settings and go to Network.
- Select the VPN profile you want to activate from the list on the left.
- Click Connect and wait for the status to change to Connected. You should see a VPN icon appear in the menu bar, confirming activation.
- To switch to another profile, disconnect the current VPN by selecting it and clicking Disconnect.
- Select the other VPN profile you want to use and click Connect again.
When using VPN apps, you typically activate a profile by opening the app, selecting the desired VPN server or profile, and toggling the connection on. These apps often allow faster switching with one click.
To automate switching, use macOS Automator or Shortcuts apps to create workflows that connect or disconnect VPN profiles based on your location or schedule. For example, you can set a shortcut to activate your "Work VPN" when you arrive at the office Wi-Fi network and switch back to "Personal VPN" when you leave.
Third-party tools like ControlPlane or Keyboard Maestro can also automate VPN switching triggered by network changes, reducing manual effort.
Setting up a VPN profile on Mac for work: considerations and features
Work VPN profiles often require more stringent security than personal use. Typically, corporate VPNs use certificate-based authentication and secure protocols like IKEv2 or L2TP over IPsec to ensure data confidentiality and compliance with company policies.
To import a certificate-based VPN profile, you usually receive a configuration file or certificate from your IT department. Follow these steps:
- Open System Preferences and go to Profiles. You should see the option to install a new profile. When you select the provided certificate file, the profile installs and appears in Network settings.
- Navigate to System Preferences > Network, select the newly added VPN profile, and verify the authentication method is set to use the imported certificate.
- Test the connection by clicking Connect. A successful connection means the certificate and settings are correctly applied.
Security considerations include ensuring your Mac’s firewall is active, keeping macOS updated, and using approved protocols. Some organizations require always-on VPN to maintain secure connections at all times, which can be enabled via third-party apps or macOS configurations.
Split tunneling, which routes only work-related traffic through the VPN, can improve performance and privacy but might be disabled in strict corporate environments due to security policies.
Before finalizing setup, confirm with your IT department that your configuration meets compliance requirements and that you understand any additional features like multi-factor authentication or network access controls.
Troubleshooting common VPN profile issues on Mac
If your VPN won’t connect, first verify your username, password, and server address in System Preferences > Network > VPN. Confirm the VPN protocol matches the one supported by your provider, such as IKEv2 or L2TP over IPSec. Common error messages like “Authentication failed” often indicate credential or protocol mismatches.
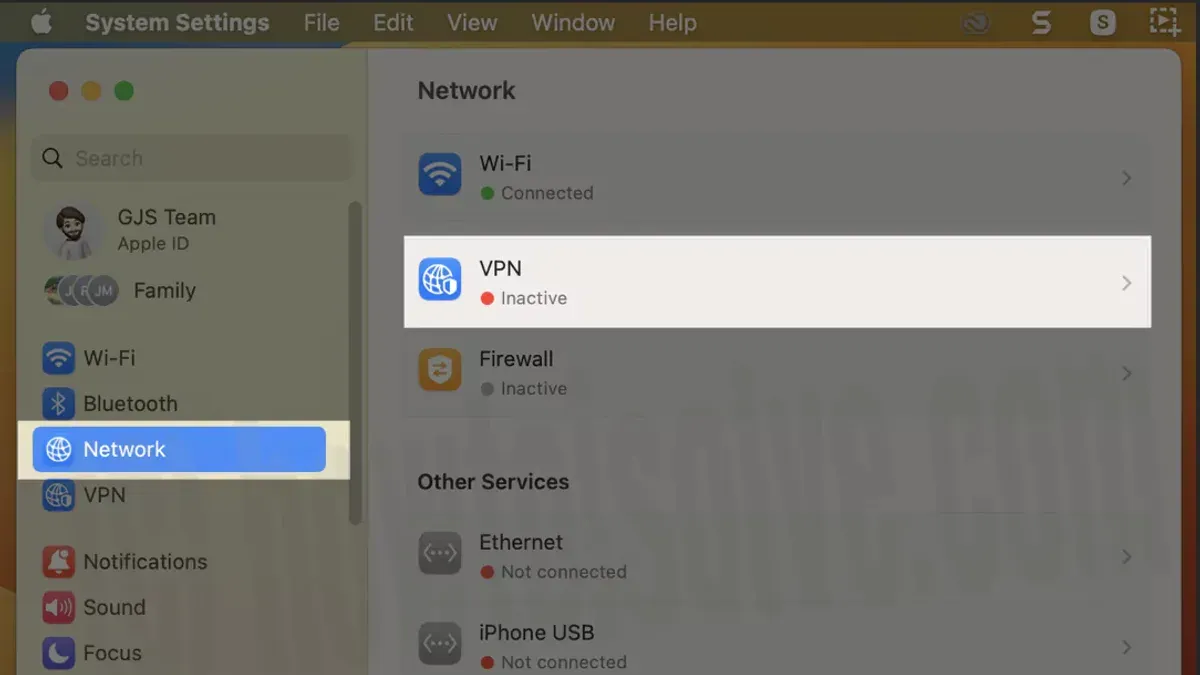
For slow VPN speeds or frequent disconnects, try switching to a different server location within your VPN app or System Preferences, as congested servers reduce performance. Additionally, check your internet connection without VPN to isolate the issue. Restarting your Mac’s network interface can also help.
DNS leaks and IP address mismatches reduce privacy. To fix DNS leaks, set your DNS servers manually to trusted options like 1.1.1.1 or 8.8.8.8 in System Preferences > Network > Advanced > DNS. Confirm your IP address matches the VPN server’s region using an online IP checker.
If problems persist despite these steps, contact your VPN provider’s support with details like error messages and connection logs. For work-related VPNs, reach out to your IT department to ensure your profile complies with corporate policies and firewall settings.
Understanding the benefits and limits of VPN profiles on Mac
VPN profiles on Mac provide several clear benefits. They enhance your privacy by encrypting your internet traffic, making it harder for third parties to track your online activities. VPNs also improve security when using public Wi-Fi networks, protecting your data from potential eavesdroppers. Additionally, they allow you to bypass geo-restrictions, giving access to content that may be blocked in your region.
However, VPNs have limitations. They do not guarantee complete anonymity; certain activities and data can still be exposed depending on the VPN’s policies and the websites you visit. Using a VPN profile typically reduces your internet speed due to encryption overhead and routing, though the impact varies by provider and server load. VPNs are also not substitutes for antivirus software or a firewall, which protect against malware and unauthorized access at different levels.
Consider alternative or additional security solutions if you require comprehensive protection against malware, phishing, or advanced cyber threats. VPNs mainly secure data in transit rather than system-wide threats.
- How to Set Custom DNS on Mac: Step-by-Step Guide
- How to Share Internet from Mac to Mac: A Clear Step-by-Step Guide
- How to Prevent Your Mac from Sleeping: Step-by-Step Solutions
Frequently asked questions
How to use vpn on macbook?
To use a VPN on your MacBook, start by setting up a VPN profile via System Settings under Network. Add a VPN connection by selecting the VPN type, entering the server details, and providing your authentication credentials. Alternatively, you can install a trusted third-party VPN app and sign in to connect easily.
How to use vpn on mac?
Using a VPN on Mac involves either configuring a VPN profile in System Settings or using a dedicated VPN app. Once set up, you connect to the VPN server to encrypt your internet traffic and access restricted content. You can manage connections and switch profiles through Network preferences or the app interface.
How to access vpn on mac?
You can access VPN settings on Mac by opening System Settings and navigating to Network, where VPN profiles are listed. From there, select the VPN and click Connect. If you use a VPN app, open the app directly and connect to your preferred server.
How to put vpn on mac?
To put a VPN on your Mac, you either add a VPN profile in System Settings > Network by clicking the plus (+) button and choosing VPN, or download and install a VPN app from a reputable provider. Enter the required connection details or sign in to the app to start using the VPN.
How to check for vpn on mac?
Check if a VPN is active on Mac by looking for the VPN icon in the menu bar or by going to System Settings > Network. The VPN connection will show as connected there. Some VPN apps also display connection status prominently in their interface.
What this guide does not cover
This guide does not cover setting up VPN servers or advanced network configurations requiring IT expertise. If your needs include creating or managing VPN servers, configuring custom routing rules, or handling enterprise-level network security policies, you should consult with an IT professional or network administrator. Similarly, this article does not address VPN protocols in depth or specialized VPN hardware setups.
The most useful next step is to familiarize yourself with your Mac's Network pane in System Preferences. Experiment with adding and switching between VPN profiles there, and explore trusted third-party VPN apps to see which interfaces and features best fit your workflow and privacy needs. By hands-on practice, you will quickly understand how to manage VPNs effectively on your Mac.