How to Convert PowerPoint to Video on Mac: A Clear Step-by-Step Guide
Step-by-step guide to converting your PowerPoint presentation into a high-quality video on Mac with custom timings and narrations.
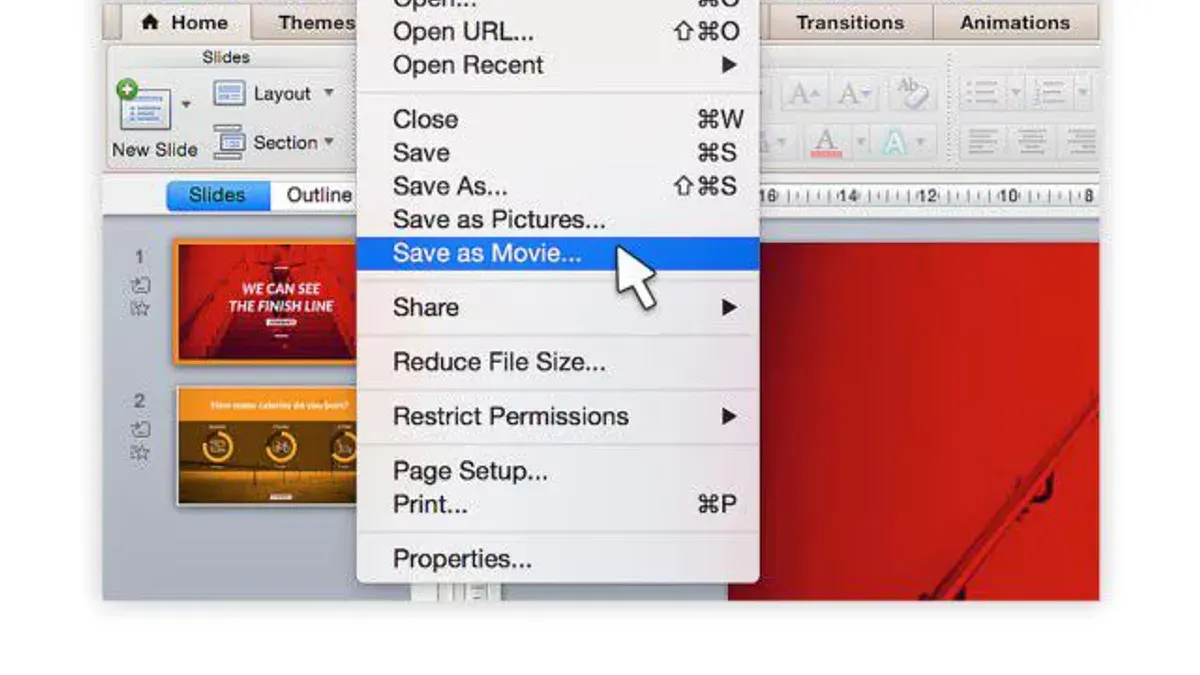
You’ve just finished crafting a detailed PowerPoint presentation on your Mac, and now you want to share it as a video. Maybe you’re preparing to upload it to YouTube or embed it into a website, but the question is, how do you convert to video in PowerPoint on Mac without losing quality or timing?
This article guides you step by step through the entire process of converting your PowerPoint presentation into a video file on your Mac. You’ll learn how to use PowerPoint’s built-in export features, set custom slide timings and narrations, optimize your video for platforms like YouTube, and even how to adjust the video’s shape after conversion. Plus, we’ll cover alternative methods and troubleshooting tips to ensure your video looks and plays exactly as you intend.
Key takeaways
- Use PowerPoint’s Export > Create a Video option to convert presentations smoothly.
- Customize slide timings and record narrations for a polished final video.
- Export as MP4 with 1920 x 1080 resolution for optimal YouTube upload quality.
- Adjust video shape post-export using PowerPoint’s Format Video tools.
- Check for common issues like missing audio or slides not advancing and how to fix them.
Before you start: What you need to convert PowerPoint to video on Mac
Before converting your PowerPoint presentation to video on a Mac, ensure you have the right version of Microsoft PowerPoint installed. Video export is available in Microsoft PowerPoint for Mac versions 2016 and later, including Microsoft 365 subscription versions. Older versions may not support video export directly, so confirm your software includes this feature by checking under File > Export and looking for video options.
Next, verify your presentation file is finalized and saved in a compatible format, typically the standard .pptx. Having your presentation saved ensures all recent changes are included during export. Additionally, check your Mac has sufficient disk space, as video files can be significantly larger than presentations. For example, a 20-slide presentation of around 5 MB can convert into a video file ranging from 50 MB to over 200 MB depending on quality settings and length.
Finally, consider whether you want to use additional tools after export. While PowerPoint’s built-in export handles most needs, external video editors or converters can help optimize the video for specific platforms or compress file size further. Having software like iMovie or HandBrake ready can be useful for post-export adjustments.
- Open Microsoft PowerPoint on your Mac. You should see your presentation ready to open or already open if you saved it earlier.
- Confirm your presentation is saved as a .pptx file by selecting File > Save As and checking the format dropdown.
- Check available disk space by clicking the Apple menu and selecting About This Mac > Storage. Ensure there is at least a few gigabytes free for video export.
- Look under File > Export to confirm the presence of video export options like MP4 or MOV formats. If these are missing, update your PowerPoint or check your version.
- Optionally, prepare any external video editing tools you plan to use after export for further video enhancement or compression.
How to convert PowerPoint to video on Mac using PowerPoint’s built-in export feature
Converting your PowerPoint presentation to a video on Mac is straightforward using PowerPoint’s native export feature. This method allows you to choose the output format, video quality, and whether to include slide timings and narrations. Follow these steps carefully to ensure your video is exported exactly as you want.
- Open your PowerPoint presentation. Once ready, click File in the menu bar, then select Export. You should see an export dialog box appear.
- In the Export dialog, choose your preferred File Format. You can select MP4 or MOV. MP4 is widely compatible and recommended for most uses.
- Set the Quality of your video. Options typically include Presentation Quality, Internet Quality, and Low Quality. Higher quality produces larger files and longer export times. For example, exporting a 10-slide presentation at Presentation Quality might take a few minutes and result in a file of tens of megabytes, while Internet Quality is faster with a smaller file size.
- Adjust timing options if needed by clicking Use Recorded Timings and Narrations to include any recorded slide timings or narrations. If you haven’t set these, you can specify seconds spent on each slide manually by selecting Seconds spent on each slide and entering a number.
- Click Export to begin the conversion process. A progress bar will appear showing the export status. When complete, locate your video file in the folder you specified.
Remember, choosing higher quality settings increases the file size and export time, so balance these based on your needs and where you plan to upload or share the video.
How to convert PowerPoint presentation to video on MacBook with custom slide timings and narrations
To create a polished video from your PowerPoint presentation on MacBook, adding custom slide timings and voice narrations is essential. This allows you to control the pacing and make your video more engaging. You can record narrations directly within PowerPoint or import pre-recorded audio files for each slide.
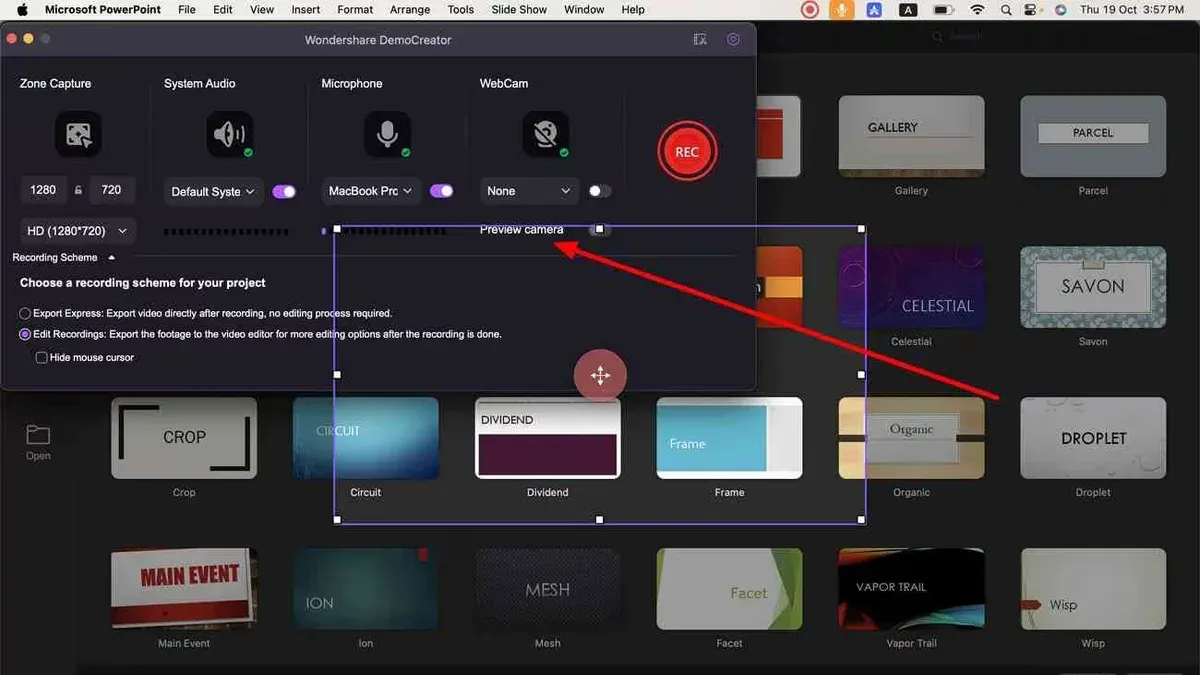
- Open your presentation in PowerPoint and go to the Slide Show tab.
- Select Record Slide Show, then choose whether to start recording from the beginning or from the current slide. You will see a recording window with options to record your voice and control slide timings.
- Speak clearly to record your narration for each slide. PowerPoint will automatically record the time you spend on each slide, creating custom timings.
- If you have external audio files, go to the slide where you want to add narration, click Insert > Audio > Audio from File, then select your audio. Adjust the playback options to start automatically or on click.
- To review your timings and narrations, go to Slide Show > Play from Start. Check that the slides advance correctly with your narration and that audio is clear.
- When satisfied, export your presentation to video by selecting File > Export > MP4 or MOV. In the export options, make sure to check Use Recorded Timings and Narrations to include your custom settings.
For example, a narrated presentation with custom timings might run five minutes, while exporting without timings defaults to uniform durations, possibly shortening or lengthening the video unintentionally. Using your recorded timings ensures the video matches your narration and intended pacing precisely.
How to convert PowerPoint to MP4 on Mac and optimize for YouTube upload
To ensure your PowerPoint video plays smoothly on YouTube, start by selecting MP4 as the export format. MP4 offers wide compatibility and maintains good quality while keeping file size manageable. YouTube recommends uploading videos with a resolution of 1920x1080 pixels (Full HD) and a frame rate matching your original presentation, typically 30 frames per second.
Balancing file size and video quality is key. Higher resolution and frame rates increase quality but also create larger files, which can take longer to upload. If you want smaller files, consider reducing resolution to 1280x720 pixels (HD), but avoid going lower to maintain clarity.
- Open your presentation in PowerPoint and go to File > Export. You should see export options including file format choices.
- Choose MP4 from the format dropdown menu. This ensures broad compatibility with YouTube.
- Click on Video Quality and select Presentation Quality or Internet Quality depending on your file size preference. Presentation Quality is best for YouTube uploads.
- Set the Resolution to 1920 x 1080 (Full HD) for optimal YouTube playback. This setting balances clarity and file size well.
- Confirm the Seconds spent on each slide or use your custom timings if set. Click Export to save the MP4 video.
- After export, check the file properties to verify the resolution is 1920x1080 and the frame rate is close to 30 fps.
- When uploading to YouTube, use the Standard upload settings and add descriptive titles and tags. YouTube will process your MP4 video efficiently with these settings.
Following these steps helps your PowerPoint video maintain quality, load quickly, and display correctly on YouTube without unnecessary file bloat or playback issues.
How to convert PowerPoint to movie on Mac using alternative methods
When PowerPoint’s built-in export options don’t meet your needs or are unavailable, alternative methods can help you convert your presentation to a movie on Mac. These alternatives include using QuickTime Player for screen recording and third-party PowerPoint video converters designed for Mac compatibility. Each option has its advantages and trade-offs in terms of quality, ease of use, and cost.
Using QuickTime Player Screen Recording
QuickTime Player offers a straightforward way to capture your presentation as it plays on your screen. While this method requires manual timing and narration, it is useful when export features are limited.
- Open your PowerPoint presentation and set it to Slide Show mode.
You should see your slides full screen and ready to play. - Launch QuickTime Player, then click "File" > "New Screen Recording."
The Screen Recording window will appear with a record button. - Click the arrow next to the record button to select microphone input if you want to record narration.
Your microphone will be enabled for audio capture. - Click the record button, then select the area of the screen showing your presentation or click to record the full screen.
Recording will start immediately or after you select the area. - Play through your presentation at your desired pace.
QuickTime captures the video and audio as you go. - When finished, click the stop button in the menu bar.
Your recording will open in QuickTime Player for preview. - Save the recording by choosing "File" > "Save."
You will have a movie file of your presentation.
Using Third-Party PowerPoint Video Converters
There are several third-party tools designed to convert PowerPoint files to video formats on Mac. These apps often provide extra features such as batch conversion, format variety, and advanced editing. However, they may require purchase or subscriptions, and their quality and interface vary.
| Method | Export Quality | Ease of Use | Cost |
|---|---|---|---|
| QuickTime Player Screen Recording | Good, but dependent on screen resolution and manual pacing | Moderate; requires manual operation and timing | Free (built into macOS) |
| Third-Party Converters (e.g., Movavi, iSpring, others) | Varies; often high, with format options | Varies; generally user-friendly but can have a learning curve | Usually paid or subscription-based |
Choosing an alternative depends on your priorities: if you prefer a free, manual solution, QuickTime Player is useful. For more automated and feature-rich conversions, third-party software is better, but be aware of potential costs and compatibility requirements.
How to change video shape in PowerPoint Mac after conversion
PowerPoint on Mac has limited options for editing the shape or aspect ratio of a video after export. You cannot crop or resize the video frame directly within PowerPoint once it is a video file. To adjust the video's shape, you will need to use external tools such as Mac’s built-in iMovie or QuickTime Player, which offer straightforward ways to crop, resize, and change the aspect ratio while preserving quality.
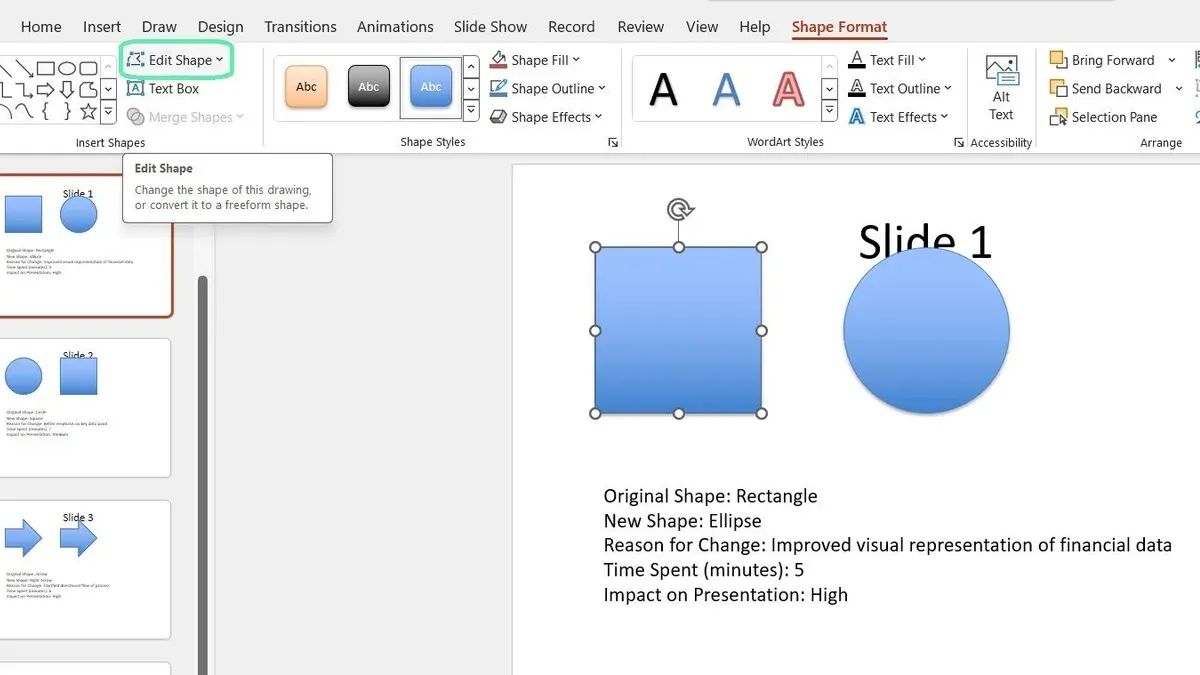
Using iMovie allows you to crop and reframe your video precisely. It lets you maintain common aspect ratios like 16:9 for YouTube or 1:1 for Instagram. QuickTime Player offers simple trimming and rotation but has basic cropping features through the “Edit” menu, which can be sufficient for minor adjustments.
- Open iMovie and create a new project by clicking “Create New” > “Movie”. You should see a blank timeline ready for import.
- Import your exported PowerPoint video by dragging it into the timeline or using the “Import Media” button. Once imported, the video thumbnail appears in the timeline.
- Select the video clip in the timeline, then click the “Cropping” button (a square icon) above the preview window. Choose “Crop to Fill” to adjust the frame size and shape.
- Drag the adjustable frame in the preview window to crop the video as needed. Aim for standard aspect ratios: 16:9 for widescreen platforms or 4:3 for traditional displays. You will see a real-time preview of your crop.
- Click the blue checkmark to apply the crop. The timeline video clip updates to the new shape.
- Export the adjusted video by clicking the “Share” button in the upper right, then “File”. Choose your desired resolution and quality, then save. Your video now has the new shape.
For quick, minor shape adjustments, open the video in QuickTime Player, then go to the “Edit” menu. Use “Trim” to cut unwanted parts, or rotate if needed. QuickTime does not support advanced cropping but can handle simple fixes while preserving video quality.
Maintaining video quality during shape changes depends on exporting at high resolution. Avoid excessive cropping that reduces resolution below 720p, as this will degrade clarity. Choose export settings in iMovie that match your target platform’s recommendations, such as 1920x1080 for YouTube.
Troubleshooting common issues when converting PowerPoint to video on Mac
If you find the Export to Video button grayed out or missing, check that your presentation is saved in a supported PowerPoint format (.pptx). Also, verify you are not in Slide Show or Reading View, as export options are only available in Normal View. Restarting PowerPoint after saving can refresh the interface and restore the button.
When your exported video lacks animations or transitions, confirm that you have selected the highest quality export option, such as Presentation Quality. Also, ensure animations are set to On Click or have defined durations; otherwise, they might be skipped. Preview your slides in Slide Show mode before exporting to confirm animations play correctly.
Audio problems like missing sound or out-of-sync narration often result from incorrect recording or export settings. Check the Record Slide Show feature’s audio playback and timing before exporting. In the export dialog, make sure Use Recorded Timings and Narrations is enabled. If audio remains out of sync, re-record narration or adjust slide timings accordingly.
Export processes that appear stuck or very slow can be caused by large embedded media or complex animations. Try closing other applications to free memory, and if the issue persists, reduce video quality settings or break the presentation into smaller parts for separate exports.
If the resulting video is corrupted or unplayable, verify the export file format (MP4 or MOV) matches your playback software’s compatibility. Try opening the video in QuickTime Player, the native Mac video app, which supports these formats well. If corruption occurs, re-export after saving a fresh copy of your presentation and removing any problematic media files.
- Open your PowerPoint presentation and save it as a.pptx file to ensure compatibility.
- Switch to Normal View if not already there, then check the Export menu for the Export to Video option.
- Confirm that animations and transitions play correctly in Slide Show mode by pressing Play.
- If using narration, open Slide Show > Record Slide Show and verify audio playback and timings.
- In the export dialog, select Presentation Quality and check Use Recorded Timings and Narrations if applicable.
- Start the export and monitor progress; if it stalls, close other apps and reduce video quality settings.
- Once exported, open the video in QuickTime Player to confirm it plays correctly without corruption.
Frequently asked questions
How to convert a powerpoint to mp4 on mac?
To convert a PowerPoint to MP4 on Mac, open your presentation and go to File > Export. Choose MP4 as the file format, select your desired quality (such as Presentation Quality), and set the slide duration if you don’t have custom timings. Finally, click Export to create the video file.
How to convert powerpoint to youtube video on mac?
First, export your PowerPoint as an MP4 video following the export steps. Then, sign in to YouTube and click the upload button. Select your exported MP4 file and fill in the video details before publishing. Make sure your video uses standard 16:9 aspect ratio and MP4 format for best compatibility.
How to convert PowerPoint to video file on Mac?
Use PowerPoint’s built-in export feature by going to File > Export and selecting a video format like MP4 or MOV. You can customize slide timings and include narrations if needed before exporting. This process generates a video file suitable for sharing or uploading.
How to convert PowerPoint to YouTube video on Mac?
The key is to export your presentation as an MP4 video with proper slide timings and narration if desired. After exporting, upload the MP4 file directly to YouTube. Confirm the video settings on YouTube to ensure it meets platform requirements.
How to convert PowerPoint to movie on Mac?
Converting PowerPoint to a movie format involves exporting the presentation as a video file, typically MP4 or MOV, via File > Export. Choose the movie format you prefer, adjust quality and timings, then export. Alternatively, you can use screen recording tools to capture a slideshow if you want more control over the movie format.
What This Guide Does Not Cover
This guide focuses exclusively on converting PowerPoint presentations to video using PowerPoint for Mac. It does not cover the process on Windows devices or through web-based PowerPoint applications, which have different features and export limitations. If you need to convert presentations on those platforms, you should consult specific resources tailored to those environments. Additionally, this guide does not address professional video editing software beyond basic PowerPoint export and Mac-native options.
For your next step, ensure your PowerPoint slides are fully finalized with all timings, narrations, and animations correctly set. Then, use PowerPoint’s Export > Create a Video feature while selecting MP4 as the format and choosing the appropriate resolution—commonly 1920x1080 for YouTube uploads—to produce a high-quality video. This single step ensures your video is ready for sharing or further editing without unexpected playback issues.
See also: How to Compress Pictures in PowerPoint on Mac: A Clear Step-by-Step Guide · How to Use Presenter View in PowerPoint on Mac: Step-by-Step Guide · How to Embed Fonts in PowerPoint on Mac: A Clear Step-by-Step Guide