
How to Install and Set Up 1Password on Your Mac: A Step-by-Step Guide
Step-by-step guide to install and set up 1Password on your Mac for efficient and secure password management.
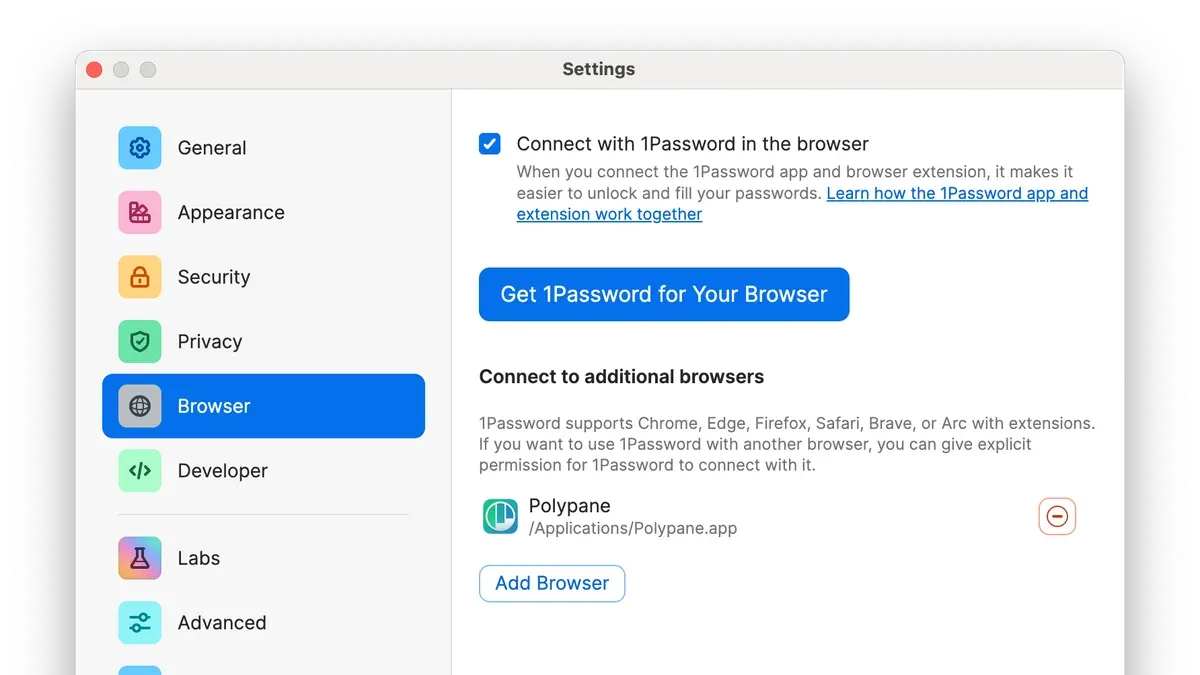
You’ve decided to switch to 1Password for managing your passwords on Mac, or you’re setting it up on a new device. Whether you’re moving from Apple’s built-in password manager or starting fresh, knowing how to install 1Password on Mac correctly is key to a smooth transition.
This guide walks you through each step: from preparing your Mac and installing the app to setting up your account, importing existing passwords, and using 1Password efficiently. It also covers how to integrate 1Password across multiple platforms and how to handle common setup issues.
Key takeaways
- Download 1Password from the official website or the Mac App Store for the safest installation.
- Use the 1Password setup assistant to create or sign in to your account immediately after installation.
- Import passwords from Apple’s password manager via exported CSV files to keep your data consolidated.
- Enable browser extensions and Touch ID integration for smoother daily password management.
- If you switch devices, use 1Password’s account sync to maintain access across Macs, iPhones, and Windows PCs.
Before you start: What you need to install 1Password on Mac
To install 1Password on your Mac, ensure your system meets the minimum requirements. The current 1Password app supports macOS versions 11 Big Sur and later, running on compatible Mac hardware such as Intel-based Macs or Macs with Apple silicon.
You will need an active 1Password subscription or a trial account to use the service. Subscription plans include options for individuals, families, and teams, with trials typically available directly from 1Password’s website.
A stable internet connection is necessary to download the app and to complete setup, including account verification and syncing your password vaults.
Have your Apple ID or existing 1Password account credentials ready for signing in. If you are moving from another password manager, consider backing up your current password data before starting the migration process to avoid data loss.
- Check your Mac’s operating system by clicking the Apple menu and selecting "About This Mac". You should see macOS 11 or later listed. If not, update your system or use a compatible device. Successful check means your Mac is ready for 1Password installation.
- Visit the official 1Password website to create an account or sign up for a trial. Confirm your subscription status or trial activation in your account dashboard.
- Ensure your internet connection is stable by opening a web page or running a speed test. A steady connection prevents installation interruptions.
- Prepare your account login details (Apple ID or 1Password credentials) for seamless sign-in after installation.
- If migrating, export your passwords from your current manager and save the file securely as a backup before importing into 1Password.
How to install 1Password on Mac
- Choose your download source. Visit the official 1Password website at 1password.com/downloads or open the Mac App Store. The website often provides the latest version more quickly, while the Mac App Store offers automatic updates managed by Apple.
- Download the installer. From the website, click the Mac download button to get a.dmg file. From the Mac App Store, click "Get" and then "Install" to download the app directly to your Applications folder.
- Open the installer. If you downloaded from the website, double-click the.dmg file, then drag the 1Password app icon into your Applications folder. If installed via the Mac App Store, this step is automatic.
- Grant necessary permissions. Upon first launch, macOS may prompt you to approve security permissions or accessibility access. Approve these to enable 1Password features like autofill and browser integration.
- Verify the installation. Launch 1Password from your Applications folder or Launchpad. The app should open to the welcome screen without errors, indicating successful installation.
Downloading from the official website ensures you access the most current version, which may include the latest features or fixes before they appear in the Mac App Store. However, the Mac App Store offers convenience with automatic updates and trusted distribution through Apple’s ecosystem. Both methods are secure when using official sources.
How to set up 1Password on Mac after installation
- Open the 1Password app and select Sign In if you already have an account, or choose Create Account to set up a new one. You should see the sign-in screen or account creation form.
- Enter your email address, Secret Key, and Master Password if signing in, or provide your email and create a Master Password if creating an account. The Master Password should be at least 12 characters, combining uppercase and lowercase letters, numbers, and symbols for strong protection.
- Once signed in, go to 1Password > Preferences > Security to enable two-factor authentication (2FA) by linking a compatible authenticator app. Enabling 2FA significantly strengthens your account security by requiring a second verification step.
- Navigate to the Vaults section to customize your vaults. You can create new vaults to organize passwords by categories such as personal, work, or projects. Changes save automatically, and your vaults will appear in the sidebar.
Setting a strong Master Password is crucial because it encrypts all your stored data locally before syncing. Enabling two-factor authentication adds a robust layer of protection, helping prevent unauthorized access even if your password is compromised. Organizing your vaults helps manage passwords efficiently across different contexts.
How to import Apple passwords to 1Password
Transitioning from Apple’s built-in password manager to 1Password requires exporting your saved passwords from Safari or iCloud Keychain and then importing them into 1Password. Apple allows exporting passwords in a CSV format via Safari, which is compatible for import with 1Password after some formatting.
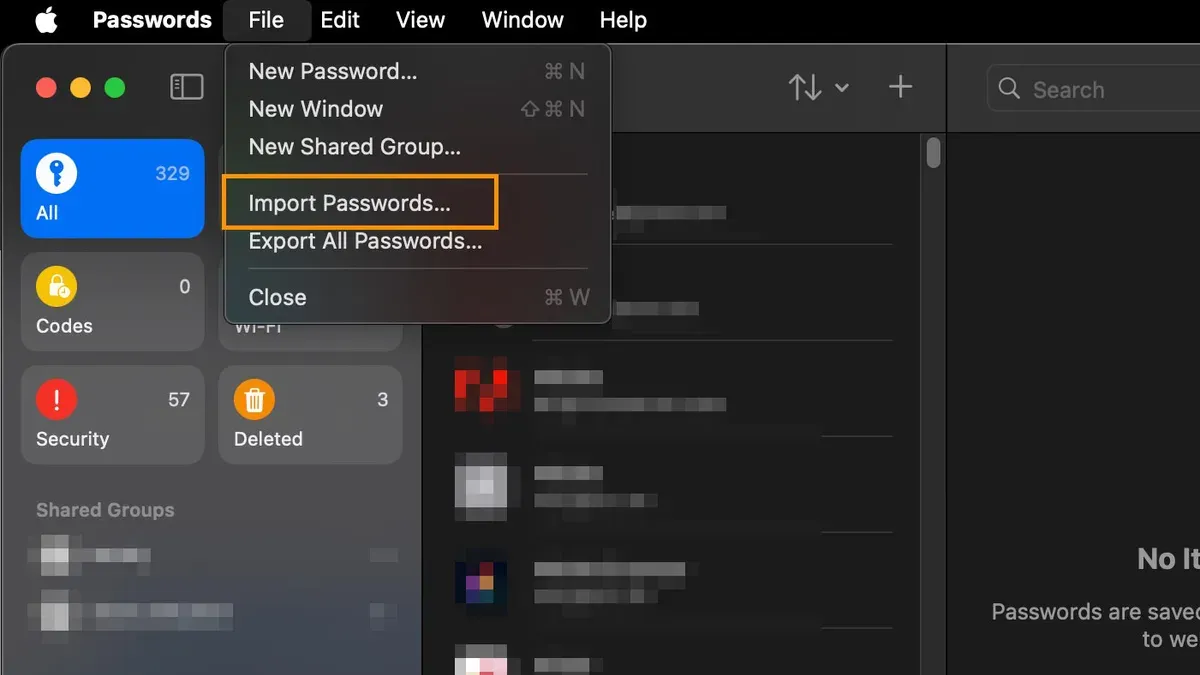
- Open Safari and go to Preferences > Passwords. Authenticate with your Mac password or Touch ID to access your saved passwords.
- Click the three-dot menu at the bottom left and select Export Passwords. Confirm the export, and save the CSV file to a secure location. You should see a file with entries listing website, username, and password.
- Open the CSV file with a spreadsheet editor to verify the format. Ensure columns are labeled clearly with website, username, and password, as 1Password requires these for proper import.
- In the 1Password app on your Mac, go to File > Import and select Passwords CSV. Choose the exported CSV file. 1Password will parse the file and display the entries to be imported.
- Review the import preview for accuracy and duplicates. Confirm the import. You should see your Apple passwords integrated into your 1Password vaults.
- After importing, check for duplicates or outdated entries within 1Password and clean them up to maintain an organized vault.
Apple Password Manager offers seamless integration with iOS and macOS but lacks advanced features like password auditing, sharing vaults securely, and cross-platform breadth that 1Password provides. Importing your data enables you to leverage 1Password’s enhanced security and management tools while preserving your existing credentials.
How to install 1Password on a new Mac or add 1Password to your computer
- Download 1Password from the official website or the Mac App Store. When the installation completes, you should see the 1Password icon in your Applications folder.
- Open 1Password and sign in using your existing account credentials. Upon successful sign-in, your vaults and saved data will begin syncing automatically across your devices, typically completing within a few minutes depending on your data size and network speed.
- Install 1Password browser extensions for Safari, Chrome, or Firefox by visiting the 1Password website's extension page or your browser's extension store. Once installed, the extension icon appears in the browser toolbar, allowing autofill and quick access to your passwords.
- Manage multiple devices securely by enabling two-factor authentication on your account and regularly reviewing authorized devices in your 1Password account settings. This ensures consistent security across all Macs, iPhones, or other platforms you use.
Syncing across multiple devices usually completes swiftly, maintaining data consistency without manual intervention. Security best practices include using a strong Master Password and keeping your devices updated to protect your password vault on all platforms.
How to use 1Password on Mac effectively
1Password streamlines your daily password management by autofilling login details in browsers and supported apps. This saves time and reduces errors when entering passwords manually. For example, when you visit a website with stored credentials, 1Password will prompt you to fill them automatically, letting you log in quickly and securely.
Generating strong, unique passwords is simple with 1Password’s built-in generator. You can create passwords tailored to specific site requirements and save them instantly. Beyond passwords, secure notes allow you to store sensitive information like software licenses or private documents safely.
Watchtower monitors your vault for security risks by alerting you to compromised, weak, or reused passwords. Users often find Watchtower alerts prevent breaches by prompting timely password updates and two-factor authentication enablement.
Sharing passwords or items securely with family or teams is possible through shared vaults, ensuring sensitive credentials are accessible only to authorized users. This avoids insecure sharing methods like email or messaging.
How to remove 1Password from Mac
Before uninstalling 1Password, back up your data to avoid permanent loss. Export your vaults or ensure your information is synced with your 1Password account.
- Quit 1Password completely by right-clicking its icon in the Dock and selecting Quit. The app should no longer appear in the Dock or menu bar.
- Open the Applications folder in Finder, locate 1Password, and drag it to the Trash. Alternatively, right-click and choose Move to Trash. The app will be removed from your Mac.
- Remove 1Password browser extensions by opening each browser (Safari, Chrome, Firefox, etc.), going to the extensions or add-ons settings, and uninstalling the 1Password extension. This prevents autofill or password capture after uninstall.
- Delete local vault data by navigating to
~/Library/Group Containers/2BUA8C4S2C.com.1passwordin Finder. Move this folder to the Trash to clear local caches and vaults. Warning: this action deletes all local data permanently if not backed up. - Empty the Trash to complete removal. Confirm that 1Password no longer appears in Spotlight or Launchpad.
- If you used a subscription, remember to manage or cancel it via your 1Password account online to avoid charges after uninstalling the app.
How to install 1Password on Windows 11 and other platforms
To install 1Password on Windows 11, start by downloading the official installer from the 1Password website. The Windows app supports most features available on Mac but has minor differences in interface and integration options.
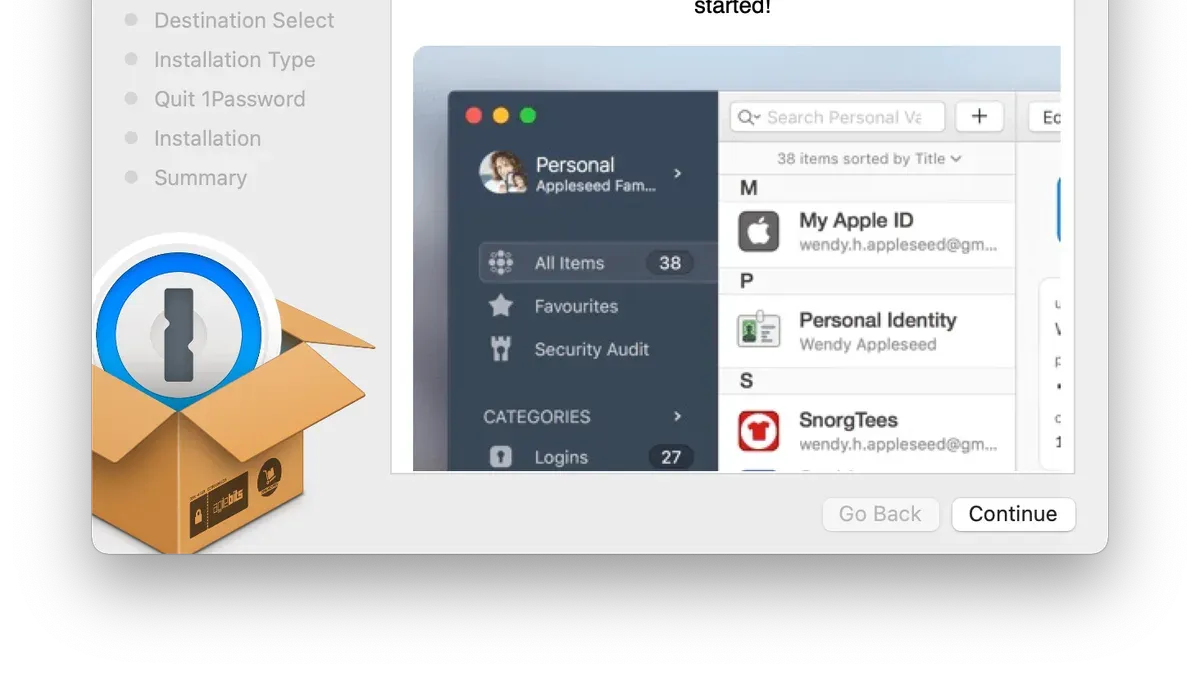
- Visit 1Password for Windows download page. You should see the latest stable version available for Windows 11.
- Click the download button and open the installer once it finishes. The setup wizard will launch.
- Follow the on-screen prompts to install 1Password. When complete, launch the app and you will see the sign-in screen.
- Enter your 1Password account credentials to sign in. Successful login will display your vaults and stored data synced from your account.
1Password automatically syncs your data across Mac, Windows, and other devices through your account, ensuring seamless access to passwords and secure notes. Some features like Touch ID on Mac do not have direct equivalents on Windows 11, but Windows Hello can be used for biometric unlocking where supported.
| Feature | Mac | Windows 11 |
|---|---|---|
| Autofill in browsers | Yes, with Safari, Chrome, Firefox | Yes, with Chrome, Edge, Firefox |
| Biometric unlock | Touch ID, Face ID | Windows Hello |
| Watchtower security alerts | Yes | Yes |
| Menu bar integration | Yes | No |
| Local vault storage | Supported | Supported |
While the core functionality remains consistent, the user interface and some platform-specific integrations vary. Screenshots of the Windows 11 installation process and app interface can be found on the 1Password support site, useful for visual guidance during setup.
Troubleshooting common issues installing or setting up 1Password on Mac
If the 1Password installer won’t run or the app fails to launch, first ensure your Mac meets the minimum macOS version requirement. If you see an error like “App can’t be opened,” check System Preferences > Security & Privacy > General to allow the app. Restart your Mac and try again.
For sign-in errors such as “Invalid credentials” or “Unable to connect,” verify your internet connection and double-check your account email and Master Password. If you forgot your Master Password, use the account recovery options on 1Password.com or contact 1Password Support for assistance.
Import failures often occur due to file format issues or corrupted CSV exports. Ensure your Safari export follows 1Password’s import format exactly. If syncing conflicts happen, open 1Password Preferences > Sync and re-enable syncing or sign out and back in.
Browser extension problems, including autofill not working, may be resolved by reinstalling the extension from the 1Password website or the browser’s extension store. Make sure the extension has permission to access websites and is enabled in the browser settings.
If these steps do not solve your problem, visit the 1Password Support site or join the 1Password Community forums for detailed advice and troubleshooting from other users and experts.
- How to Install and Use Bitwarden on Mac: A Clear Step-by-Step Guide
- How to Install and Set Up Proton VPN on Mac Step-by-Step
- How to Install and Set Up OpenVPN on Your Mac Step-by-Step
- How to Install Microsoft Remote Desktop on Mac: A Step-by-Step Guide
Frequently asked questions
How to install 1password on new computer?
To install 1Password on a new computer, visit the official 1Password website and download the macOS or Windows app, depending on your system. After downloading, open the installer and follow the on-screen prompts to complete installation. Once installed, sign in with your 1Password account credentials to sync your data and start using the app.
How to install mac password on windows?
Apple’s built-in password manager passwords are not directly transferable to Windows. Instead, you can export your passwords from Safari on your Mac as a CSV file and then import them into 1Password on Windows. This requires exporting from Safari’s password manager, then using 1Password’s import feature to bring those passwords into its vault on your Windows computer.
How to add 1password to my computer?
Adding 1Password to your computer involves downloading the app from the official website or the Mac App Store. After installation, open the app and either create a new account or sign in to an existing one. This process integrates 1Password with your system, enabling password management across browsers and apps.
How to install 1Password on new computer?
Repeat the download and installation steps by accessing 1Password’s official site or app store for your operating system. Follow the installer instructions, then log into your account to restore your saved passwords and settings. This ensures continuity of your password management on the new device.
How to remove 1Password from Mac?
To remove 1Password from your Mac, first quit the app completely. Then drag the 1Password application from the Applications folder to the Trash. To fully clean up, you may also want to delete related files in ~/Library/Application Support/1Password and ~/Library/Preferences/com.agilebits.onepassword7.plist, but be cautious if you plan to reinstall later.
What this guide does not cover
This guide focuses on installing and setting up 1Password for individual Mac users and covers basic cross-platform use and data migration from Apple’s password manager. It does not cover enterprise-specific 1Password configurations, advanced custom security policies, or management through organizational IT controls. If your setup involves company-wide deployment, specialized security requirements, or integration with enterprise identity providers, consult your IT department or 1Password’s business support resources.
The most useful next step is to regularly back up your 1Password data and familiarize yourself with the app’s Watchtower feature. This tool alerts you to weak or compromised passwords, helping you maintain strong security practices as you continue using 1Password across your devices.



