How to Uninstall Homebrew Using Mac Terminal: A Step-by-Step Guide
This guide shows you how to uninstall Homebrew in Mac Terminal with clear, step-by-step instructions for complete removal.
You installed Homebrew to manage packages on your Mac, but now you want to remove it completely. Whether you're troubleshooting, cleaning up your system, or switching to a different package manager, knowing how to uninstall Homebrew in Mac Terminal is essential.
This guide walks you through a clear, step-by-step process for uninstalling Homebrew using Terminal. It explains what each step does so you can make informed decisions and avoid unintended system changes.
Key takeaways
- Uninstalling Homebrew via Terminal requires running a dedicated uninstall script or manual removal of its files.
- Removing Homebrew does not automatically delete packages or dependencies installed through it; those may need manual cleanup.
- Carefully follow each step to avoid impacting other system components or user-installed apps.
- Backing up important data and configurations before uninstalling is recommended.
- Terminal commands provide transparency and control during the uninstall process.
Before you start: What you need to know
Uninstalling Homebrew requires administrator access on your Mac. This is essential because the removal commands affect system directories and user-level files created during installation. Without admin rights, you won’t be able to fully remove Homebrew or its components.
Homebrew is a package manager that installs software primarily in the /usr/local directory on Intel Macs or /opt/homebrew on Apple Silicon Macs. Uninstalling Homebrew removes these directories along with all installed packages, but it does not delete software installed outside of Homebrew’s control, such as apps installed via the App Store or manual downloads.
The typical footprint of a Homebrew installation, including its core files and packages, can range from a few hundred megabytes to several gigabytes, depending on how many packages you have installed. Most packages place their files inside Homebrew’s directories, so removing them will free disk space primarily there.
Before proceeding, back up any important data or configurations related to your installed Homebrew packages. For example, if you have customized configuration files for databases or development tools installed via Homebrew, save those separately. This ensures you can restore settings if you reinstall or switch package managers later.
- Verify you have administrator privileges by opening Terminal and running
sudo -v. You should be prompted for your password without errors. This confirms you can run commands as admin. - Check your Homebrew installation path by running
brew --prefix. This shows where Homebrew and its packages reside. Make a note of this location for reference. - Review installed packages by running
brew list. Identify any critical packages you want to back up configurations for. - Back up any important configuration files or data from the directories related to these packages, such as
~/.configor database data folders.
How to uninstall Homebrew on Mac Terminal
- Open the Terminal app on your Mac. You can find it via Spotlight search (Cmd + Space) by typing "Terminal" and pressing Enter.
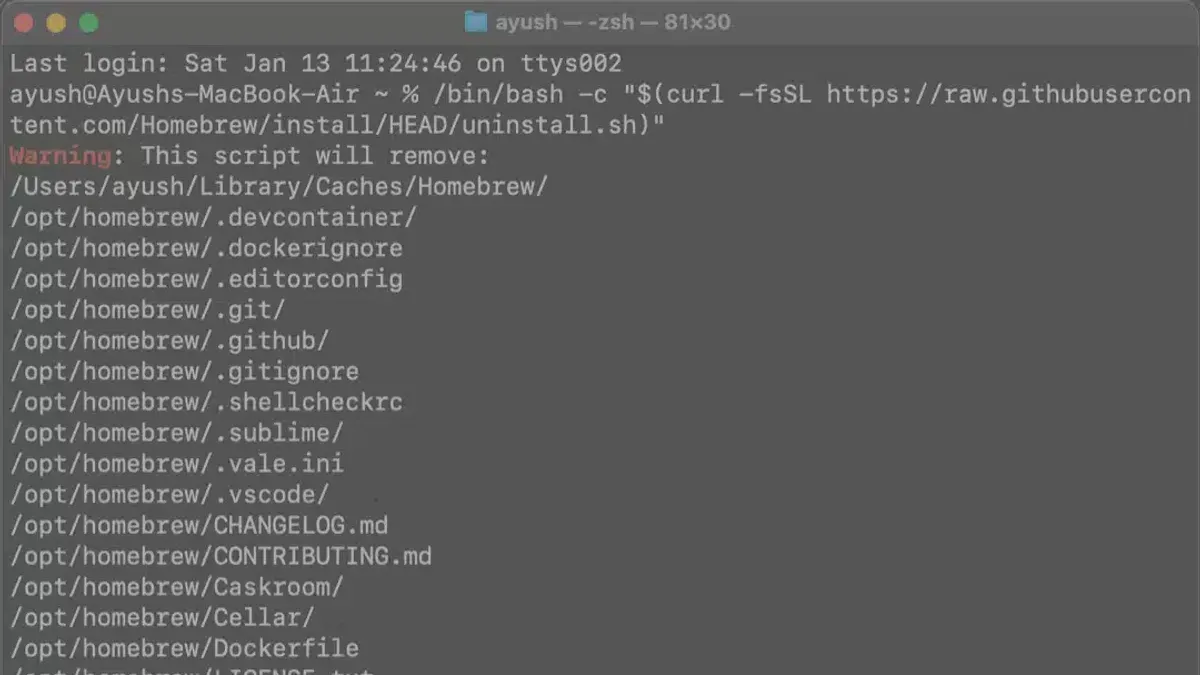
- Run the official Homebrew uninstall script by entering the following command:
/bin/bash -c "$(curl -fsSL https://raw.githubusercontent.com/Homebrew/install/HEAD/uninstall.sh)"
This command downloads and executes the uninstall script directly from Homebrew's official GitHub repository. - When prompted, confirm that you want to uninstall Homebrew by typing y and pressing Enter. The script will then remove Homebrew directories, binaries, and cache files from your system.
- Wait for the script to complete. You should see output indicating it is removing files such as /usr/local/Homebrew, /usr/local/bin/brew, and cache directories. A successful run ends with a confirmation message that Homebrew has been uninstalled.
- Verify the uninstall by typing brew and pressing Enter. If Homebrew was fully removed, the Terminal will respond with command not found: brew, confirming the removal.
This method is the safest and most reliable way to fully uninstall Homebrew using Terminal, as it handles all core components and leaves no residual files. It also minimizes risk by running an official, maintained script rather than manual deletion.
How to uninstall Homebrew and all packages manually
If you prefer to remove Homebrew and all its installed packages without using the official uninstall script, you can do so by manually deleting its directories and cleaning related files. This offers more control but requires caution to avoid affecting other system components.
- Check Homebrew's installation directories. By default, Homebrew installs in
/usr/local/Homebrewon Intel Macs and/opt/homebrewon Apple Silicon Macs. To confirm, runbrew --prefix. You should see the main directory path. This directory contains Homebrew's core files and packages. - Remove the Homebrew directory. Use
sudo rm -rf /usr/local/Homebreworsudo rm -rf /opt/homebrew, depending on your setup. Runningsudo du -sh /usr/local/Homebrewbefore deletion shows the space used, and afterward, this directory should no longer exist. - Delete installed packages and cached downloads. Installed packages reside within
Cellarinside the main Homebrew folder, while downloads are cached in~/Library/Caches/Homebrew. Remove these withrm -rf ~/Library/Caches/Homebrew. Checking the size of this folder withdu -sh ~/Library/Caches/Homebrewbefore and after confirms removal. - Remove Homebrew environment variables from your shell profile. Homebrew often adds lines to shell configuration files like
~/.zshrc,~/.bash_profile, or~/.bashrc. Open these files in a text editor and delete lines referencing Homebrew paths, such asexport PATH=/opt/homebrew/bin:$PATH. After saving, restart your Terminal or runsource ~/.zshrc(or corresponding file) to apply changes.
This manual process removes Homebrew and its data but requires careful attention to paths and files. Always double-check directory names before executing removal commands to avoid deleting unrelated data.
How to uninstall Homebrew on Mac OS without affecting other apps
Uninstalling Homebrew only removes packages and files it installed, not system applications or software obtained through other means such as the App Store or manual downloads.
To ensure you do not affect other apps, first identify which applications were installed via Homebrew. This prevents confusion about what will be removed during uninstallation.
- Open Terminal and run brew list. This command displays all packages currently managed by Homebrew. For example, you might see packages like wget, node, or python.
- Cross-check this list against your Applications folder and any manually installed software. Apps installed via the Mac App Store or downloaded manually typically do not appear here.
- When you uninstall Homebrew, only these listed packages and Homebrew’s directories are removed. Your other software remains intact and fully functional.
- After uninstalling, verify your other apps by launching them as usual or checking the Applications folder to confirm they are unaffected.
This approach gives you control and reassurance that uninstalling Homebrew won’t disrupt your broader Mac environment.
How to install Homebrew on Mac Terminal (brief overview)
Before installing Homebrew, ensure you have the Xcode Command Line Tools installed. These tools provide essential compilers and utilities required by Homebrew to build and manage software packages.
- Open the Terminal app on your Mac.
- Run the following command to install Homebrew:
/bin/bash -c "$(curl -fsSL https://raw.githubusercontent.com/Homebrew/install/HEAD/install.sh)" - Follow the on-screen prompts; you may be asked to enter your administrator password.
- Once installation completes, you should see a message confirming Homebrew is installed along with instructions to add Homebrew to your PATH.
- Verify the installation by typing brew --version, which should output the current Homebrew version, for example:
Homebrew 4.0.0
Installing Homebrew is often the first step before uninstalling it if you are troubleshooting issues or planning to reinstall for a fresh setup. This overview provides context for why you might run the install command, making the uninstall process more understandable.
Troubleshooting common issues when uninstalling Homebrew
If the official uninstall script does not complete successfully or the brew command remains recognized, you may need to take additional steps. A common error is a permission denied message when attempting to remove Homebrew directories.
- Run the uninstall script again with elevated privileges by typing
sudo /bin/bash -c "$(curl -fsSL https://raw.githubusercontent.com/Homebrew/install/HEAD/uninstall.sh)". You should see confirmation that Homebrew and its files have been removed. - If permission errors persist, manually change ownership of Homebrew directories by running
sudo chown -R $(whoami) /usr/local/Homebrew /usr/local/bin/brew. Then rerun the uninstall script. Successful ownership changes will produce no error messages. - After uninstalling, check if Homebrew environment variables remain by typing
echo $PATHorenv | grep HOMEBREW. If entries exist, open your shell configuration file (e.g.,~/.zshrcor~/.bash_profile) and remove lines that export Homebrew paths. Save and reload the shell withsource ~/.zshrcor the equivalent. - To address residual files or broken symbolic links, run
find /usr/local -type l -exec ls -l {} + | grep Homebrewto locate broken links. Remove them withrmif they point to non-existent targets.
These steps help ensure a clean uninstall and prevent conflicts if you reinstall Homebrew or switch package managers.
How to uninstall apps on Mac Terminal beyond Homebrew
Uninstalling apps via Terminal on Mac varies depending on how the app was installed—whether from the App Store, downloaded as a.dmg, or installed via a package manager. Unlike Homebrew, many apps are self-contained bundles or scattered across system folders, requiring careful removal.
To remove an app bundle manually, you first need to locate it. Most apps reside in the /Applications folder as .app bundles. You can list these with ls /Applications. To delete an app, use the rm -rf command followed by the app’s path. For example:
- Type
sudo rm -rf /Applications/ExampleApp.appand press Enter. You should see no output if successful. - Remove related support files often stored in
~/Library/Application Support/ExampleAppby typingrm -rf ~/Library/Application\ Support/ExampleApp. No output indicates success. - Clear caches in
~/Library/Caches/ExampleAppsimilarly withrm -rf ~/Library/Caches/ExampleApp.
Be cautious: using rm -rf can delete any specified files or folders without confirmation, risking system stability if used incorrectly. Always double-check paths before execution.
For apps installed via package managers other than Homebrew (like MacPorts or Fink), use their respective uninstall commands to avoid leaving orphaned files.
In summary, manual app removal via Terminal requires precise knowledge of app locations and support files. Without this, unintended deletions or incomplete removals may occur.
- How to Generate an SSH Key in Mac Terminal: A Step-by-Step Guide
- How to Use SSH in Mac Terminal: A Clear Step-by-Step Guide
- How to Use sudo Safely in Mac Terminal: A Step-by-Step Guide
Frequently asked questions
How to install homebrew in mac?
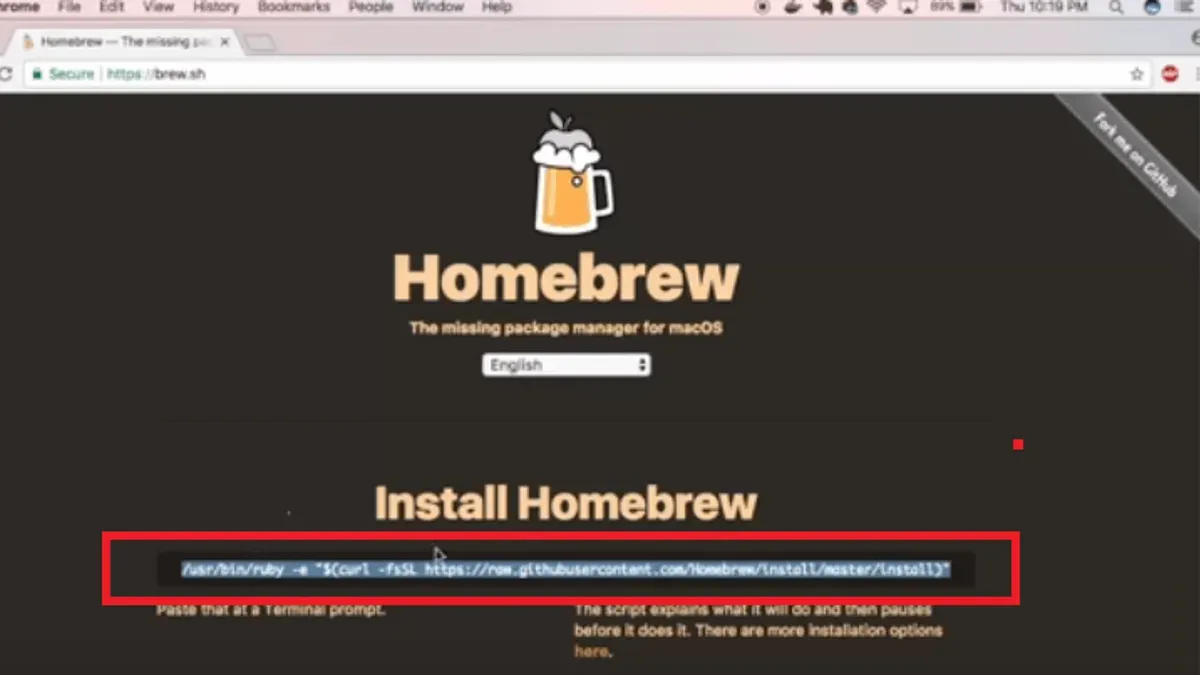
To install Homebrew on a Mac, open the Terminal app and enter the official installation command provided on the Homebrew website. This command uses Ruby or Bash to download and install Homebrew in the /usr/local directory. You’ll need an active internet connection and administrator privileges to complete the process.
How to uninstall homebrew mac terminal?
You can uninstall Homebrew through the Mac Terminal by running the official uninstall script available from Homebrew’s GitHub repository. This script removes Homebrew files, directories, and installed packages. Make sure to review the script’s output to understand what will be deleted before confirming the removal.
How to install homebrew in mac terminal?
Installing Homebrew directly in the Mac Terminal involves running a single command copied from the Homebrew homepage. This command fetches the installation script and executes it, setting up Homebrew in the standard location. Follow the on-screen prompts and enter your Mac password when requested.
How to uninstall app on mac terminal?
To uninstall an app via Mac Terminal, you generally need to remove the application’s executable and associated files manually. This often involves deleting the app from the /Applications folder using the rm command with appropriate permissions. For apps installed via package managers like Homebrew, use the package manager’s uninstall command to avoid leftover files.
How to uninstall Homebrew on Mac?
Uninstalling Homebrew on a Mac involves running the official uninstall script or manually deleting Homebrew’s installation directories, typically /usr/local/Homebrew and related files. This process removes Homebrew and all packages installed through it. Back up any important data or configurations before proceeding to prevent accidental loss.
What this guide does not cover
This guide does not cover uninstalling software installed outside of Homebrew, nor does it address complex situations like partial Homebrew installations or multi-user setups. If your Homebrew environment is customized extensively or shared across different user accounts, manual intervention beyond these steps may be necessary. For those scenarios, consulting specialized forums or professional support is recommended to avoid unintended system issues.
The single most useful next step after uninstalling Homebrew is to verify that your system’s PATH environment variable no longer references Homebrew directories. This ensures your Terminal commands do not mistakenly call Homebrew components that no longer exist, preventing confusion or errors when running other software. Open your Terminal and run echo $PATH to check for residual Homebrew paths like /usr/local/bin or /opt/homebrew/bin and clean them from your shell configuration files such as ~/.zshrc or ~/.bash_profile if needed.