How to Use Your iPhone as a Webcam on Mac: A Step-by-Step Guide
Discover how to use your iPhone as a webcam on Mac with step-by-step setup tips for seamless video meetings and streaming.
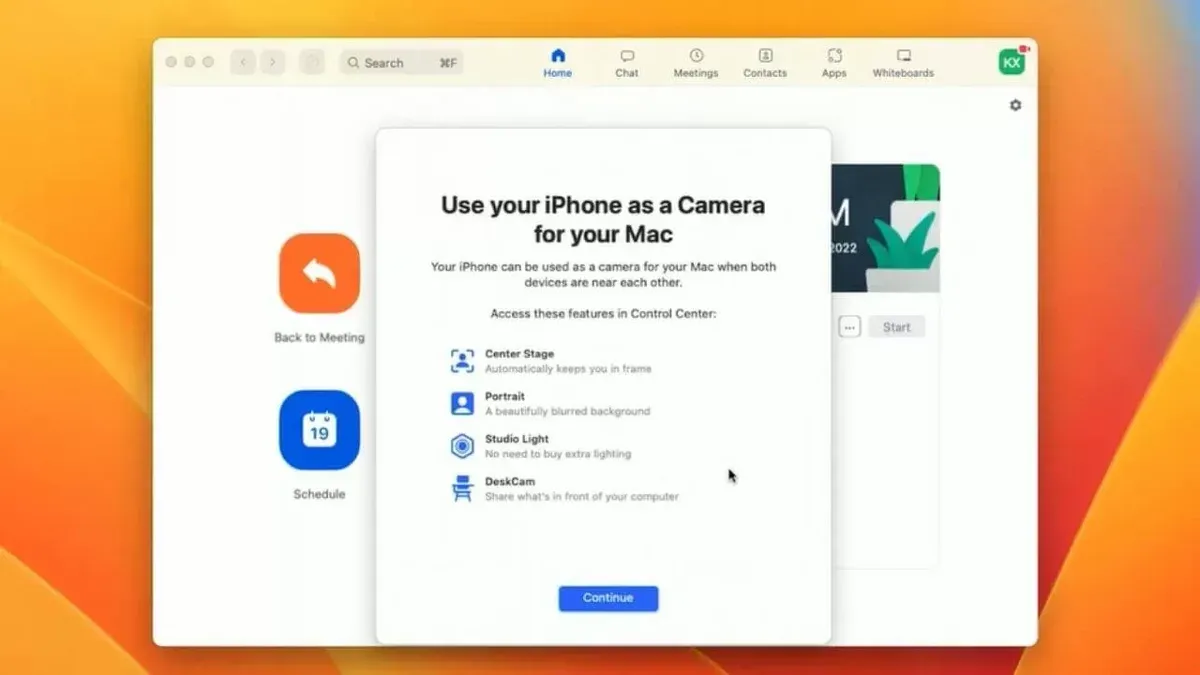
You’re about to join an important video meeting on your Mac Mini M4 or Mac Studio, but the built-in webcam resolution doesn’t meet your expectations. Alternatively, you want to stream on OBS using your iPhone’s superior camera without buying extra hardware.
This guide explains how to use iPhone as webcam on Mac with clear, step-by-step instructions tailored for different Mac models, including MacBook, Mac Mini, and Mac Studio. You’ll also find setup tips for popular video apps like Google Meet, Teams, and OBS, plus troubleshooting advice to ensure smooth performance.
Key takeaways
- Use Apple’s Continuity Camera for seamless iPhone webcam integration starting from macOS Ventura and iOS 16.
- For Mac Mini and Mac Studio, connect via USB or Wi-Fi but prioritize USB for lower latency and stability.
- Popular apps like OBS require configuring video capture devices to select your iPhone camera.
- Battery and privacy settings on your iPhone can affect webcam performance and connection reliability.
- Dedicated webcams may offer convenience but often lack the image quality of an iPhone camera.
Before you start: What you need to use your iPhone as a webcam on Mac
Using your iPhone as a webcam on your Mac requires specific hardware, software, and connection setups to ensure smooth video quality and compatibility. First, ensure your iPhone runs iOS 16 or later, as this is the minimum version supporting Apple's Continuity Camera feature. Compatible iPhone models include iPhone XR and later, covering most recent devices.
On the Mac side, Continuity Camera works with MacBook Air, MacBook Pro, Mac Mini (including the M4 chip models), and Mac Studio running macOS Ventura or later. Older Macs or macOS versions require third-party apps such as EpocCam or Camo to enable iPhone webcam functionality.
For connection, you can use either a USB cable or a Wi-Fi network. A wired USB connection offers a more stable and lower-latency video feed, especially important for professional streaming or recording. Wi-Fi connections are convenient but may suffer from increased latency or compression artifacts, depending on your network speed and congestion.
Third-party apps often support both connection types, but their performance varies. Apple's Continuity Camera automatically detects and switches between wired and wireless connections.
In summary, you need a compatible iPhone with iOS 16+, a Mac with macOS Ventura+, and a reliable USB or Wi-Fi connection. If your devices do not meet these criteria, third-party apps provide alternatives but may require additional setup.
- Verify your iPhone model and iOS version by going to Settings > General > About. You should see iOS 16 or later and a model at least iPhone XR.
- Check your Mac's model and macOS version via Apple menu > About This Mac. Confirm it runs macOS Ventura or newer.
- Ensure your Mac and iPhone are signed in to the same Apple ID and connected to the same Wi-Fi network for wireless use.
- Alternatively, prepare a Lightning or USB-C cable to connect your iPhone directly to your Mac for a wired connection.
- If your Mac or iPhone is not compatible with Continuity Camera, download a third-party app like EpocCam or Camo from the App Store and their corresponding Mac client. Follow their setup instructions.
How to use iPhone as webcam on MacBook and MacBook Pro
MacBook and MacBook Pro users can leverage the native Continuity Camera feature to use their iPhone as a webcam seamlessly. This integration requires macOS Ventura or later and iOS 16 or later, with both devices signed into the same Apple ID and connected via Wi-Fi or Bluetooth.
- Place your iPhone near your MacBook or MacBook Pro and unlock it. You should see a prompt on your iPhone to use it as a webcam.
- On your Mac, open System Settings and navigate to General > AirPlay & Handoff. Make sure Continuity Camera is enabled.
- Grant camera and microphone permissions on your iPhone when prompted to allow video and audio streaming.
- In your chosen video app (FaceTime, Zoom, Google Meet), open the video source menu. Select your iPhone listed as a camera option—usually labeled as "[Your iPhone's Name] Camera." After selection, your iPhone’s camera feed should appear in the video preview.
- If Continuity Camera is unavailable or your macOS is older, consider third-party apps like EpocCam or Camo. Install the corresponding app on both devices and follow the app’s instructions to connect via USB or Wi-Fi.
- For optimal video quality, use the iPhone’s rear camera and position it on a stable surface or mount. Ensure good lighting and a strong Wi-Fi or wired connection to reduce lag and dropouts.
- Within apps like Zoom and Google Meet, adjust video settings to match your preferred resolution and frame rate. Continuity Camera typically provides superior clarity and low latency compared to third-party apps, although app features vary.
By following these steps, you can easily switch your MacBook or MacBook Pro webcam to your iPhone’s camera, enhancing video quality and flexibility during calls or recordings.
How to use iPhone as webcam on Mac Mini, including Mac Mini M4 and Mac Studio
The Mac Mini and Mac Studio present unique setups for using your iPhone as a webcam due to their hardware configurations and port availability. Both desktop models lack integrated webcams, making the iPhone an excellent option for high-quality video input.
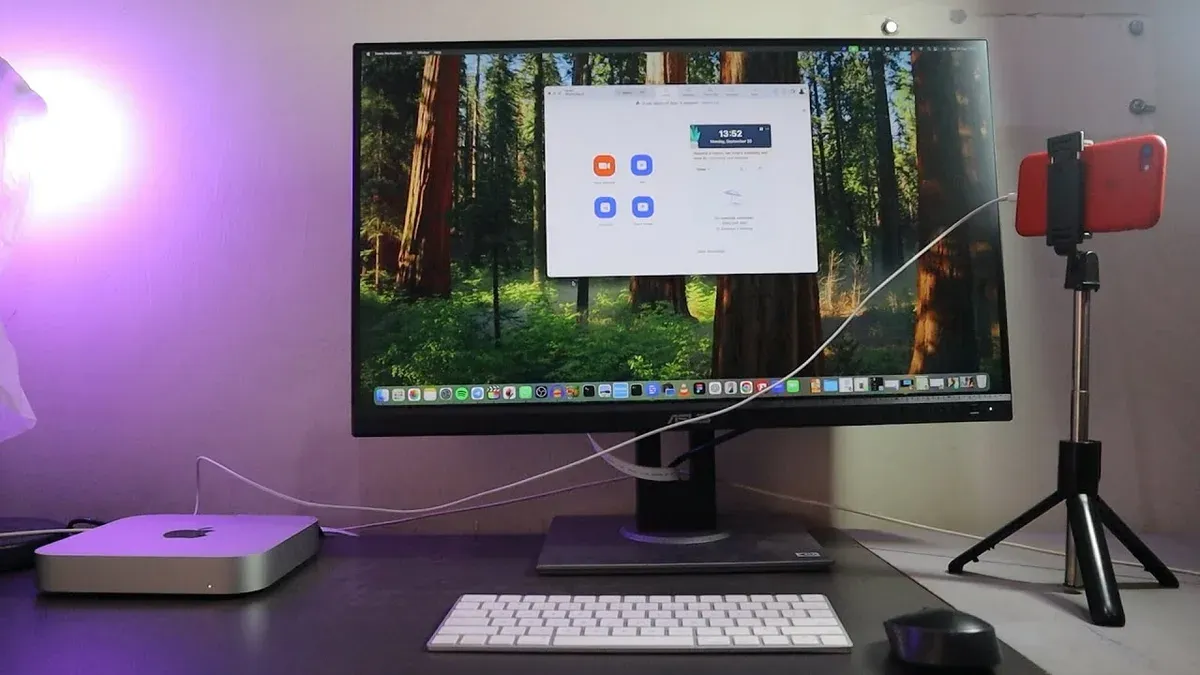
The Mac Mini M4 and Mac Studio support Continuity Camera similarly to MacBooks, but USB-C and Thunderbolt port availability affects connection choices. You can connect your iPhone via a Lightning to USB-C cable or use Wi-Fi for wireless streaming.
- Ensure your Mac Mini or Mac Studio is running macOS Ventura or later, and your iPhone has iOS 16 or newer. This compatibility is critical for Continuity Camera to function properly.
- Connect your iPhone to your Mac Mini M4 or Mac Studio using a USB-C to Lightning cable if you prefer a wired connection. The Mac Mini M4 includes multiple Thunderbolt 4 ports, while Mac Studio offers Thunderbolt 4 and USB-A ports; use appropriate adapters if needed.
- On your Mac, open System Settings and navigate to General > AirPlay & Handoff. Enable Continuity Camera to allow your Mac to detect the iPhone as a webcam.
- On your iPhone, unlock the device and position it where you want the camera view. The iPhone should automatically appear as a webcam option in your video app, such as Zoom or FaceTime.
- If Continuity Camera is unavailable or you prefer third-party software, apps like EpocCam and Camo offer optimized drivers for Mac Mini and Mac Studio hardware, supporting both USB and Wi-Fi connections. Install the companion Mac app and iPhone app, then follow their setup instructions.
- Confirm the video app detects the iPhone webcam by selecting it from the camera input menu. For example, in OBS, add a video capture device and choose your iPhone model.
- Performance tip: On the Mac Mini M4 and Mac Studio, wired connections generally provide more stable video with lower latency, especially for streaming or recording sessions longer than 10 minutes.
Users report smooth 1080p video at 30fps using Continuity Camera on Mac Mini M4 and Mac Studio, with minimal lag on wired setups. Wireless connections can introduce occasional frame drops depending on network conditions.
How to use iPhone as webcam on macOS with popular video apps like OBS, Google Meet, and Teams
Integrating your iPhone as a webcam on macOS varies depending on the video app you use. OBS Studio, Google Meet, and Microsoft Teams each require different steps to recognize your iPhone camera feed.
- Open your preferred video app (e.g., OBS Studio) on your Mac.
- Ensure your iPhone is connected via USB or on the same Wi-Fi network if using wireless.
- In OBS Studio, click the “+” button under the Sources panel, then select Video Capture Device.
- Name the source (e.g., “iPhone Webcam”) and click OK.
- From the Device dropdown menu, select your iPhone’s camera, often labeled with the app name or “Continuity Camera.”
- Adjust resolution and frame rate as needed, then click OK. You should see your iPhone video feed appear.
- For Google Meet or Microsoft Teams, start or join a meeting.
- Open the app’s video settings: in Google Meet, click the three dots, then Settings > Video; in Teams, go to Devices under Settings.
- Select your iPhone camera from the dropdown list; it may appear as “Continuity Camera” or the third-party app’s name.
- Allow camera permissions if prompted; otherwise, the feed won’t appear.
App-specific permissions and troubleshooting: Make sure macOS has granted camera and microphone access to your video app in System Settings > Privacy & Security. Restart the app if the iPhone camera does not show up. Wired connections usually offer more stability than wireless.
| App | Native Continuity Camera Support | Third-Party App Compatibility | Notes |
|---|---|---|---|
| OBS Studio | Limited; requires manual source selection | Good; many webcam apps appear as video devices | Best with USB for low latency |
| Google Meet | Full; seamless selection as Continuity Camera | Works; may need camera permission granted | Wireless can introduce lag |
| Microsoft Teams | Full; Continuity Camera selectable in settings | Works; some apps require manual selection | May require app restart after setup |
While native Continuity Camera support offers direct integration with minimal setup, third-party apps expand compatibility to a wider range of software but may require additional configuration. Your choice depends on the app you use and whether you prioritize ease of setup or broader compatibility.
Using your iPhone camera as a webcam for iPad and secondary devices
You can use Continuity Camera to extend your iPhone’s webcam functionality to an iPad, turning the iPhone into a video source for FaceTime, Zoom, or other video apps on iPadOS. This works similarly to Mac setups but with some differences in app compatibility and connection stability.
To use your iPhone camera as a webcam on an iPad, both devices must be signed into the same Apple ID with Bluetooth and Wi-Fi enabled. The iPhone should be nearby and unlocked. When you open a video app on iPad, select your iPhone as the camera source if the app supports Continuity Camera.
- On your iPad, launch a video app that supports external cameras, such as FaceTime or Zoom. You should see the iPhone camera appear as an option in the camera settings menu.
- Select your iPhone as the video source. The iPad screen should display the live feed from your iPhone camera.
- Adjust positioning or orientation of your iPhone to optimize framing. The video feed updates in real-time with minimal latency, though some delay may be noticeable compared to wired Mac connections.
Apps that support cross-device webcam streaming include FaceTime, Zoom, and Microsoft Teams on iPad, though third-party apps may vary in their support. Continuity Camera offers smoother integration and higher resolution compared to many third-party solutions.
While the iPhone offers a higher-quality camera than most iPads, using it as a webcam for iPad may introduce slight latency and occasional frame drops, especially over Wi-Fi. Wired connections are not currently available for this setup, limiting stability compared to Mac configurations.
Example use cases include remote teaching where an iPad runs a lesson app while the iPhone serves as a high-quality webcam, or video calls on iPad with improved camera input without needing external hardware.
Troubleshooting common issues when using iPhone as webcam on Mac
If your iPhone does not appear as a camera option on your Mac, first check that both devices are signed into the same Apple ID with two-factor authentication enabled. Also, ensure Bluetooth and Wi-Fi are active on both devices, even if using a USB connection. A common error message is “No camera detected,” which typically indicates connectivity or permission issues.
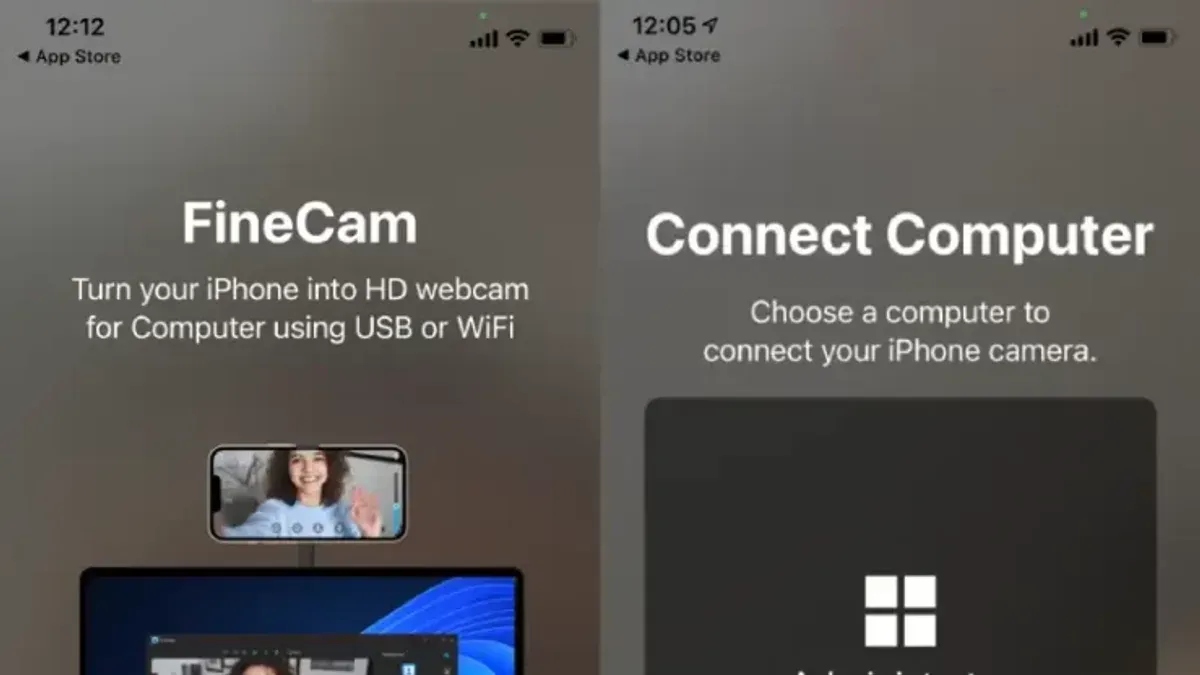
Connectivity problems over USB often arise from faulty cables or ports. Try using an Apple-certified USB-C to Lightning cable and connect directly to your Mac’s port rather than through a hub. For Wi-Fi connections, ensure both devices are on the same network and that the network does not block device discovery protocols. Lag or low video quality can result from weak Wi-Fi signals or interference; switching to a wired connection usually improves stability and resolution.
App permissions and privacy settings can block camera access. On your Mac, go to System Settings > Privacy & Security > Camera and verify the video app you use (e.g., OBS, Teams) has permission to access the camera. On your iPhone, check Settings > Privacy > Camera to confirm any third-party apps involved have camera access.
If problems persist, restart both devices. Updating iOS and macOS to the latest versions can resolve known bugs affecting Continuity Camera or third-party app integration. A typical fix after updates is seeing the iPhone listed immediately as a webcam option.
- Check both devices are on the same Apple ID with two-factor authentication; you should see your iPhone listed in the Mac’s camera options.
- Use an Apple-certified USB cable connected directly to the Mac; the iPhone should switch to webcam mode without errors.
- Verify app permissions under System Settings > Privacy & Security > Camera; the app should have a checkmark.
- Restart both iPhone and Mac; on reboot, the iPhone webcam should appear ready to use.
- Update iOS and macOS; after update, the connection tends to be more stable and recognized consistently.
Comparing iPhone as webcam versus dedicated Mac webcams
When deciding between using your iPhone as a webcam or purchasing a dedicated Mac webcam, several factors come into play including video quality, ease of setup, cost, latency, and reliability. Each option has its strengths depending on your needs.
| Feature | iPhone as Webcam | Dedicated Mac Webcam |
|---|---|---|
| Video Resolution | Typically 1080p or higher, depending on iPhone model; some support 4K video capture | Commonly 720p or 1080p; higher-end models offer up to 4K |
| Frame Rate | Up to 60fps on newer iPhones with Continuity Camera or apps | Usually 30fps to 60fps depending on model |
| Cost | No extra cost if you already own an iPhone | Ranges from affordable ($40+) to premium ($150+) |
| Setup and Portability | Requires cable or Wi-Fi setup; portable as you already carry the iPhone | Plug-and-play USB connection; portable but an extra device to carry |
| Latency and Reliability | Wired connection offers low latency and stable video; Wi-Fi can introduce delay or dropouts | Generally stable with low latency; designed for continuous video use |
| User Experience | High-quality video for streaming and meetings; occasional app or connection quirks | Consistent performance; optimized for webcam use with fewer setup steps |
For streaming or professional meetings where video quality is paramount, using a recent iPhone can provide superior image clarity and frame rates, especially with a wired USB-C connection on Mac Mini M4 or Mac Studio. However, dedicated webcams offer more plug-and-play simplicity and reliability for long sessions without battery or app dependency.
Casual users or those on a budget benefit from leveraging their iPhone, while users needing guaranteed uptime and minimal setup may prefer a dedicated webcam. For mobile setups, the iPhone’s portability is an advantage, but dedicated webcams are generally better for permanent desktop arrangements.
- How to Use Your iPad as a Second Display for Your Mac
- How to Set Up Universal Control on Mac: A Complete Step-by-Step Guide
Frequently asked questions
How to use iPhone as webcam on Mac Mini M4?
To use your iPhone as a webcam on Mac Mini M4, connect your iPhone to the Mac Mini using a Lightning or USB-C cable. Install a compatible app like Continuity Camera (built into macOS Ventura and later) or a third-party app such as EpocCam or Camo. On your Mac Mini, select your iPhone as the camera source within the video app you are using. Ensure both devices are on the same Wi-Fi network if using wireless mode, but a wired connection typically offers better stability and lower latency.
How to use iPhone as webcam on MacBook Air?
Using your iPhone as a webcam on a MacBook Air is straightforward with Continuity Camera if your MacBook Air supports macOS Ventura or later. Simply bring your iPhone close to your MacBook Air, and the system will automatically detect it as a webcam. Alternatively, use a third-party app and connect your iPhone via cable or Wi-Fi. In your video app, choose your iPhone as the camera source to start streaming.
Can I use iPhone as webcam on Mac OBS?
Yes, you can use your iPhone as a webcam with OBS on Mac by installing a virtual camera app like OBS Studio combined with third-party software such as EpocCam or Camo. After connecting your iPhone to your Mac, add a video capture device source in OBS and select the iPhone camera from the list. Note that some apps may require additional drivers or permissions to function properly.
How to use iPhone as webcam on Mac Google Meet?
To use your iPhone as a webcam in Google Meet on Mac, connect your iPhone and open Google Meet in a supported browser like Chrome or Safari. Select the video input settings within Google Meet and choose your iPhone camera, which appears after connecting via Continuity Camera or a third-party app. Make sure to grant any necessary permissions on both devices for camera and microphone access.
What this guide does not cover
This guide does not cover using your iPhone as a webcam on non-Apple operating systems or on older Mac hardware that does not support Continuity Camera or relevant third-party apps. Some third-party applications may require paid licenses to unlock full video quality or additional features. Also, Continuity Camera depends on relatively recent macOS (Ventura or later) and iOS (16 or later) versions to work seamlessly.
For users with unsupported devices or those seeking high-end professional streaming setups, dedicated webcams or specialized capture hardware may offer more reliable performance and customization options.
To get started with your iPhone as a webcam on your Mac, ensure both devices are updated and connected via Wi-Fi or USB, then enable Continuity Camera or install your chosen app. This preparation is the single most useful step to avoid common connection and recognition issues.