
How to Use Personal Voice on Mac: A Clear Step-by-Step Guide
Discover how to set up and use Personal Voice on Mac for custom voice typing, voice control, and seamless integration with your Apple devices.
You want to dictate a document or control your Mac using your own voice, but you're unsure how to get started. Personal Voice offers a way to create a custom voice profile for voice typing, commands, and accessibility on your Mac and connected Apple devices.
This guide explains how to use Personal Voice on Mac, detailing the setup process, use cases like voice typing and voice control, and integration with your iPhone. It also clarifies how Personal Voice differs from other Mac voice features and third-party apps, helping you decide if it fits your needs.
Key takeaways
- Set up Personal Voice in System Settings under Accessibility > Speech to create a custom voice profile.
- Use Personal Voice for accurate voice typing via the Dictation feature in keyboard settings.
- Enable voice commands through Voice Control with your Personal Voice profile for hands-free operation.
- Personal Voice works across Mac and iPhone when signed in to the same Apple ID and using iCloud.
- Other Mac voice tools like Siri or third-party apps serve different functions and may not support custom voices.
Before you start: What you need to use Personal Voice on Mac
To use Personal Voice on your Mac, you need to ensure your hardware and software meet specific requirements. Personal Voice is supported on Mac models running macOS Ventura or later. Compatible Macs generally include models from 2018 onward, such as MacBook Air, MacBook Pro, Mac mini, iMac, and Mac Studio, but checking your exact model against Apple's official compatibility list is recommended.
You must be signed in with an Apple ID that has iCloud enabled. This is essential for syncing your Personal Voice profile across devices and backing up your voice data securely.
A good-quality microphone is key for accurate voice recognition. Built-in microphones on recent Mac models usually suffice, but external microphones can improve clarity, especially in noisy environments. USB or Thunderbolt microphones with noise-canceling features typically deliver better results than basic headset mics.
If you plan to use Personal Voice on your iPhone or integrate voice features across Apple devices, ensure your iPhone runs iOS 16 or later and is signed in with the same Apple ID. This cross-device compatibility allows seamless voice profile sharing and command execution.
- Check your Mac model by clicking the Apple menu > About This Mac. Confirm it runs macOS Ventura or later by selecting System Settings > General > About. You should see the macOS version displayed.
- Verify your Apple ID status under System Settings > Apple ID. Ensure you are signed in and that iCloud Drive is enabled.
- Test your microphone by opening System Settings > Sound > Input. Speak to see the input level meter respond, confirming the mic is active. For better recognition, consider using an external mic if the input level is inconsistent or weak.
- Confirm your iPhone compatibility by opening Settings > General > About and verifying the iOS version is 16 or newer. Also, check the Apple ID under Settings > [your name].
How to use Personal Voice on Mac: Enabling the feature
To begin using Personal Voice on your Mac, you need to activate and configure it within System Settings. This process involves creating a unique voice profile that captures your speech patterns for personalized voice input.
- Open System Settings from the Apple menu () in the top-left corner of your screen.
- Scroll down and select Accessibility from the sidebar.
- Within Accessibility, find and click on Personal Voice under the Speech section.
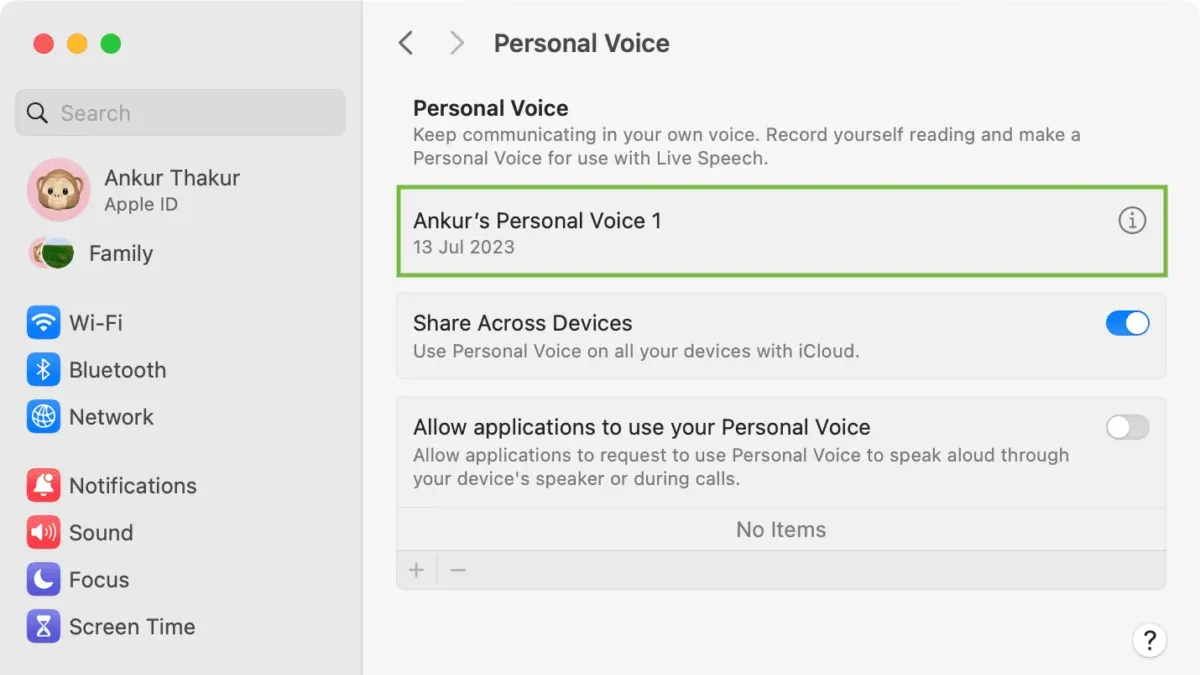
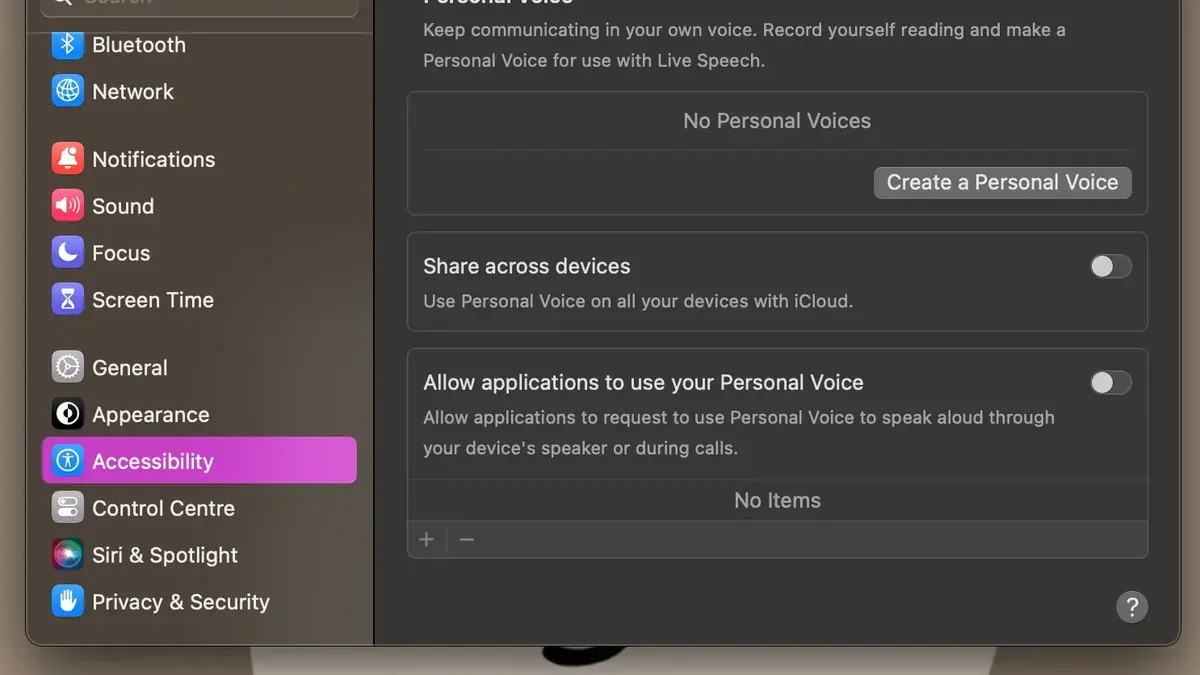
- Click Set Up Personal Voice to start creating your voice profile. You will be guided through recording a series of phrases to capture your voice accurately.
- Follow the on-screen prompts to record each phrase clearly using your Mac’s microphone. After each phrase, the system will process and display your recorded voice waveform.
- Once all phrases are recorded, you can name your Personal Voice profile for easy identification (e.g., "Work Voice" or "Home Voice").
- Review your saved voice profile and adjust settings such as voice speed or pitch if available.
- Click Save to securely store your voice data on your Mac and in iCloud if enabled, ensuring privacy and accessibility across your devices.
An example completed Personal Voice profile will show your chosen name and a waveform preview indicating the voice data is ready for use.
Remember to keep your microphone clear during recording for the best results. You can manage or delete voice profiles anytime from the same Accessibility > Personal Voice menu.
How to use Personal Voice for voice typing on Mac
Personal Voice on Mac allows you to dictate text efficiently, replacing manual typing with voice input. To start voice typing, use the keyboard shortcut by pressing Fn (Function) key twice or select Edit > Start Dictation from the menu bar. When activated, a microphone icon appears, indicating that your Mac is listening.
You can speak naturally and include voice commands for punctuation and formatting. For example, say "comma," "period," or "new paragraph" to insert punctuation marks and structure your text. Commands like "all caps" or "new line" help control capitalization and line breaks without needing to touch the keyboard.
- Place the cursor where you want to start typing; this could be in any text field or document.
Expected result: The cursor blinks, ready for input. - Press the Fn key twice or choose Edit > Start Dictation.
Expected result: A microphone icon appears on screen, indicating dictation mode is active. - Speak clearly, including punctuation commands such as "comma," "period," or "question mark."
Expected result: Your spoken words appear as text, formatted according to your voice commands. - To stop dictation, press Fn key once or click the microphone icon.
Expected result: The microphone icon disappears and input stops.
Compared to manual typing, voice typing with Personal Voice may increase your input speed, especially for longer texts, though occasional misrecognitions can occur depending on pronunciation and background noise. To improve accuracy, speak clearly, minimize ambient noise, and review your text for minor corrections after dictation.
For instance, dictating the phrase: "Hello comma new paragraph this is a test period" results in:
Hello,
This is a test.
How to use Personal Voice for voice commands and control on Mac
To operate your Mac functions and apps using Personal Voice, you first need to enable Voice Control and link it with Personal Voice. Voice Control lets you navigate macOS and control apps hands-free through spoken commands.
- Open System Settings and go to Accessibility > Voice Control. Toggle Voice Control on. You should see a microphone icon appear, indicating Voice Control is active.
- Under the Voice Control settings, ensure Use Personal Voice is selected as the voice profile. This setting customizes recognition to your voice for better accuracy.
- Start using common voice commands such as "Open Safari", "Click File menu", "Scroll down", and "Switch to Mail". These commands reliably perform actions and navigation in macOS and supported apps.
- Create custom voice commands by going to System Settings > Accessibility > Voice Control > Commands. Click the + button to add a new command. For example, set the phrase "Start presentation" to open Keynote and enter presentation mode. When you say this phrase, Keynote opens and begins the slideshow.
Common voice commands achieve high success rates for standard operations like launching apps, clicking buttons, scrolling, and switching windows. Custom commands expand control to personalized workflows, increasing productivity by reducing reliance on keyboard and mouse.
How to use Personal Voice on iPhone and its integration with Mac
Personal Voice is available on iPhone, where you can set it up similarly to your Mac, allowing voice profiles to sync across devices via your Apple ID and iCloud. This synchronization ensures that your voice data remains consistent and secure, enabling smooth transitions when using voice features.
- Open Settings on your iPhone and navigate to Accessibility > Personal Voice. You should see the option to create or manage your Personal Voice profile.
- Follow the prompts to record your voice profile if you have not done so. Once complete, your voice profile uploads securely to iCloud and syncs with your Mac.
- To start dictating on iPhone and continue on Mac, begin dictation in any text field on your iPhone using Personal Voice. When you switch to your Mac, activate the dictation feature there, and the system will recognize your voice profile for consistent transcription.
- After syncing, you can use Personal Voice for voice commands and dictation on both devices without reconfiguring, allowing a seamless workflow across iPhone and Mac.
While the core functionality of Personal Voice is consistent, the Mac version offers more advanced voice command customization and integration with apps due to its larger processing capabilities. On iPhone, Personal Voice focuses more on dictation and accessibility, with some limitations on command complexity.
| Feature | Mac | iPhone |
|---|---|---|
| Voice profile creation and syncing | Yes | Yes |
| Dictation with punctuation and formatting commands | Full support | Supported but with fewer command options |
| Custom voice commands for app control | Available | Not available |
| Cross-device continuity during dictation | Yes | Yes |
Using Personal Voice across iPhone and Mac lets you start tasks on one device and finish on another, enhancing accessibility and productivity through Apple's ecosystem.
How to use voice on MacBook and other Apple devices beyond Personal Voice
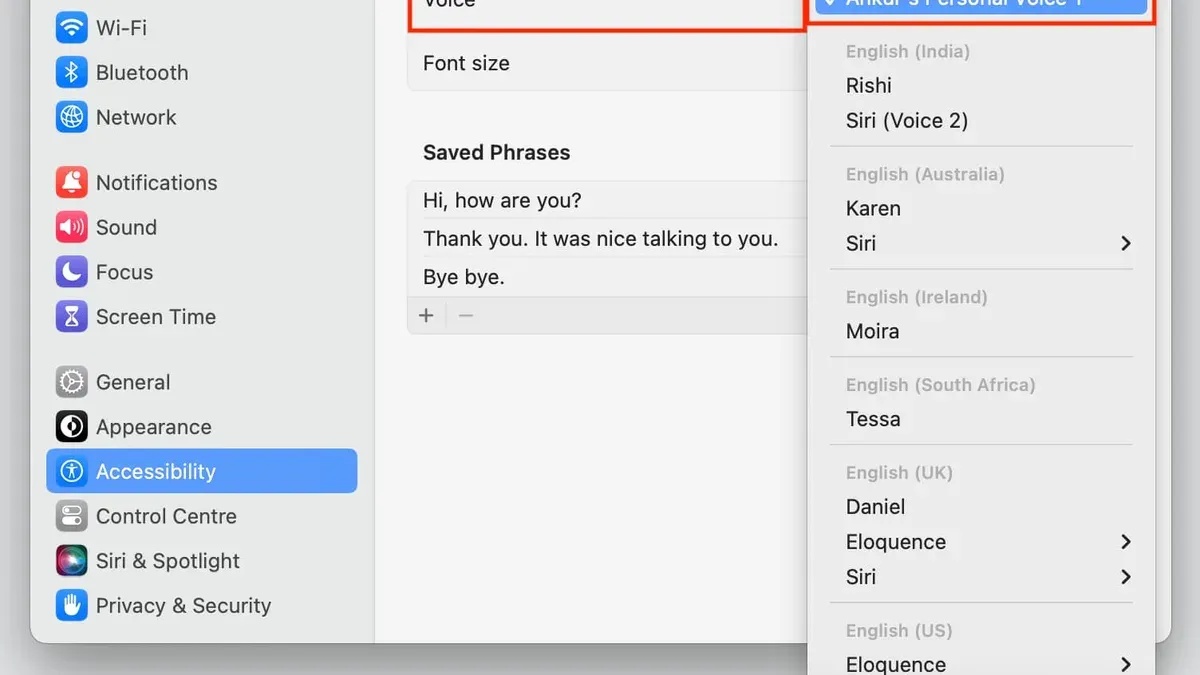
Beyond Personal Voice, macOS offers several built-in voice tools suited for different needs. VoiceOver is a comprehensive screen reader designed for users with visual impairments, providing spoken descriptions of screen elements and enabling keyboard navigation. Speak Selection reads aloud selected text on demand, useful for reviewing documents or emails without full screen reading. Voice Control allows full voice-driven device control, supporting commands for navigation, editing, and interaction across apps.
Third-party software such as Voicemod for Mac extends voice functionality with real-time voice modulation and effects, popular for gaming and content creation but less integrated with system accessibility features.
Choosing the right voice tool depends on your goals. For accessibility and hands-free control, VoiceOver or Voice Control are preferable. For dictation with your own voice profile, Personal Voice is ideal. For entertainment or creative voice effects, third-party apps like Voicemod offer specialized features.
| Feature | Personal Voice | VoiceOver | Speak Selection | Voice Control | Voicemod |
|---|---|---|---|---|---|
| Primary use | Personalized dictation and commands | Screen reading and accessibility | Text-to-speech for selected text | Full voice navigation and control | Voice modulation and effects |
| Integration | Deep macOS and iOS integration | Built-in accessibility feature | Built-in accessibility feature | Built-in accessibility feature | Third-party app requiring installation |
| Best for | Accurate voice typing and control | Blind or low-vision users | Casual text listening | Hands-free device operation | Gaming and streaming voice effects |
Example scenarios illustrate these differences: If you want to navigate your Mac hands-free, Voice Control is the most powerful choice. For writing documents by speaking with your natural voice, Personal Voice offers enhanced accuracy. If you occasionally want text read aloud, Speak Selection is simple and fast. For content creators wanting to alter their voice live, Voicemod adds creative flair but lacks system-level control.
Troubleshooting common issues with Personal Voice on Mac
If your microphone is not recognized or input quality is poor, first check System Settings > Sound > Input to confirm the correct microphone is selected and input level is adequate. If you see “No input detected,” try reconnecting or testing another mic. Background noise can also reduce accuracy, so use a quiet environment.
If Personal Voice does not activate or fails to sync across devices, ensure both Mac and iPhone are signed in with the same Apple ID and have iCloud Drive enabled. Restarting devices or toggling Personal Voice off and on in System Settings > Accessibility > Spoken Content can resolve sync glitches. Common error messages like “Unable to connect to iCloud” indicate network or account issues that require checking your internet connection and Apple ID status.
Voice typing errors and command misinterpretation often arise from unclear pronunciation or ambient noise. Speak clearly, use standard punctuation commands, and review your dictation settings under System Settings > Keyboard > Dictation. If commands fail, verify that Voice Control is enabled and custom commands do not conflict.
Regarding privacy, Apple states Personal Voice data is encrypted on your device and in iCloud, used solely to improve voice recognition for you. You can manage or delete your voice profile anytime in System Settings > Accessibility > Spoken Content > Personal Voice. Always review your privacy settings to control data sharing.
- How to Use VoiceOver on Mac: A Complete Step-by-Step Guide
- How to Use Eye Tracking on Mac: A Step-by-Step Guide
- How to Enable and Use Sticky Keys on Mac: A Step-by-Step Guide
Frequently asked questions
How to use apple personal voice?
To use Apple Personal Voice, go to System Settings on your Mac, then navigate to Accessibility > Speech > Personal Voice. Follow the prompts to create your unique voice profile by reading a series of sentences. Once set up, you can use this voice for voice typing and commands across supported apps and devices linked to your Apple ID.
How to use personal voice ios 17?
On iOS 17, Personal Voice is accessed through Settings > Accessibility > Speech > Personal Voice. You create your voice by recording the required phrases, and the voice can then be used for text-to-speech and voice commands on the iPhone. It also syncs with your Mac if you're signed in to the same Apple ID, enabling cross-device use.
How to voice type on mac?
To voice type on Mac, enable Dictation by going to System Settings > Keyboard > Dictation and turn it on. You can then press the shortcut (often the Fn key twice) to start dictating text directly into any text field. For a more personalized experience, you can use Personal Voice if you've set it up under Accessibility > Speech.
How to use voice on pc?
Using voice features on a PC depends on your operating system. Windows offers built-in Speech Recognition accessible via Settings > Ease of Access > Speech. You can set up voice typing by pressing Windows + H in a text field. Third-party apps like Dragon NaturallySpeaking offer more advanced voice control options.
How to voice to text on mac?
Voice to text on Mac can be done using the built-in Dictation feature. Enable it in System Settings > Keyboard > Dictation, then start dictating with the shortcut key. For better accuracy and personalization, use Personal Voice under Accessibility if available, which tailors the speech recognition to your voice.
What this guide does not cover and who should look elsewhere
Personal Voice requires a Mac running macOS Ventura or later and compatible Apple hardware, such as Macs with Apple silicon. It may struggle in noisy environments or with strong accents, affecting accuracy. This feature is designed for general voice typing and control, not for specialized professional dictation or transcription needs where dedicated software might be more reliable. If you require advanced voice recognition tools or work in environments with significant background noise, consider third-party solutions tailored to those requirements.
To continue, the most practical next step is to open System Settings, navigate to Accessibility > Voice Control > Personal Voice, and set up your voice profile. This setup enables personalized voice recognition across your Mac and supported Apple devices, allowing you to start using Personal Voice effectively for dictation and commands.



