
How to Enable TRIM on External SSD Using Mac Terminal
This guide shows how to enable TRIM on external SSDs via Mac Terminal to maintain peak SSD performance and longevity.
You have an external SSD connected to your Mac, and you want to ensure it runs at peak performance and lasts longer. Knowing how to enable TRIM on external SSD in Mac Terminal can make a significant difference in maintaining your drive's health.
This article guides you through the specific steps to check and enable TRIM support on external SSDs via Terminal commands, highlighting important nuances and potential limitations that are often missed in general TRIM guides focused on internal drives.
Key takeaways
- TRIM helps maintain SSD speed and longevity by managing unused data blocks.
- You can check TRIM status for external SSDs using System Information or Terminal.
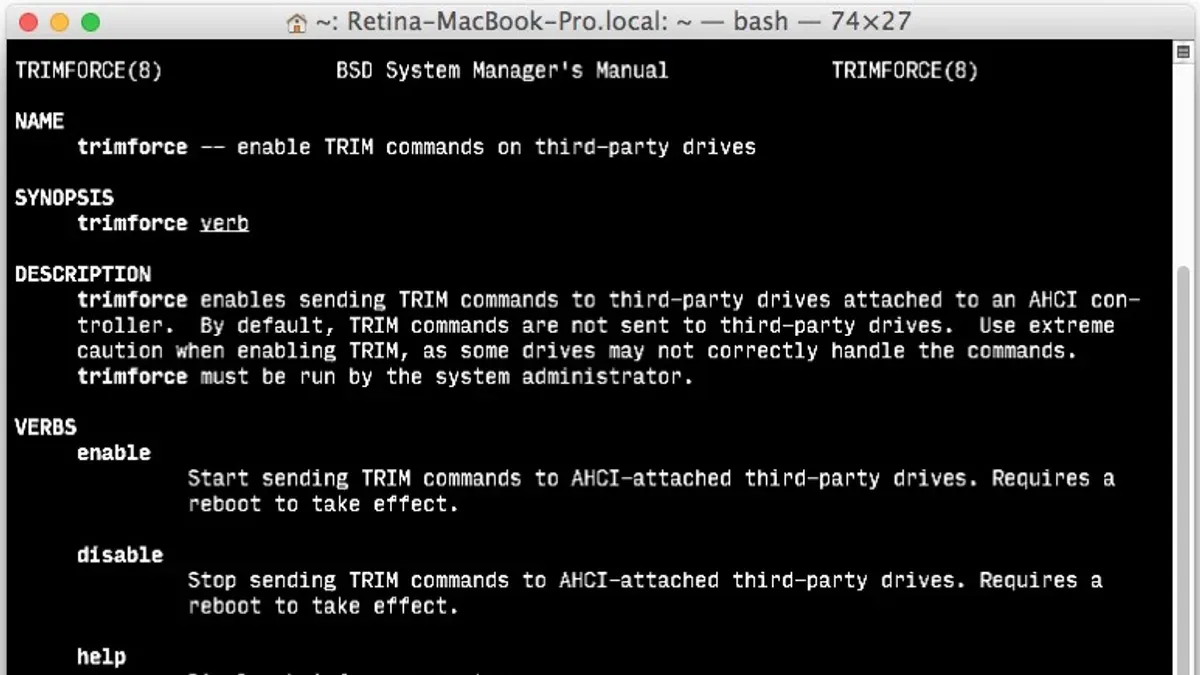
- The Terminal command "sudo trimforce enable" is the primary method to enable TRIM on external SSDs.
- Some external SSDs or enclosures may not support TRIM even if the Mac's software allows it.
- Verifying TRIM functionality after enabling it ensures your SSD benefits from this feature.
Before you start: what you need to enable TRIM on an external SSD
Enabling TRIM on an external SSD requires certain hardware and software conditions. Your external SSD must be connected via Thunderbolt or USB-C, as some USB-A connections often do not support TRIM commands, limiting functionality.
Your Mac must be running a macOS version that supports TRIM for external drives; typically, this means macOS Sierra or later, but support can vary by model and macOS updates. To check your macOS version, click the Apple menu, select "About This Mac," and view the version number.
TRIM helps maintain SSD performance and longevity by allowing the operating system to inform the drive which data blocks are no longer in use, reducing unnecessary write operations and wear. However, enabling TRIM on external drives carries risks, including possible data corruption or drive incompatibility.
Before proceeding, back up all important data on your external SSD to prevent potential data loss. Also, note that not all Macs or external SSD models support TRIM externally, so success is not guaranteed.
- Verify your external SSD is connected via Thunderbolt or USB-C. You should see the connection type in System Information under "USB" or "Thunderbolt." If shown correctly, proceed to next step.
- Check your macOS version via Apple menu > About This Mac. If running macOS Sierra or newer, continue.
- Back up your external SSD data using Time Machine or manual copying. You should have a secure backup before enabling TRIM.
How to check if TRIM is already enabled on your external SSD
To avoid unnecessary steps, you should first verify whether TRIM is active on your external SSD. This depends on the type of connection your drive uses—NVMe (such as Thunderbolt or USB-C with NVMe SSDs) or SATA (common in some external enclosures).
- Open Terminal on your Mac.
- If your external SSD uses an NVMe connection, enter system_profiler SPNVMeDataType. For SATA connections, enter system_profiler SPSerialATADataType.
- Locate your external SSD by its name and connection details in the output list. This helps ensure you're checking the correct device.
- Look for the line labeled TRIM Support. If it says Yes, TRIM is enabled. If it says No, TRIM is disabled.
Example for TRIM enabled on an NVMe external SSD:
TRIM Support: Yes
Example for TRIM disabled:
TRIM Support: No
Confirming the TRIM status before proceeding helps you decide whether you need to enable it through Terminal commands.
How to enable TRIM on external SSD using Terminal commands
- Open Terminal from your Applications > Utilities folder.
- Type sudo trimforce enable and press Enter. You will be prompted to enter your administrator password; type it and press Enter again.
- Read the warning message carefully. The command enables TRIM for all compatible drives connected to your Mac, including external SSDs. Confirm by typing y and pressing Enter.
- Your Mac will prepare to enable TRIM and display a message indicating that the process will restart your computer. Save any open work before continuing.
- The Mac will automatically reboot. During startup, TRIM support will be activated for all compatible SSDs. You might see a brief message about system integrity protection—this is normal.
- After the reboot, open Terminal again and run system_profiler SPSerialATADataType | grep 'TRIM' or use the appropriate command for your SSD interface to verify that TRIM is now enabled.
Note that macOS natively enables TRIM only for Apple-manufactured SSDs; using trimforce overrides this limitation to include supported external SSDs. However, it applies system-wide to all compatible drives, so be certain your external SSD is compatible to avoid issues.
Alternative methods if trimforce does not work for your external SSD
If the standard sudo trimforce enable command fails due to hardware or macOS limitations, you can explore other options, though each comes with trade-offs.
- Use third-party tools or drivers: Some third-party utilities and drivers claim to enable TRIM on external SSDs by modifying system behavior. When successful, you should notice TRIM status changes in the system profiler. However, these tools may pose security risks or cause system instability since they operate outside official Apple support.
- Check for SSD firmware updates: Visit your SSD manufacturer’s website to download and install firmware updates. Updated firmware can add native TRIM support or improve compatibility, enabling macOS to recognize and activate TRIM without additional tools. After updating, verify TRIM status using Terminal.
- Format the drive with APFS: Converting your external SSD to APFS can improve performance and reduce wear even without TRIM. Use Disk Utility to reformat the drive, but back up data first as formatting erases all content. APFS’s native features partially compensate for TRIM’s absence.
Official methods like trimforce are safer and supported by macOS, but third-party solutions might be necessary for unsupported hardware. Always weigh the risks and backup data before proceeding with non-official options.
Troubleshooting common issues when enabling TRIM on external SSDs
When running sudo trimforce enable, you might encounter error messages such as "TRIM not supported on this device" or "Operation not permitted." These typically indicate that your external SSD or its connection does not support TRIM, or macOS is restricting the command for security reasons.
If your external SSD is not recognized or the TRIM status does not change after enabling, first disconnect and reconnect the drive, then check if it appears in Disk Utility. If it still doesn't show or TRIM remains disabled, the drive's firmware or interface may not support TRIM commands.
To examine detailed TRIM-related errors, use Terminal to view system logs by typing log show --predicate 'eventMessage contains "trim"' --last 1h. This can reveal kernel or driver issues preventing TRIM activation.
If problems persist or your system becomes unstable, you can disable TRIM by running sudo trimforce disable in Terminal, followed by a restart. This reverts changes safely and should restore your drive’s original behavior.
- Run
sudo trimforce enablein Terminal; if you see an error like "TRIM not supported," note the message. - Disconnect and reconnect your external SSD; open Disk Utility to confirm it is detected.
- Check TRIM status with
system_profiler SPSerialATADataType | grep 'TRIM' -A 1or equivalent for your drive interface. - View system logs for TRIM errors by entering
log show --predicate 'eventMessage contains "trim"' --last 1h; look for relevant error entries. - If enabling TRIM causes issues, disable it with
sudo trimforce disableand restart your Mac; your drive should return to its previous state.
How to verify TRIM is working correctly after enabling it
- Open Terminal and enter system_profiler SPSerialATADataType or system_profiler SPNVMeDataType, depending on your SSD interface. Confirm that the TRIM Support field for your external SSD shows Yes. This indicates macOS recognizes TRIM is enabled.
- Run a disk health utility like DriveDx or Smart Utility that supports external SSDs. Check the reported health status and whether the drive reports TRIM-related parameters as active. Improved health metrics compared to previous scans suggest TRIM is functioning.
- Compare your SSD’s read/write performance before and after enabling TRIM using benchmarking tools such as Blackmagic Disk Speed Test. Noticeable improvements or maintained high performance over time indicate TRIM is helping manage free space and wear leveling effectively.
- Observe the SSD’s behavior during extended use. If TRIM is working, you should encounter fewer slowdowns or write amplification issues typical of drives without TRIM support.
- How to Install Oh My Zsh in Mac Terminal: A Clear Step-by-Step Guide
- How to Use Aliases in zsh on Mac Terminal: A Practical Guide
- How to Check Mac Temperature Using Powermetrics in Terminal
- How to Kill a Process by Name in Mac Terminal: Step-by-Step Guide
Frequently asked questions
Can I enable TRIM on any external SSD connected to my Mac?
Not all external SSDs support TRIM when connected to a Mac. The drive must be compatible with macOS’s TRIM support, and the connection interface (such as Thunderbolt or USB) can affect this. Some external SSDs, particularly those using certain USB chipsets, may not allow TRIM to be enabled through standard methods.
Is it safe to use the 'trimforce' command on external drives?
The 'trimforce' command is generally safe but should be used with caution. It is designed to enable TRIM on compatible drives, but forcing it on unsupported or incompatible external SSDs can risk data loss or drive instability. Always back up your data before enabling TRIM and confirm your drive’s compatibility.
What should I do if my Mac doesn’t allow TRIM on my external SSD?
If your Mac blocks TRIM activation, check if your external SSD’s firmware and macOS version support TRIM for external drives. Alternative methods include using third-party utilities or checking for firmware updates from the SSD manufacturer. In some cases, TRIM may not be available for your specific external SSD due to hardware or software limitations.
Will enabling TRIM improve my SSD’s lifespan significantly?
Enabling TRIM helps maintain SSD performance by allowing the system to clean unused data blocks efficiently, which can indirectly contribute to longer drive lifespan. However, the actual lifespan improvement varies depending on usage patterns and drive quality. TRIM is one of several factors that support SSD health but is not a guarantee of dramatically extended lifespan.
What this guide does not cover and who should look elsewhere
This guide focuses exclusively on enabling TRIM for external SSDs connected to Macs. It does not cover enabling TRIM on internal Apple Silicon SSDs, as these drives are managed automatically by macOS for optimal performance and longevity. If you use a Mac with Apple Silicon, manually enabling TRIM is unnecessary and unsupported.
Additionally, this guide assumes you have an external SSD that supports TRIM and that your macOS version allows the use of the trimforce command. Some third-party SSDs or enclosures may not support TRIM, or macOS might restrict its activation for security reasons. In such cases, consider consulting the SSD manufacturer’s documentation or contacting Apple Support for tailored advice.
To proceed confidently, check your external SSD’s compatibility first. If you encounter persistent issues, professional assistance or specific firmware updates may be required.
Your next step is to verify that TRIM is active after enabling it by using the System Information app under the NVMe or SATA sections, depending on your drive. Confirming TRIM status ensures your SSD benefits from improved performance and durability.



