How to Use VIP Senders in Mail App: Step-by-Step Guide
Discover how to use VIP senders in Mail app to prioritize key emails and manage your inbox with ease using our step-by-step guide.
You receive numerous emails daily, but some messages deserve immediate attention. Marking key contacts as VIP senders helps you quickly spot important emails without sorting through your entire inbox.
This article explains how to use VIP senders in Mail app on your iPhone and in Outlook, guiding you step-by-step through setting up VIP contacts. Beyond setup, it covers how to manage your VIP mailing list, use VIP features for email marketing, and troubleshoot common issues, helping you organize your inbox efficiently and leverage VIP tools strategically.
Key takeaways
- VIP senders highlight important emails by placing them in a dedicated mailbox on iPhone Mail app and Outlook.
- Adding a sender to VIP is done by tapping their name or email and selecting "Add to VIP" in Mail, or using the "Add to VIP" option in Outlook’s toolbar.
- Managing your VIP list regularly ensures only relevant contacts trigger special notifications.
- Using VIP in email marketing can improve open rates by targeting engaged recipients.
- Common issues include missing VIP alerts due to notification settings—checking these resolves most problems.
Before you start: What you need to know about VIP senders
VIP senders are contacts marked as important within your email app, allowing their messages to stand out for quicker access and better management. Both the Mail app on Apple devices and Microsoft Outlook offer VIP sender features, but they work slightly differently depending on the platform. To use VIP senders, you need a compatible device such as an iPhone, iPad, Mac, or a computer running Outlook, with your email account properly configured in the app.
In the Mail app, marking a contact as VIP highlights their emails and can trigger special notifications, helping you focus on messages that matter most. Outlook’s VIP feature may include customized inbox rules and priority flags, giving you more control over how these important emails are handled. It's useful to understand these differences so you can optimize your email organization effectively.
While VIP access apps and Viber messaging relate to managing VIP contacts and communications, they are separate topics. This guide will focus on the core VIP sender functions in Mail app and Outlook to ensure you have a solid foundation.
| Feature | Mail App (iPhone, Mac) | Outlook |
|---|---|---|
| Supported Devices | iPhone, iPad, Mac | Windows PC, Mac, Mobile Outlook apps |
| VIP Setup | Mark contact from email or contacts app | Create inbox rules or mark as VIP |
| Notifications | Custom VIP alerts available | Priority flags, custom alerts possible |
| Integration | Built in Mail app only | Integrated with Outlook rules and categories |
How to make an email VIP on iPhone Mail app
Marking an email sender as VIP in the iPhone Mail app helps you prioritize important contacts by highlighting their messages and enabling special notifications. To add someone to your VIP list, start by opening the Mail app and locating an email from the sender you want to mark.
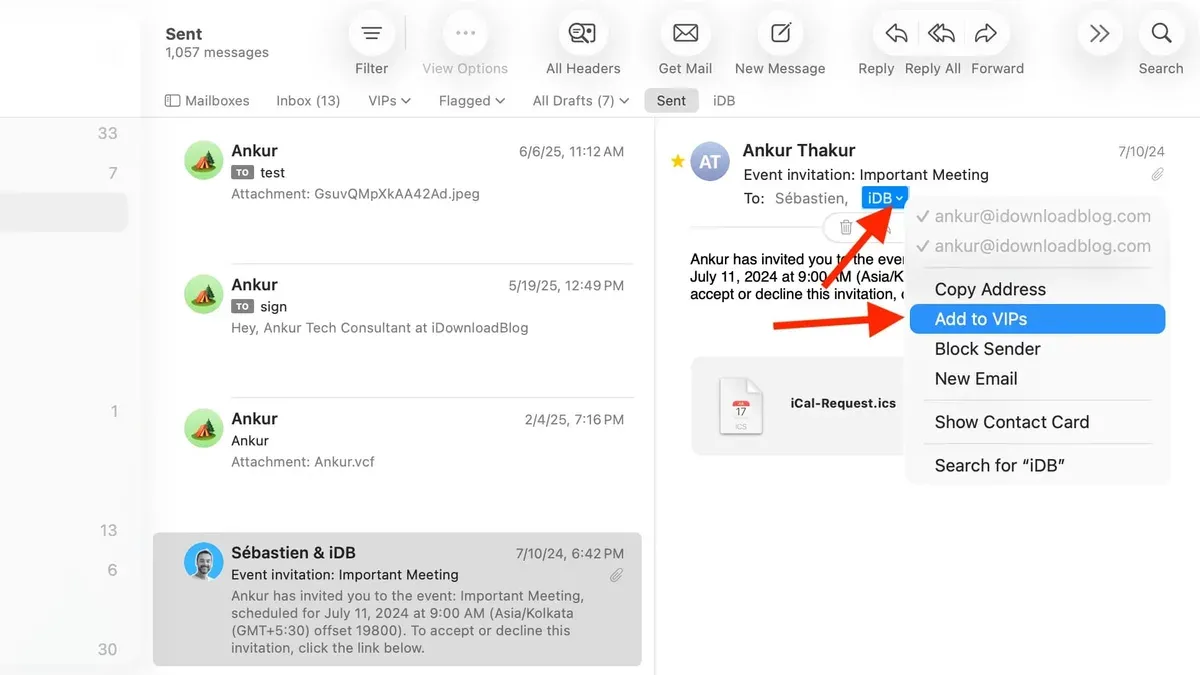
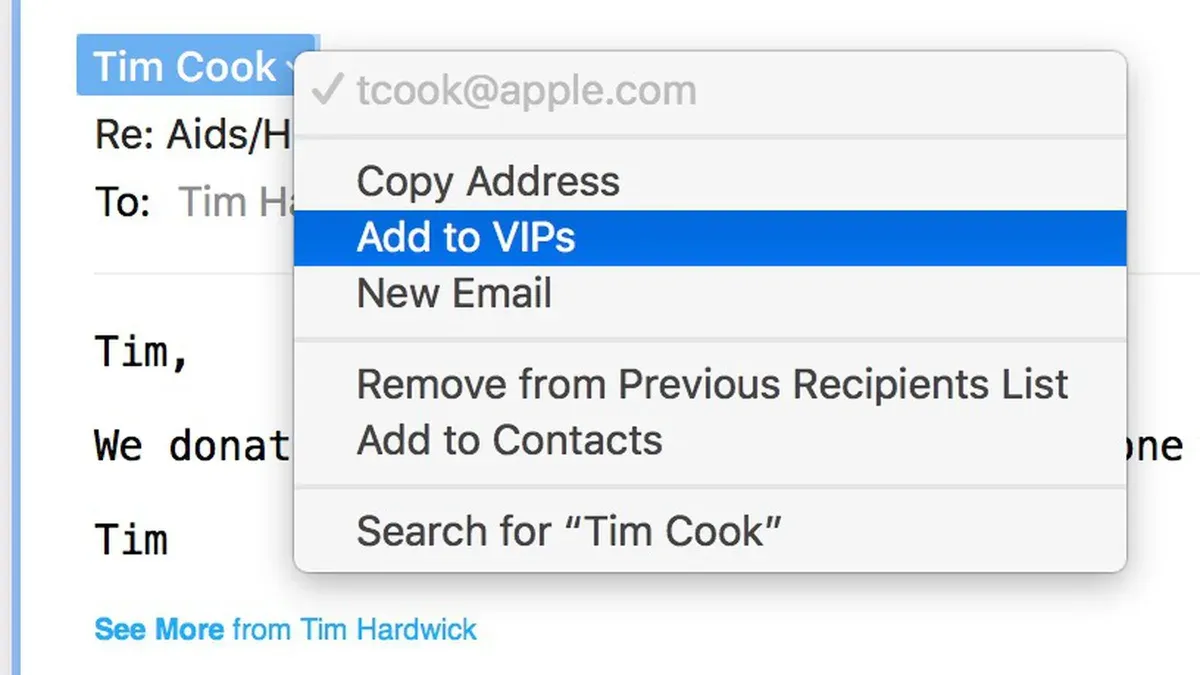
- Open the Mail app and find an email from the sender you want to add as a VIP. When you see the email, tap the sender's name or email address at the top of the message.
- In the contact card that appears, scroll down and tap Add to VIP. You will see a confirmation that the sender is now part of your VIP list.
- Return to your inbox. VIP emails are visually identified by a star icon next to the sender’s name, making them easy to spot among other messages.
- To manage your VIP list, tap the Mailboxes button at the top left, then select VIP. Here you can see all emails from VIP contacts in one place.
- To remove a contact from VIP, tap the small “i” icon next to VIP in the Mailboxes list, then tap the contact’s name and choose Remove from VIP.
Once a sender is marked VIP, the Mail app can notify you separately for their emails if you enable VIP notifications in Settings > Notifications > Mail > VIP. This filtering and notification system helps you focus on important emails without missing them amid other messages.
Visual confirmation: In your inbox, VIP emails show a star icon, and your VIP mailbox collects all these emails separately, simplifying review and response.
How to make emails VIP in Outlook and set up VIP access
Outlook allows you to mark important contacts as VIPs by creating rules and custom notifications, helping you prioritize their emails effectively. Unlike the Mail app’s dedicated VIP list, Outlook relies on mail rules and focused inbox features to highlight these messages. Here’s how to add VIP senders and configure your inbox to recognize their emails.
- Open Outlook desktop and go to the Home tab. Click on "Rules" and select "Manage Rules & Alerts." You should see the Rules and Alerts window open.
- Click "New Rule," then choose "Apply rule on messages I receive" under the Start from a blank rule section. Click "Next."This starts the rule creation wizard.
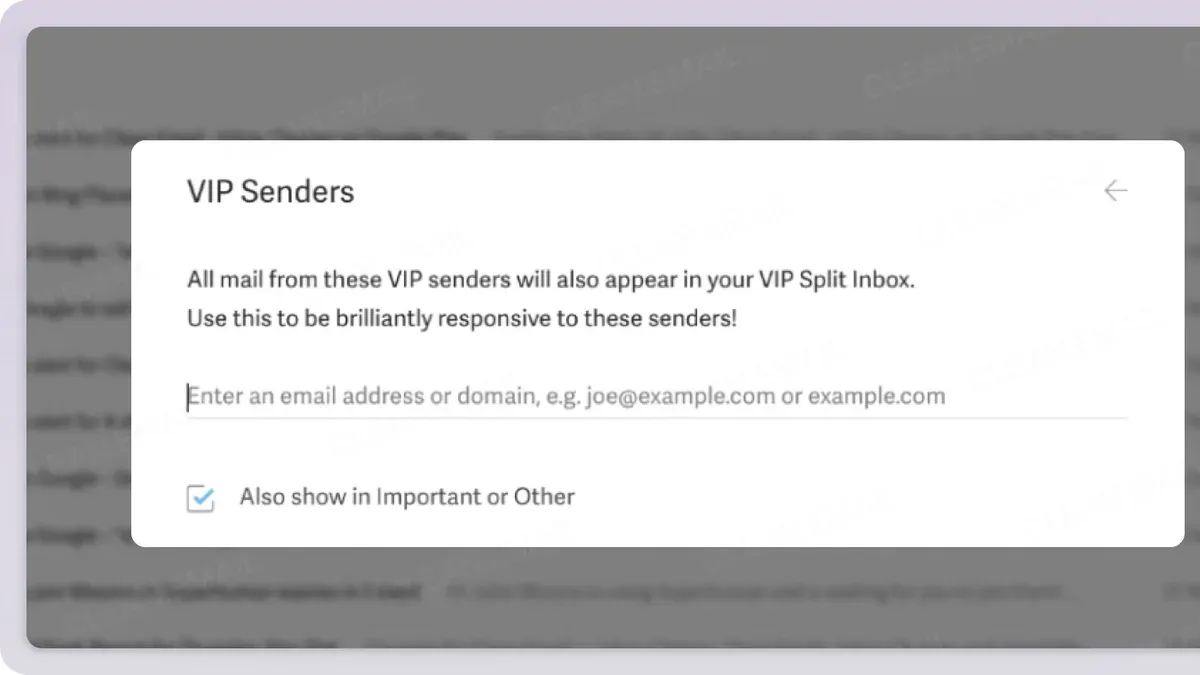
- Check "from people or public group," then click the underlined link in the bottom box to select contacts or enter email addresses of your VIP senders. Click "OK," then "Next."This sets the rule to apply only to emails from VIPs.
- Select actions such as "display a Desktop Alert," "move it to the specified folder," or "mark it as important." Click the underlined action links to specify folders or details. Click "Next."These actions define how VIP emails are highlighted or organized.
- If needed, add exceptions (for example, exclude emails with certain words). Click "Next." Give your rule a name like "VIP Sender Rule" and ensure "Turn on this rule" is checked. Click "Finish."Your rule is now active and will process incoming VIP emails accordingly.
- To set up focused inbox, go to the View tab and enable "Show Focused Inbox." Outlook will try to prioritize important emails, including those from VIP contacts, into the Focused tab.You can train this feature by moving messages between Focused and Other tabs.
- For Outlook web app, click the gear icon and select "View all Outlook settings." Go to Mail > Rules and create a new rule similar to the desktop steps, choosing conditions and actions for VIP senders.This allows you to manage VIP emails from any browser.
By using rules and focused inbox features, you can customize Outlook to treat emails from VIP senders with higher priority, including notifications and dedicated folders. This approach offers more flexibility than the Mail app’s VIP system but requires setting up rules manually.
How to use VIP email marketing tools effectively
VIP email marketing campaigns focus on engaging your most valuable contacts by delivering tailored content that resonates with their interests and needs. The purpose is to nurture stronger relationships, increase open and click-through rates, and drive loyalty by prioritizing communications to these select groups.
Successful VIP email marketing strategies include personalized offers, early access to promotions, and exclusive content. For example, sending VIP-only discount codes or sneak peeks encourages recipients to open emails more frequently and act on them. This targeted approach often results in significantly higher engagement compared to general campaigns.
Many email marketing platforms, such as Mailchimp, Constant Contact, and HubSpot, offer tools to create and manage VIP mailing lists. These tools allow you to segment your contacts based on purchase history, engagement levels, or custom tags, making it easier to send relevant messages to your VIPs.
When segmenting VIP contacts, consider factors like recent activity, lifetime value, and preferences. Proper segmentation ensures your campaigns reach the right audience and avoid overwhelming less engaged users. A well-maintained VIP list can improve open rates and conversions, sometimes by a noticeable margin compared to non-segmented emails.
- Create a VIP segment within your email marketing tool by filtering contacts based on engagement or purchase data. You should see a refined list of high-value recipients.
- Develop personalized email content tailored to VIP interests, such as exclusive offers or early product launches. Sending a test email should display the customized message.
- Schedule or automate your campaign targeting the VIP segment only. After sending, monitor the open and click-through rates to confirm increased engagement.
- Regularly update your VIP list by reviewing contact activity and adding or removing members based on recent behavior. This keeps the segment relevant and responsive.
Using VIP email marketing tools effectively means leveraging segmentation and personalization to focus your efforts on contacts most likely to respond positively, providing measurable improvements in campaign performance.
How to add email to VIP and manage your VIP mailing list
Building and maintaining a VIP mailing list requires careful identification of contacts who truly matter to you or your marketing efforts. Start by selecting individuals whose emails you want to prioritize, such as key clients, close colleagues, or important service providers. Avoid overloading your VIP list to keep notifications meaningful and manageable.
To add or remove VIP contacts across devices, begin in your primary email app. On iPhone Mail, tap the sender's name in an email, then select "Add to VIP." To remove, go to the VIP mailbox, tap "Edit," and remove contacts. In Outlook, create or update rules that mark specific senders as VIP; removing a sender involves deleting or modifying these rules. After changes, ensure your email accounts are synced via iCloud or Exchange to propagate the VIP list across your devices.
Maintaining list hygiene involves periodically reviewing your VIP contacts to remove inactive or less relevant addresses. This prevents clutter and keeps alerts focused. For example, if you add a new client as VIP on your iPhone, syncing via iCloud will update your Mac's Mail app, where you will see the new VIP contact appear in the VIP mailbox within a few minutes. Similarly, removing a contact on Outlook Web Access will reflect on your desktop Outlook app after synchronization.
- Open an email from the sender you want to add on your iPhone Mail app. You should see the sender's name or email address at the top.
- Tap the sender's name, then tap "Add to VIP." The sender will appear in your VIP mailbox, confirming the addition.
- On Outlook, open the "Rules" settings through File > Manage Rules & Alerts. Create a new rule to move emails from this sender to the focused inbox or mark them as VIP, then save the rule. You will notice their emails prioritized accordingly.
- Ensure your email accounts are configured to sync contacts and mail settings via iCloud or Exchange. Check your device's account settings under Settings > Mail > Accounts to verify syncing is enabled.
- Periodically review the VIP list by accessing the VIP mailbox or rules list; remove contacts by editing or deleting their VIP status to keep the list relevant and manageable.
How to send messages and emails to Viber and VIP access app overview
Understanding how Viber messaging, the VIP access app, and Mail app VIP senders differ can help you use each tool effectively without confusion. Viber is a standalone messaging app that lets you send texts, voice messages, and calls over the internet. The Mail app's VIP feature prioritizes important emails but does not integrate directly with Viber or VIP access apps.
Sending messages with Viber
- Open the Viber app on your iPhone or Android device. You should see your contact list or recent chats.
- Tap the "New Chat" icon, usually a pencil or speech bubble symbol, to select a contact to message.
- Type your message in the text field and tap the send button. You should see your message appear in the conversation thread.
- To share an email address or link within Viber, paste the content into the message field before sending.
Including Viber contact info in emails
If you want recipients of your emails to connect with you on Viber, include your Viber phone number or a Viber link in your email signature or message body. This approach helps bridge communication between email and Viber but is separate from Mail app VIP features.
Overview of the VIP access app
The VIP access app on iPhone is primarily a security tool for managing two-factor authentication codes, unrelated to email or messaging priorities. It does not interact with Mail app VIP sender lists or Viber messaging. This distinction is important to avoid confusion when managing your communications.
| Feature | Mail App VIP | Viber Messaging | VIP Access App |
|---|---|---|---|
| Purpose | Prioritize important email senders | Send instant messages, calls, and media | Manage two-factor authentication codes |
| Platform | Mail app on iPhone/macOS | Viber app on iPhone/Android/desktop | VIP Access app on iPhone/Android |
| Integration | Organizes emails in Mail app only | Independent messaging platform | Security tool, unrelated to messaging/email |
| How to send messages | Respond via Mail app emails | Use Viber app's chat interface | Not applicable |
Troubleshooting common issues with VIP senders in Mail app and Outlook
If VIP emails are not appearing in your VIP mailbox or folder, the first step is to confirm that the sender is still marked as VIP. Sometimes contacts get accidentally removed or not synced properly. Also, check that your email account is syncing correctly across devices.
- Open the Mail app or Outlook and go to your VIP list settings.
What you should see: The sender's email address listed as a VIP contact. - Ensure your device or app has an active internet connection to sync changes.
What you should see: Updated VIP emails appearing as expected. - Review your email filters and rules to check for conflicts.
What you should see: No rules redirecting VIP emails away from the VIP mailbox or deleting them. - For notification issues, verify that VIP alerts are enabled in both the Mail app or Outlook and your device’s notification settings.
What you should see: VIP notifications appearing when new emails arrive. - If syncing is inconsistent across devices, sign out and back in to your email account or refresh the VIP list.
What you should see: Consistent VIP email organization on all devices. - To reset or rebuild your VIP list, remove all VIP contacts and then add them back one by one.
What you should see: A clean VIP list with working notifications and correct email sorting.
Following these steps resolves most common VIP sender issues. If problems persist, checking for app updates or reinstalling the Mail app or Outlook can help address deeper software glitches.
Frequently asked questions
What is vip email on iphone?
VIP email on iPhone is a feature in the Mail app that lets you mark certain contacts as very important. Emails from these VIP senders are collected in a special VIP mailbox, making it easier for you to find and prioritize messages from key people. This helps you stay organized and ensures you don’t miss important emails.
How to make email vip on iphone?
To make an email VIP on iPhone, open the Mail app and find an email from the sender you want to mark. Tap the sender's name or email address at the top of the email, then select “Add to VIP” from the contact details. The sender will then appear in your VIP mailbox, and you can customize notifications for their emails separately.
How to use vip access app?
The VIP Access app is typically used for two-factor authentication, not email management. If you mean managing VIP emails, that is done within your email client like Mail or Outlook, not through the VIP Access app. For VIP Access, you open the app to generate security codes for account verification when logging into supported services.
How to get a vip server?
The term “VIP server” usually applies to gaming or private network servers, not email. If you’re referring to email, there is no “VIP server” to obtain; VIP status is a feature within email clients to prioritize contacts. For email marketing purposes, using reputable email service providers with priority sending options is recommended instead.
How to add vip to outlook?
In Outlook, you can mark a sender as VIP by adding them to your Favorites or creating a rule to highlight their emails. Right-click a message from the sender, choose “Add to Favorites” or create a rule with specific conditions to prioritize their emails. Outlook does not have a dedicated VIP folder like the iPhone Mail app, but you can use categories and focused inbox features to manage important senders.
What This Advice Does Not Cover
This article does not cover advanced enterprise email server configurations or third-party email clients that do not support native VIP sender features. If your organization uses custom email platforms or specialized security protocols, you may need to consult your IT department or email administrator for tailored solutions. Additionally, features and settings can vary slightly depending on software versions and device models, so always verify your app’s documentation if options appear different.
To make the most of VIP senders, focus on setting up and managing VIP lists directly within the Mail app on iPhone or Outlook’s native interface as described. This approach ensures you receive timely notifications and can prioritize important contacts efficiently.
The single most useful next step is to regularly review and update your VIP sender list based on your current priorities. Remove outdated contacts and add new key senders to keep your email experience streamlined and effective. This ongoing management helps maintain the balance between staying informed and reducing notification overload.
See also: How to Block a Sender in the Mail App: Clear Steps for Apple Users · How to Fix Mail Not Syncing in Mail App: Step-by-Step Solutions · How to Set Up an Auto Reply in Mail App: A Clear Step-by-Step Guide · How to Export Emails to PDF in Mail App: Step-by-Step Guide